

Grow carrots at home, even if you think you don’t have a green thumb! Have you ever dreamt of pulling a vibrant, crunchy carrot straight from your own backyard? It’s more achievable than you might think, and this DIY guide is your ticket to making that dream a reality. Forget those bland, store-bought carrots – imagine the superior taste and satisfaction of harvesting your own homegrown goodness.
Carrots have a rich history, dating back thousands of years, with early varieties being purple or white. Over time, through careful cultivation, the vibrant orange carrot we know and love emerged. For centuries, they’ve been a staple in cuisines worldwide, valued for their nutritional benefits and versatility. But beyond their culinary appeal, growing your own carrots connects you to this long history and allows you to participate in a tradition of self-sufficiency.
Why should you bother learning how to grow carrots at home? Well, for starters, you’ll have access to fresher, more flavorful carrots than anything you can buy in a store. Plus, you can choose from a wider variety of carrot types, from baby carrots to long, slender Nantes varieties. More importantly, growing your own food is incredibly rewarding and empowering. It’s a chance to connect with nature, reduce your carbon footprint, and enjoy the fruits (or, in this case, vegetables!) of your labor. This DIY guide will provide you with simple, effective tricks and hacks to ensure a bountiful carrot harvest, even in small spaces. Let’s get started!
Growing Carrots at Home: A Beginner’s Guide
Hey there, fellow gardening enthusiasts! Ever dreamt of pulling fresh, vibrant carrots straight from your own backyard? Well, dream no more! Growing carrots at home is surprisingly easy and rewarding. I’m going to walk you through everything you need to know, from choosing the right variety to harvesting your crunchy bounty. Let’s get digging!
Choosing the Right Carrot Variety
First things first, let’s talk carrots! Not all carrots are created equal. Different varieties thrive in different conditions, so picking the right one is crucial for success. Here’s a quick rundown:
* Nantes: These are classic, cylindrical carrots with a sweet flavor and smooth skin. They’re relatively short (around 6-7 inches) and do well in a variety of soil types. I personally love Nantes for their consistent shape and delicious taste.
* Danvers: These are longer, tapered carrots, known for their robust flavor and good storage capabilities. They’re a great choice if you want to store your carrots for later use.
* Chantenay: These are short, thick, and cone-shaped carrots. They’re perfect for heavy or rocky soils, as they don’t need as much depth to grow. If you’re dealing with less-than-ideal soil, Chantenay is your best bet.
* Baby Carrots: These are smaller, rounder varieties that mature quickly. They’re ideal for container gardening or for impatient gardeners (like me sometimes!).
* Heirloom Varieties: Don’t be afraid to experiment with heirloom varieties like ‘Purple Haze’ or ‘Yellowstone’. They offer unique colors and flavors, adding a fun twist to your carrot patch.
Consider your soil type, growing space, and personal preferences when making your choice. I usually opt for a mix of Nantes and Chantenay to cover all my bases.
Preparing the Soil: The Key to Success
Carrots need loose, well-drained soil to thrive. Rocky or compacted soil will result in stunted, misshapen carrots. Trust me, I’ve learned this the hard way! Here’s how to prepare your soil:
* Choose the Right Location: Carrots need at least 6-8 hours of sunlight per day. Pick a sunny spot in your garden.
* Loosen the Soil: Use a garden fork or tiller to loosen the soil to a depth of at least 12 inches. This is crucial for allowing the carrots to grow long and straight.
* Remove Rocks and Debris: Carefully remove any rocks, stones, or other debris from the soil. Even small pebbles can hinder carrot growth.
* Amend the Soil: Amend the soil with compost or well-rotted manure to improve drainage and fertility. Carrots are heavy feeders, so they need plenty of nutrients. I usually add a generous amount of compost to my carrot beds.
* Create Raised Beds (Optional): If you have heavy clay soil, consider creating raised beds. This will improve drainage and prevent waterlogging.
Planting Your Carrot Seeds
Now for the fun part: planting! Carrot seeds are tiny, so it’s important to handle them carefully.
1. Sow Seeds Directly: Carrots don’t transplant well, so it’s best to sow the seeds directly into the garden.
2. Create Shallow Furrows: Use a hoe or your finger to create shallow furrows about 1/4 inch deep and 1-2 inches apart.
3. Sow Seeds Sparsely: Sprinkle the seeds thinly along the furrows. This is important to avoid overcrowding, which can lead to stunted growth. I find it helpful to mix the seeds with sand to make them easier to handle.
4. Cover the Seeds: Gently cover the seeds with a thin layer of soil.
5. Water Gently: Water the soil gently with a watering can or hose with a gentle spray nozzle. Avoid washing away the seeds.
6. Keep the Soil Moist: Keep the soil consistently moist until the seeds germinate. This usually takes 1-3 weeks, depending on the weather. I like to cover the area with burlap or straw to help retain moisture.
Thinning Your Carrot Seedlings
Thinning is essential for giving your carrots enough space to grow. If you skip this step, you’ll end up with a crowded mess of small, underdeveloped carrots.
1. Wait Until Seedlings Emerge: Wait until the seedlings are about 1-2 inches tall before thinning.
2. Thin to 1-2 Inches Apart: Thin the seedlings to 1-2 inches apart. This will give them enough room to develop into mature carrots.
3. Thin Again Later: When the carrots are about 4 inches tall, thin them again to 3-4 inches apart. This will give them even more space to grow.
4. Be Gentle: When thinning, be careful not to disturb the roots of the remaining seedlings. I like to use small scissors to snip off the unwanted seedlings at the soil line.
5. Don’t Waste the Thinnings: You can eat the thinnings! They’re delicious in salads or as a garnish.
Caring for Your Carrot Plants
Once your carrots are established, it’s important to provide them with the care they need to thrive.
* Water Regularly: Carrots need consistent moisture, especially during dry spells. Water deeply and regularly, aiming for about 1 inch of water per week.
* Weed Regularly: Keep the area around your carrots free of weeds. Weeds compete with carrots for nutrients and water. I like to hand-weed regularly to prevent weeds from getting out of control.
* Fertilize Sparingly: Carrots don’t need a lot of fertilizer. Over-fertilizing can lead to excessive foliage growth and poor root development. If your soil is poor, you can side-dress your carrots with a balanced fertilizer a few weeks after thinning.
* Protect from Pests: Carrots are susceptible to a few pests, including carrot rust flies and nematodes. Cover your carrots with row covers to protect them from pests. You can also use organic pest control methods, such as neem oil or insecticidal soap.
* Mulch: Apply a layer of mulch around your carrots to help retain moisture, suppress weeds, and regulate soil temperature. I like to use straw or shredded leaves as mulch.
Harvesting Your Carrots
The moment you’ve been waiting for! Harvesting your carrots is the most rewarding part of the process.
1. Check Maturity: Carrots are typically ready to harvest 60-80 days after planting, depending on the variety. Check the seed packet for specific maturity dates.
2. Loosen the Soil: Before harvesting, loosen the soil around the carrots with a garden fork. This will make it easier to pull them out without breaking them.
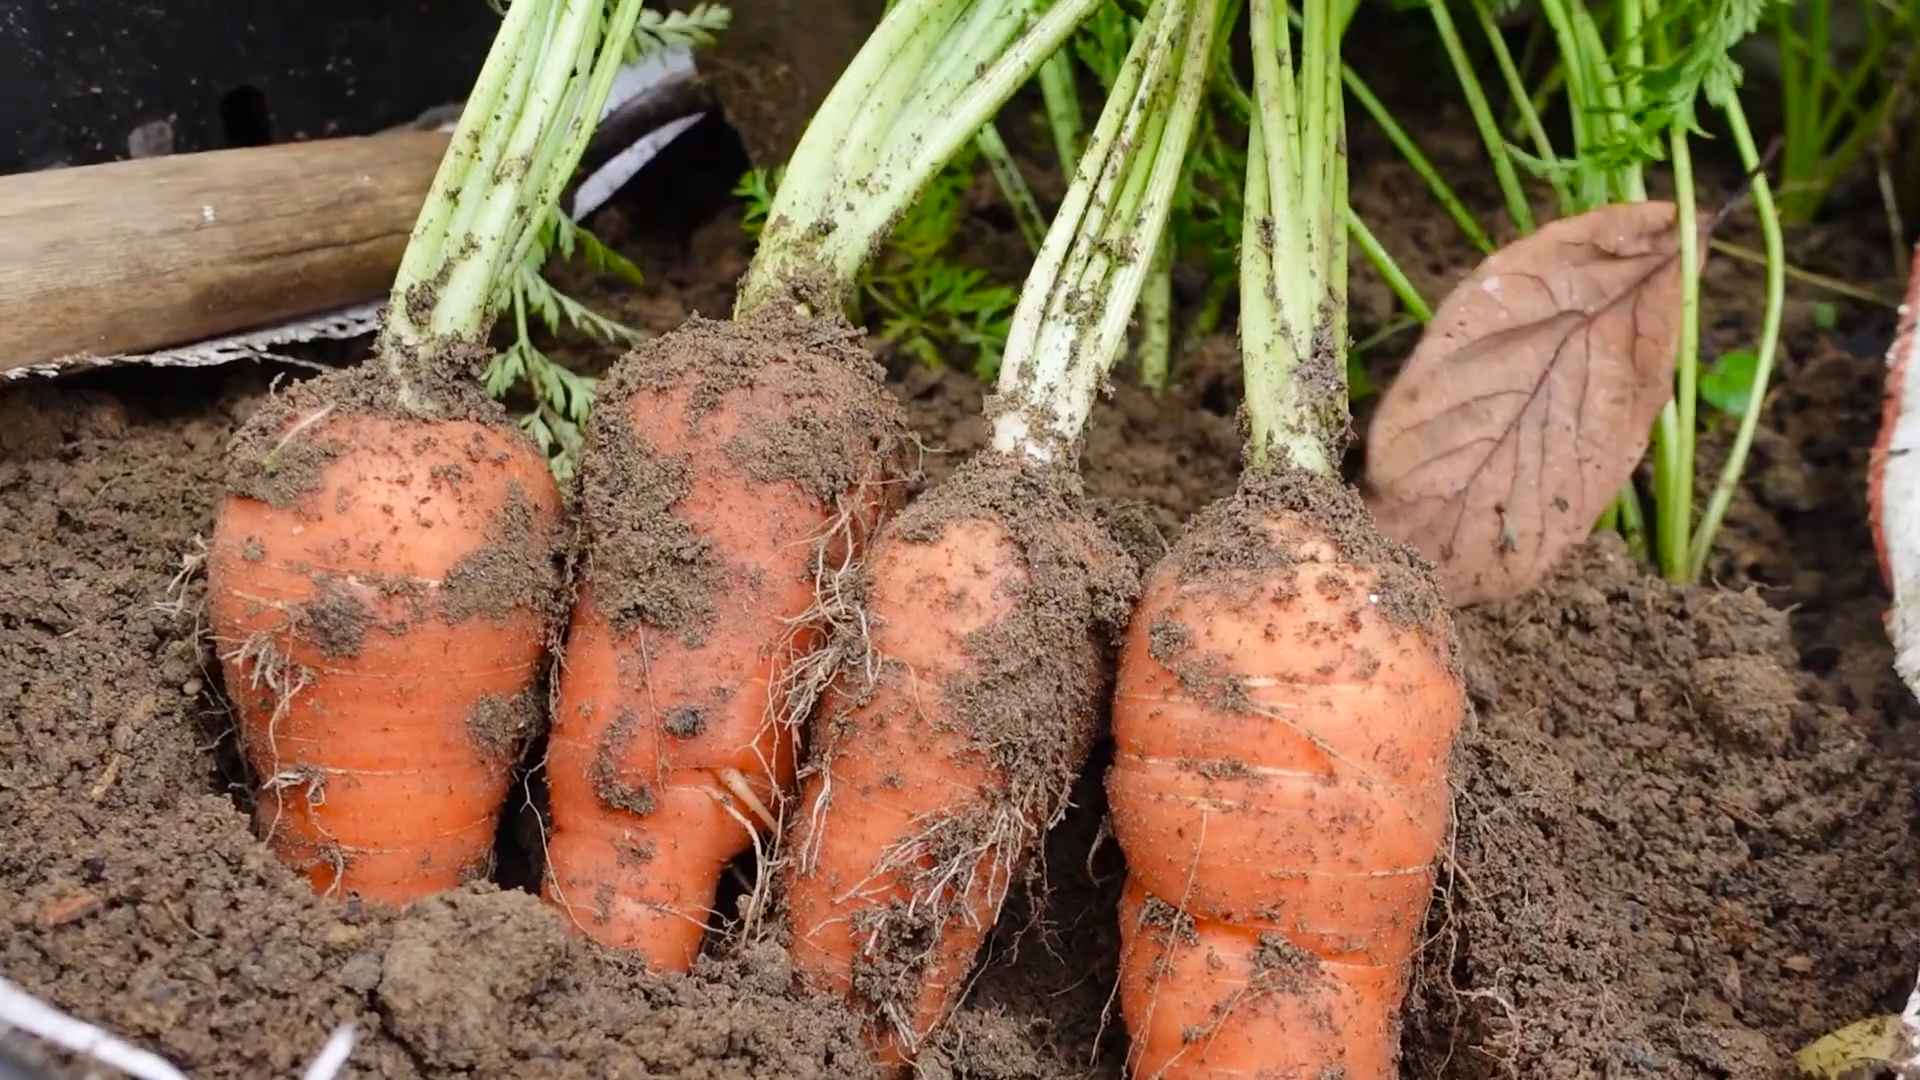
3. Pull Gently: Grasp the carrot tops firmly and gently pull the carrots out of the ground. If the carrots are difficult to pull, use the garden fork to loosen the soil further.
4. Wash and Store: Wash the carrots thoroughly and store them in the refrigerator. You can store carrots in a plastic bag or container for several weeks.
Troubleshooting Common Carrot Problems
Even with the best care, you might encounter a few problems along the way. Here are some common issues and how to address them:
* Forked or Stunted Carrots: This is usually caused by rocky or compacted soil. Make sure to prepare your soil properly before planting.
* Bitter Carrots: This can be caused by inconsistent watering or hot weather. Water your carrots regularly and provide shade during hot spells.
* Cracked Carrots: This is often caused by uneven watering. Water your carrots consistently and avoid letting the soil dry out completely.
* Pest Damage: Inspect your carrots regularly for signs of pests. Use row covers or organic pest control methods to protect your plants.
Extending Your Carrot Harvest
Want to enjoy fresh carrots for as long as possible? Here are a few tips for extending your harvest:
* Succession Planting: Sow carrot seeds every 2-3 weeks to ensure a continuous harvest throughout the growing season.
* Choose Cold-Hardy Varieties: Select cold-hardy varieties that can tolerate frost.
* Overwintering Carrots: In mild climates, you can overwinter carrots in the ground. Cover them with a thick layer of mulch to protect them from the cold.
* Cold Storage: Store your harvested carrots in a cool, dark, and humid place, such as a root cellar or refrigerator.
Enjoying Your Homegrown Carrots
Congratulations! You’ve successfully grown your own carrots. Now it’s time to enjoy the fruits (or rather, roots) of your labor. Here are a few ideas:
* Eat them raw: Freshly harvested carrots are delicious on their own.
* Add them to salads: Carrots add a crunchy sweetness to salads.
*

Conclusion
So, there you have it! Growing carrots at home isn’t just a whimsical gardening dream; it’s a tangible reality accessible to anyone, regardless of space or experience. We’ve demystified the process, breaking it down into manageable steps that empower you to cultivate your own sweet, crunchy carrots right in your backyard, balcony, or even on a sunny windowsill.
Why is this DIY trick a must-try? Because the rewards are immeasurable. Forget the bland, mass-produced carrots from the supermarket. Imagine biting into a carrot you nurtured from seed, bursting with fresh, earthy flavor and packed with nutrients. The satisfaction of harvesting your own food is unparalleled, and the taste difference is simply undeniable. Plus, you have complete control over the growing process, ensuring your carrots are free from harmful pesticides and chemicals.
Beyond the taste and health benefits, growing carrots at home is a fantastic way to connect with nature, de-stress, and learn new skills. It’s a rewarding hobby that can be enjoyed by the whole family, teaching children about the wonders of plant life and the importance of sustainable living.
But the journey doesn’t end here! Feel free to experiment with different carrot varieties. Try Nantes for their cylindrical shape and sweet flavor, Chantenay for their short, sturdy roots perfect for heavy soils, or even colorful varieties like purple or yellow carrots for a visually stunning harvest.
Consider companion planting to enhance your carrot patch. Onions and garlic can deter carrot root flies, while rosemary and sage can improve the flavor of your carrots. Don’t be afraid to get creative with your container gardening. Use recycled materials like old buckets or tires to create unique and eco-friendly planters.
And remember, success in gardening often comes with a bit of trial and error. Don’t be discouraged if your first attempt isn’t perfect. Learn from your mistakes, adjust your approach, and keep experimenting. The more you grow, the more you’ll learn, and the more bountiful your harvests will become.
We wholeheartedly encourage you to embark on this exciting adventure of growing carrots at home. It’s a simple, rewarding, and sustainable way to enjoy fresh, delicious produce while connecting with nature.
Now, we want to hear from you! Have you tried growing carrots at home before? What challenges did you face, and what tips would you share with fellow gardeners? We invite you to share your experiences, photos, and questions in the comments below. Let’s create a community of carrot-growing enthusiasts and learn from each other’s successes and failures. Together, we can cultivate a greener, healthier, and more flavorful world, one carrot at a time. So, grab your seeds, prepare your soil, and get ready to experience the joy of homegrown carrots! Let’s get growing!
Frequently Asked Questions (FAQ)
What is the best time of year to plant carrot seeds?
The best time to plant carrot seeds depends on your climate. In general, carrots are a cool-season crop, so they thrive in temperatures between 60°F and 70°F (15°C and 21°C). For most regions, this means planting in early spring (2-3 weeks before the last expected frost) or late summer/early fall (for a fall or winter harvest). In warmer climates, you can plant carrots throughout the fall and winter. Check your local climate data for specific planting dates.
What kind of soil is best for growing carrots?
Carrots need loose, well-drained soil that is free of rocks and clumps. Rocky or compacted soil can cause the carrots to become stunted, forked, or misshapen. Sandy loam soil is ideal. Amend heavy clay soil with compost, sand, and other organic matter to improve drainage and texture. The soil pH should be between 6.0 and 6.8.
How deep should I plant carrot seeds?
Carrot seeds are very small, so they should be planted shallowly. Sow the seeds about ¼ to ½ inch deep and gently cover them with soil. Water lightly to avoid washing the seeds away.
How often should I water my carrot plants?
Carrots need consistent moisture to grow properly. Water deeply and regularly, especially during dry periods. Aim to keep the soil consistently moist but not waterlogged. A good rule of thumb is to water when the top inch of soil feels dry to the touch. Mulching around the plants can help retain moisture and suppress weeds.
How long does it take for carrots to mature?
Carrots typically take 60 to 80 days to mature, depending on the variety and growing conditions. Check the seed packet for specific maturity dates. You can harvest carrots when they reach the desired size, even if they are not fully mature. Baby carrots can be harvested earlier.
Why are my carrots forked or misshapen?
Forked or misshapen carrots are usually caused by compacted soil, rocks, or other obstructions in the soil. These obstacles prevent the roots from growing straight down. To prevent this, make sure to prepare your soil thoroughly before planting, removing any rocks, clumps, or debris. Amending the soil with compost and other organic matter can also help improve its texture and drainage.
What are some common pests and diseases that affect carrots?
Some common pests that affect carrots include carrot root flies, aphids, and nematodes. Carrot root flies lay their eggs near the base of the plants, and the larvae burrow into the roots, causing damage. Aphids can suck the sap from the leaves, weakening the plants. Nematodes are microscopic worms that can damage the roots.
Common diseases that affect carrots include leaf blight and powdery mildew. Leaf blight causes brown spots on the leaves, while powdery mildew causes a white, powdery coating on the leaves.
To prevent pests and diseases, practice good garden hygiene, such as removing weeds and debris, and rotating your crops. You can also use organic pest control methods, such as insecticidal soap or neem oil.
Can I grow carrots in containers?
Yes, you can definitely grow carrots in containers! Choose a container that is at least 12 inches deep to accommodate the length of the carrot roots. Use a well-draining potting mix and make sure the container has drainage holes. Sow the seeds directly into the container and water regularly. Place the container in a sunny location that receives at least 6 hours of sunlight per day.
How do I thin my carrot seedlings?
Thinning is essential for giving your carrots enough space to grow properly. When the seedlings are about 2 inches tall, thin them to about 1-2 inches apart. When they are about 4 inches tall, thin them again to about 3-4 inches apart. Gently pull out the unwanted seedlings, being careful not to disturb the roots of the remaining plants.
How do I know when my carrots are ready to harvest?
You can harvest carrots when they reach the desired size, even if they are not fully mature. Gently loosen the soil around the carrots and pull them out by the tops. If the soil is dry, water it before harvesting to make it easier to pull the carrots out.
Can I store carrots after harvesting?
Yes, you can store carrots for several months if you store them properly. Cut off the green tops, leaving about an inch of stem. Gently brush off any excess soil, but do not wash the carrots. Store the carrots in a cool, dark, and humid place, such as a root cellar or refrigerator. You can store them in a plastic bag or container with a damp paper towel to help maintain humidity.


Leave a Comment