

Grow Cauliflower at Home? Absolutely! Imagine harvesting your own crisp, creamy cauliflower, knowing exactly where it came from and how it was grown. Forget those bland, overpriced heads at the grocery store. I’m here to show you how surprisingly easy it is to cultivate this nutritional powerhouse right in your own backyard, or even in containers on your balcony!
Cauliflower, a descendant of wild cabbage, has a rich history dating back to ancient times. It was cultivated in the Mediterranean region for centuries before making its way to other parts of the world. Today, it’s a staple in countless cuisines, celebrated for its versatility and health benefits. But let’s be honest, buying it can be a gamble. Sometimes you get a great one, other times it’s…well, less than stellar.
That’s where this DIY guide comes in! I’m going to share my favorite tips and tricks for successfully grow cauliflower at home. Whether you’re a seasoned gardener or just starting out, these simple hacks will help you avoid common pitfalls and ensure a bountiful harvest. Think of it: fresh, delicious cauliflower ready whenever you need it for roasting, steaming, or even turning into a healthy pizza crust. Let’s get growing!
Growing Cauliflower at Home: A Beginner’s Guide
Hey there, fellow gardening enthusiasts! Ever dreamt of harvesting your own crisp, delicious cauliflower right from your backyard? Well, dream no more! Growing cauliflower at home is totally achievable, even for beginners. It might seem a little intimidating at first, but trust me, with the right knowledge and a little patience, you’ll be enjoying homegrown cauliflower in no time. Let’s dive in!
Choosing the Right Cauliflower Variety
First things first, let’s talk about cauliflower varieties. There’s more to cauliflower than just the standard white head you see in the grocery store. Different varieties have different maturity times and are suited for different climates. Here’s a quick rundown of some popular choices:
* Snowball Y Improved: This is a classic, reliable variety that produces medium-sized, tightly packed white heads. It’s a good choice for beginners and matures in about 50-60 days.
* Early White Hybrid: As the name suggests, this variety matures early, usually in around 45-50 days. It’s a great option if you’re in a hurry to harvest.
* Graffiti: Want to add some color to your garden? Graffiti cauliflower produces stunning purple heads! It’s not just pretty, though; it also has a slightly sweeter flavor than white cauliflower. It takes around 70-80 days to mature.
* Cheddar: This variety produces bright orange heads and has a mild, slightly nutty flavor. It matures in about 70 days.
* Romanesco: If you’re looking for something truly unique, try Romanesco. It has a striking fractal pattern and a delicate, nutty flavor. It takes about 75-80 days to mature.
When choosing a variety, consider your local climate and the length of your growing season. Also, think about what you want to use the cauliflower for. If you plan on pickling it, a denser variety like Snowball Y Improved might be a good choice. If you want to roast it, a sweeter variety like Graffiti or Cheddar might be more appealing.
Preparing the Soil
Cauliflower is a heavy feeder, meaning it needs a lot of nutrients to grow properly. So, preparing the soil is crucial for success. Here’s what I recommend:
* Soil Type: Cauliflower prefers well-drained, fertile soil with a pH between 6.0 and 7.0.
* Amendments: Before planting, amend the soil with plenty of organic matter, such as compost, well-rotted manure, or leaf mold. This will improve drainage, aeration, and nutrient content. I usually add a generous layer of compost (about 2-3 inches) and work it into the top 6-8 inches of soil.
* Fertilizer: Cauliflower also benefits from a balanced fertilizer. I like to use a slow-release fertilizer with an NPK ratio of 10-10-10 or something similar. Follow the instructions on the fertilizer package for application rates.
* Sunlight: Cauliflower needs at least 6 hours of sunlight per day. Choose a location in your garden that gets plenty of sun.
Starting Cauliflower Seeds (or Buying Transplants)
You have two options for starting cauliflower: you can either start seeds indoors or buy transplants from a local nursery. Starting seeds indoors gives you more control over the growing process and allows you to choose from a wider variety of cultivars. However, buying transplants is a convenient option if you’re short on time or don’t have the space to start seeds indoors.
Starting Seeds Indoors:
1. Timing: Start seeds indoors about 4-6 weeks before the last expected frost in your area.
2. Containers: Use seed starting trays or small pots filled with a seed starting mix.
3. Sowing: Sow seeds about 1/4 inch deep and gently water them.
4. Warmth: Keep the soil consistently moist and warm (around 70-75°F) until the seeds germinate. You can use a heat mat to help speed up germination.
5. Light: Once the seedlings emerge, provide them with plenty of light. A sunny windowsill or a grow light will work well.
6. Hardening Off: Before transplanting the seedlings outdoors, you’ll need to harden them off. This means gradually exposing them to outdoor conditions over a period of 7-10 days. Start by placing them in a sheltered location for a few hours each day, gradually increasing the amount of time they spend outdoors.
Buying Transplants:
1. Choose Healthy Plants: When buying transplants, look for plants that are healthy and vigorous, with no signs of disease or pests.
2. Avoid Root-Bound Plants: Avoid plants that are root-bound, meaning the roots are tightly packed in the container.
3. Transplant Immediately: Transplant the seedlings into your garden as soon as possible after purchasing them.
Transplanting Cauliflower Seedlings
Once your seedlings are ready (either homegrown or purchased), it’s time to transplant them into the garden.
1. Timing: Transplant cauliflower seedlings outdoors after the last expected frost in your area.
2. Spacing: Space the plants about 18-24 inches apart in rows that are 24-36 inches apart. This will give them enough room to grow and mature.
3. Planting Depth: Dig a hole that is slightly larger than the root ball of the seedling. Gently remove the seedling from its container and place it in the hole. Make sure the top of the root ball is level with the surrounding soil.
4. Watering: Water the seedlings thoroughly after transplanting.
5. Mulching: Apply a layer of mulch around the plants to help retain moisture, suppress weeds, and regulate soil temperature. I like to use straw or shredded leaves.
Caring for Your Cauliflower Plants
Once your cauliflower plants are in the ground, it’s important to provide them with proper care to ensure a successful harvest.
* Watering: Cauliflower needs consistent moisture, especially during head formation. Water deeply and regularly, especially during dry spells. Aim for about 1-2 inches of water per week.
* Fertilizing: Side-dress the plants with a nitrogen-rich fertilizer about 3-4 weeks after transplanting. This will help promote leafy growth and head development. You can use a fertilizer like ammonium nitrate or urea, or you can use an organic fertilizer like fish emulsion or blood meal. Follow the instructions on the fertilizer package for application rates.
* Weeding: Keep the area around the plants free of weeds. Weeds compete with cauliflower for nutrients and water.
* Pest Control: Cauliflower is susceptible to several pests, including cabbage worms, aphids, and flea beetles. Inspect your plants regularly for signs of pests and take action if necessary. You can use insecticidal soap, neem oil, or Bacillus thuringiensis (Bt) to control these pests.
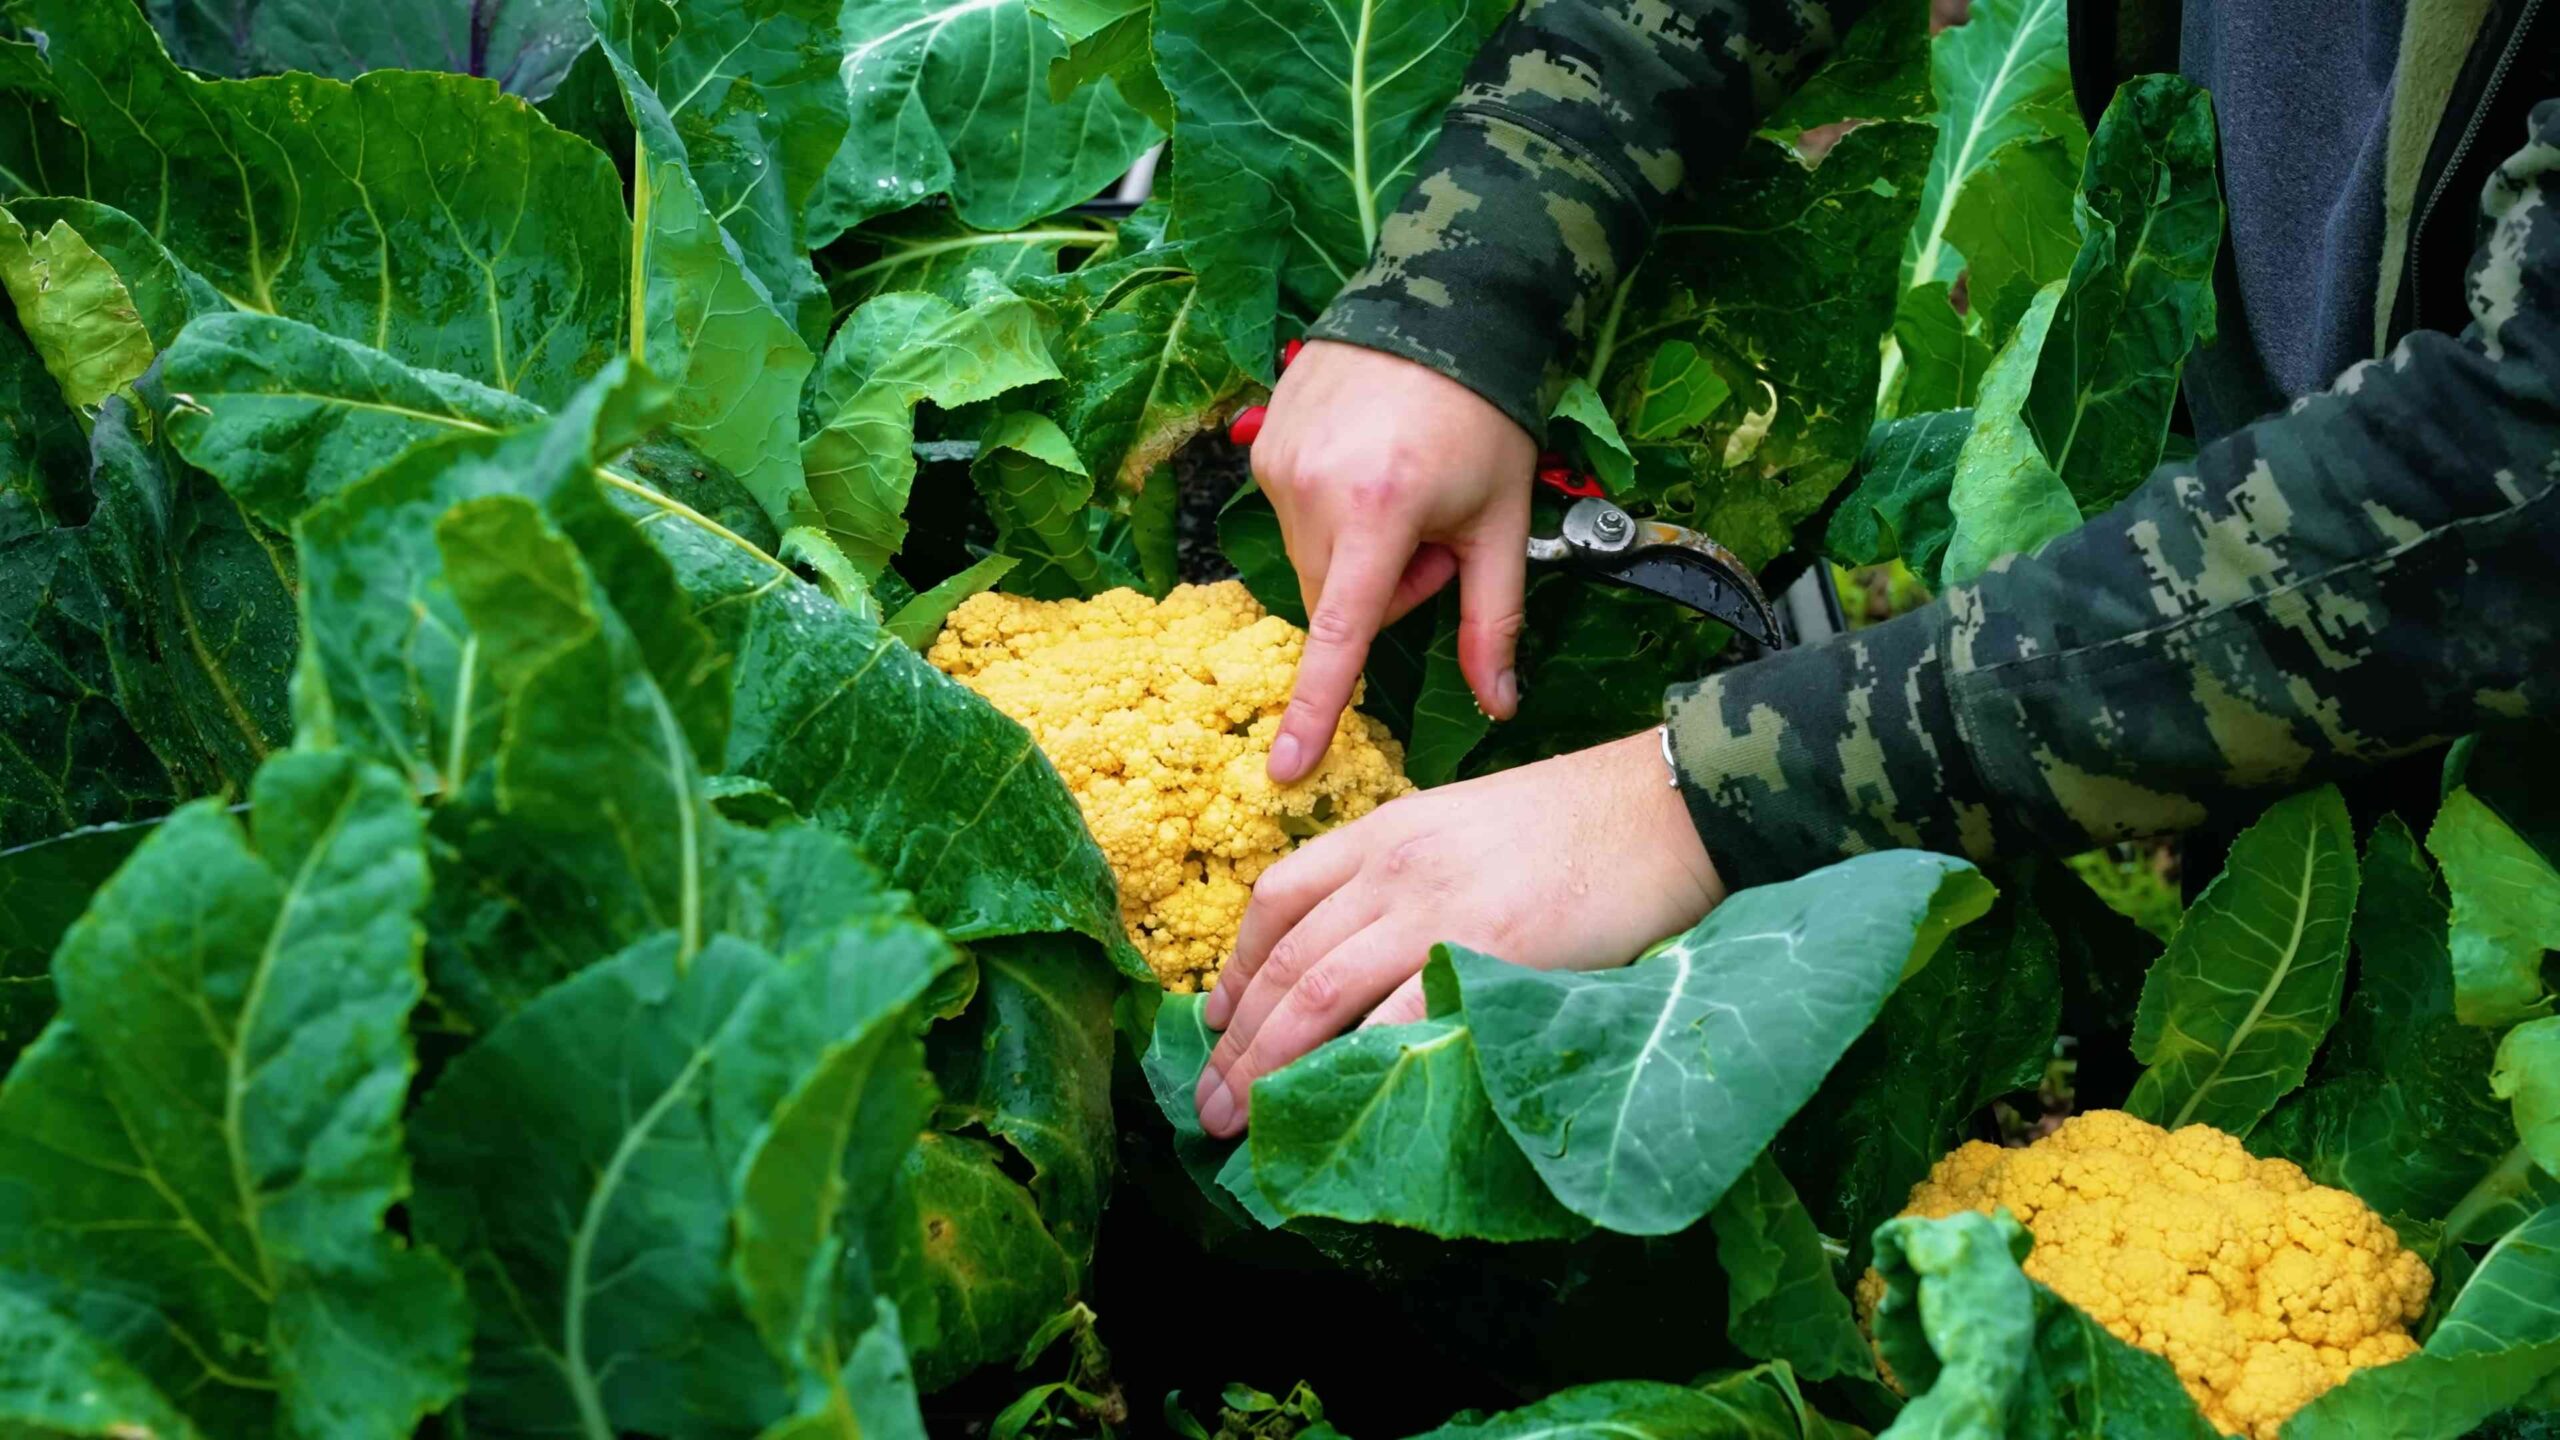
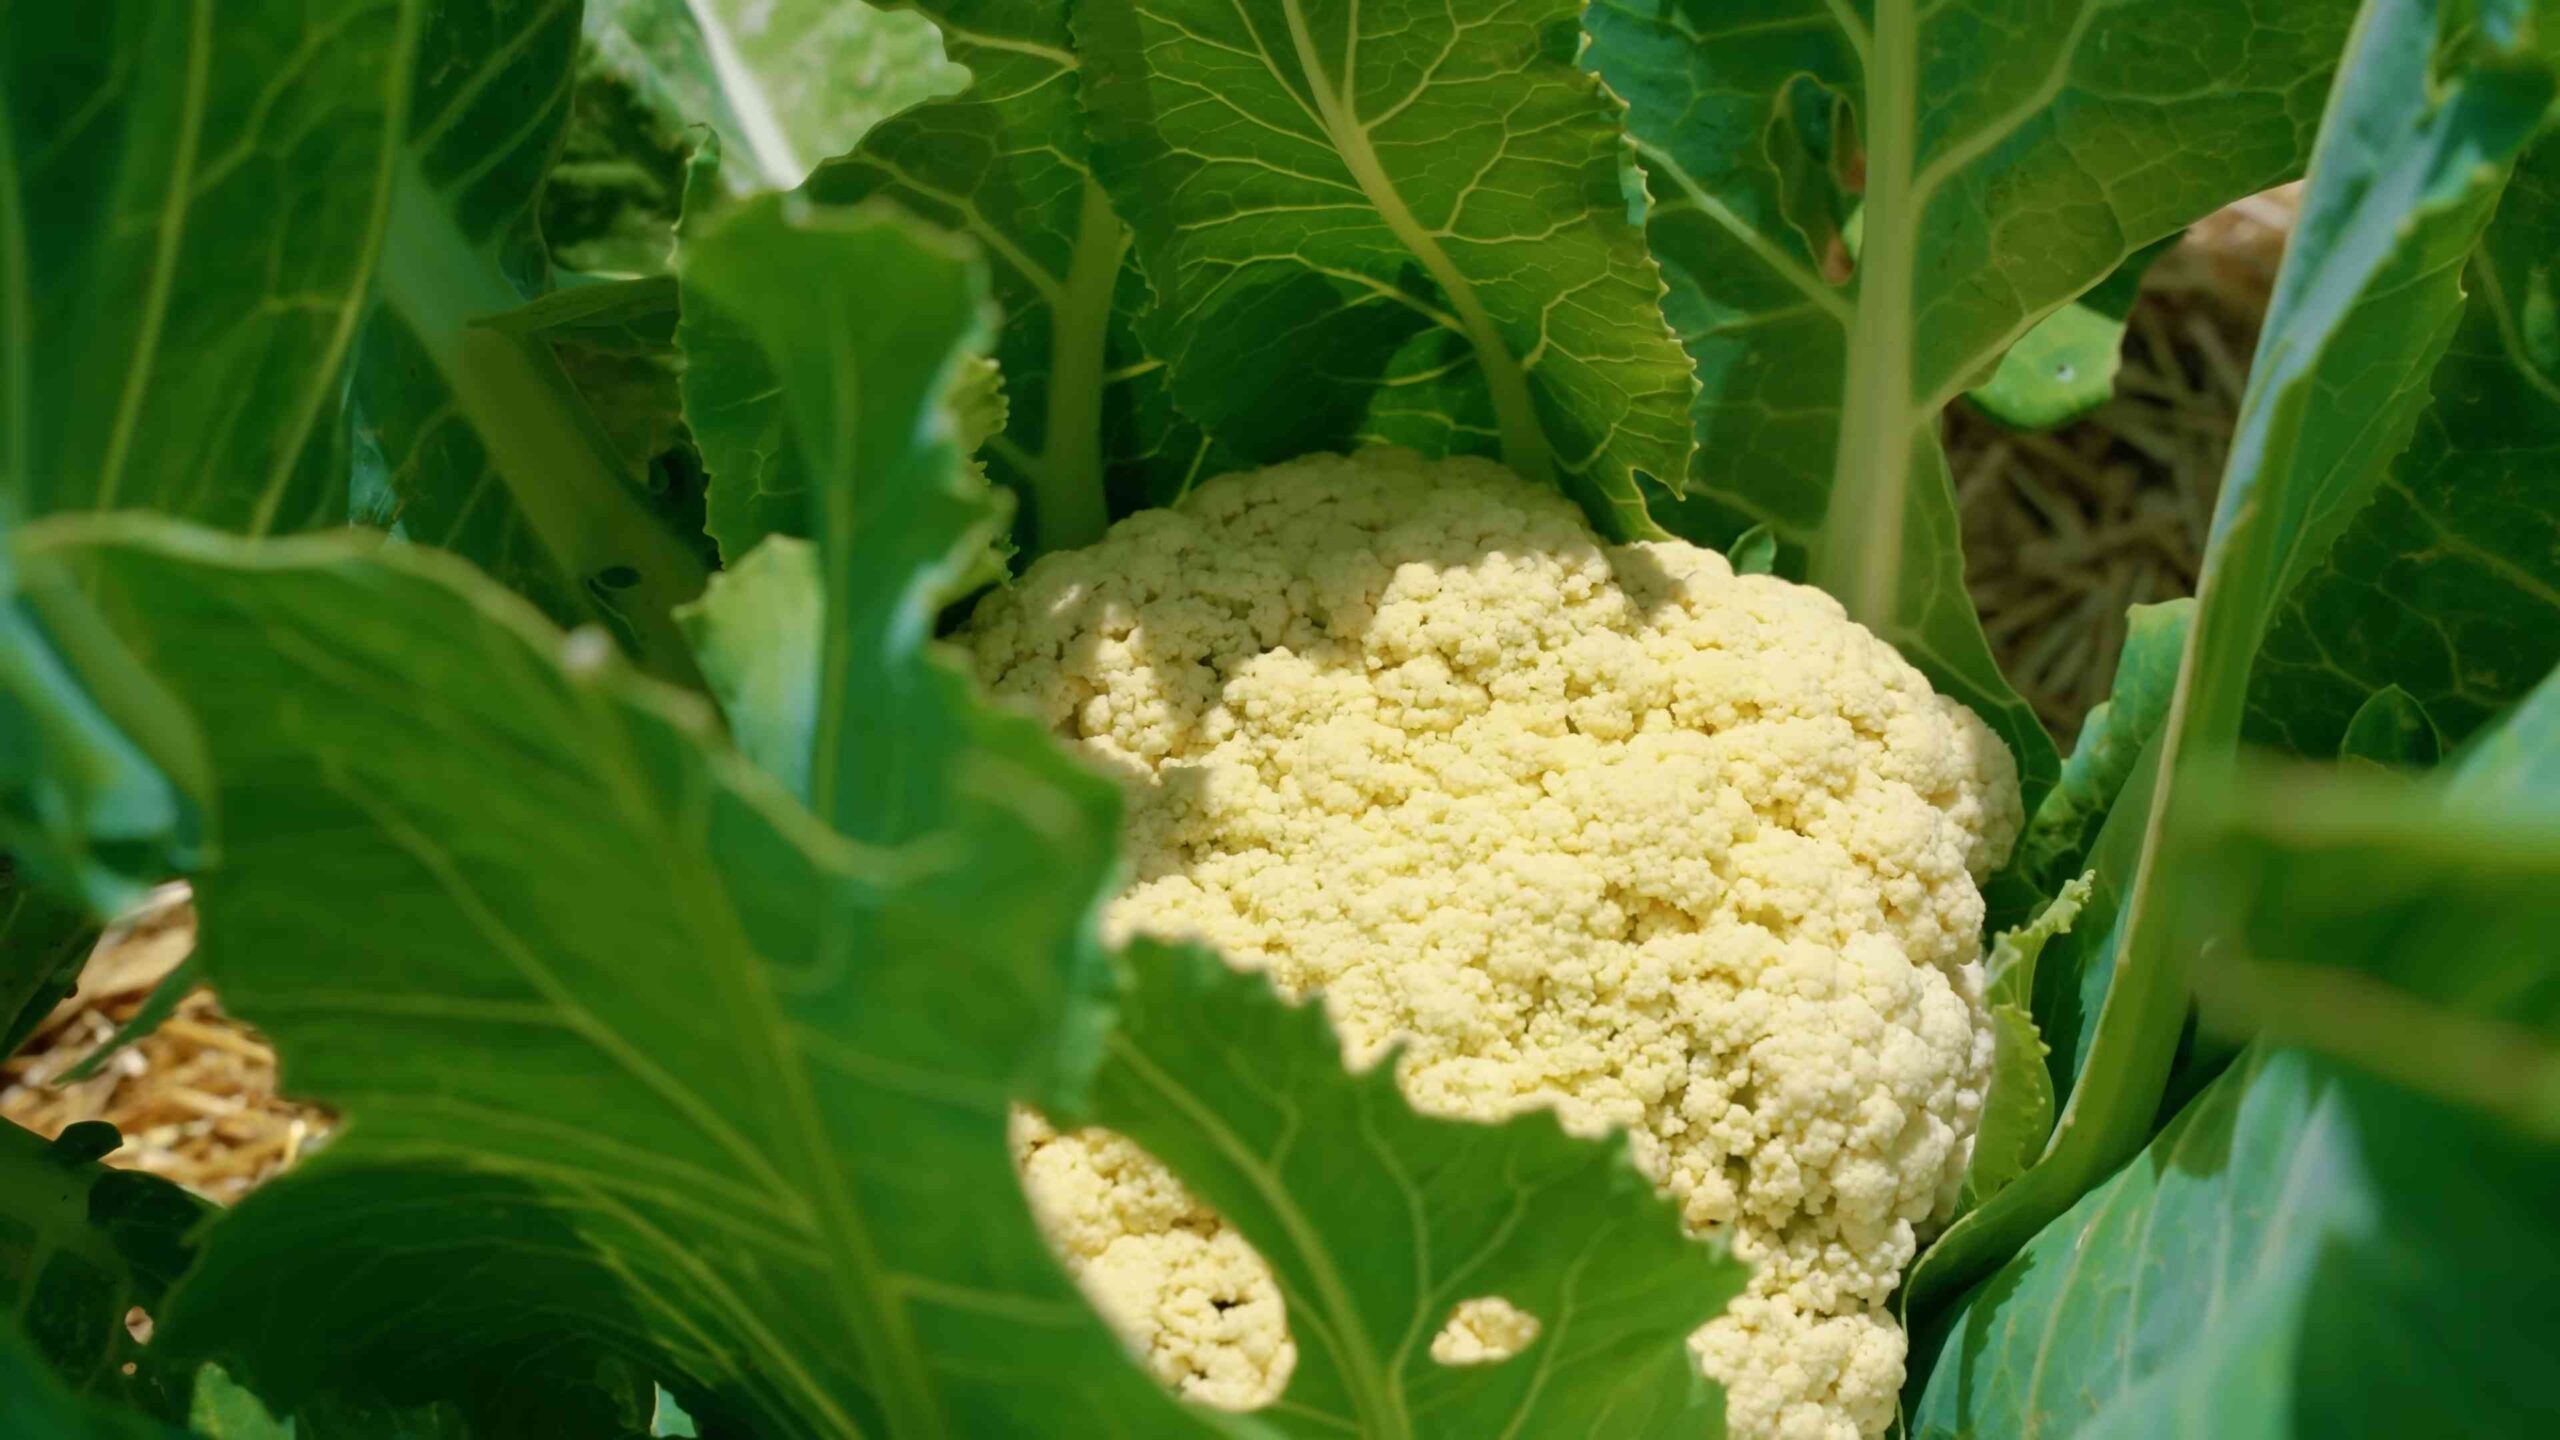
* Blanching (for White Varieties): If you’re growing a white cauliflower variety, you’ll need to blanch the head to keep it white. Blanching involves covering the head with the surrounding leaves to protect it from sunlight. When the head is about 2-3 inches in diameter, tie the leaves together over the head with twine or rubber bands. Check the head regularly and harvest it when it reaches the desired size.
Harvesting Your Cauliflower
Harvest time is the most rewarding part of growing cauliflower!
1. Timing: Cauliflower is ready to harvest when the head is firm, compact, and reaches the desired size. The size will vary depending on the variety, but most varieties are ready to harvest when the head is 6-8 inches in diameter.
2. Cutting: To harvest, cut the stem of the cauliflower head with a sharp knife, leaving a few leaves attached to protect the head.
3. Storage: Store cauliflower in the refrigerator for up to a week.
Troubleshooting Common Problems
Even with the best care, you might encounter some problems while growing cauliflower. Here are a few common issues and how to address them:
* Buttoning: Buttoning is when the cauliflower head forms prematurely and remains small. This can be caused by stress, such as cold temperatures, lack of water, or nutrient deficiencies. To prevent buttoning, make sure to provide your plants with consistent moisture, adequate nutrients, and protection from extreme temperatures.
* Loose Heads: Loose heads are when the cauliflower curds are not tightly packed together. This can be caused by hot weather, lack of boron, or inconsistent watering. To prevent loose heads, choose heat-tolerant varieties, amend the soil with boron (if necessary), and water regularly.
* Pest Infestations: As mentioned earlier, cauliflower is susceptible to several pests. Inspect your plants regularly for signs of pests and take action if necessary.
* Diseases: Cauliflower can also be affected by diseases, such as black rot and clubroot. To
Conclusion
So, there you have it! Growing cauliflower at home might seem daunting at first, but with a little patience and these simple steps, you can enjoy fresh, delicious, and organically grown cauliflower right from your own backyard. The satisfaction of harvesting your own vegetables, knowing exactly where they came from and what went into growing them, is truly unparalleled. Forget the bland, often overpriced cauliflower from the grocery store; homegrown cauliflower bursts with flavor and nutrients.
This DIY approach to growing cauliflower isn’t just about saving money; it’s about connecting with nature, learning a new skill, and enjoying the fruits (or rather, vegetables) of your labor. Plus, it’s a fantastic way to reduce your carbon footprint and support sustainable living.
But the best part? You can customize your cauliflower growing experience to suit your preferences. Want to try a different variety? Go for it! Purple, orange, or Romanesco cauliflower can add a splash of color to your garden and your plate. Experiment with different companion plants to deter pests naturally. Consider succession planting to ensure a continuous harvest throughout the growing season.
Don’t be afraid to experiment with different fertilizers and soil amendments to find what works best for your specific climate and soil conditions. Some gardeners swear by adding bone meal to the soil to promote strong root development, while others prefer using compost tea for a nutrient boost. The possibilities are endless!
We highly encourage you to give this DIY trick a try. Even if you’re a beginner gardener, you’ll be surprised at how rewarding it can be. And remember, gardening is a journey, not a destination. There will be challenges along the way, but don’t let them discourage you. Learn from your mistakes, adapt your approach, and keep growing!
We’re confident that you’ll be enjoying homegrown cauliflower in no time. And when you do, we’d love to hear about your experience! Share your tips, tricks, and photos in the comments below. Let’s build a community of cauliflower enthusiasts and inspire others to grow their own food. Happy gardening!
Frequently Asked Questions (FAQ)
Q: How much space does cauliflower need to grow?
A: Cauliflower plants require ample space to thrive. Generally, you should allow at least 18 to 24 inches between plants and 24 to 36 inches between rows. This spacing allows for proper air circulation, which helps prevent fungal diseases, and ensures that each plant has enough room to develop a large, healthy head. If you’re growing cauliflower in containers, choose pots that are at least 12 inches in diameter. Remember, overcrowding can lead to smaller heads and increased susceptibility to pests and diseases.
Q: What kind of soil is best for growing cauliflower?
A: Cauliflower thrives in well-drained, fertile soil that is rich in organic matter. The ideal soil pH is between 6.0 and 7.0. Before planting, amend your soil with compost, aged manure, or other organic materials to improve its structure and fertility. Cauliflower is a heavy feeder, so it needs plenty of nutrients to grow properly. Consider adding a slow-release fertilizer at planting time to provide a steady supply of nutrients throughout the growing season. Avoid soils that are compacted or poorly drained, as these can lead to root rot and other problems.
Q: How often should I water my cauliflower plants?
A: Cauliflower plants need consistent moisture to grow well. Water deeply and regularly, especially during hot, dry weather. Aim to keep the soil consistently moist but not waterlogged. A good rule of thumb is to water when the top inch of soil feels dry to the touch. Mulching around your cauliflower plants can help retain moisture in the soil and suppress weeds. Avoid overhead watering, as this can increase the risk of fungal diseases. Instead, water at the base of the plants using a soaker hose or drip irrigation system.
Q: What are some common pests and diseases that affect cauliflower?
A: Cauliflower is susceptible to a variety of pests and diseases, including cabbage worms, aphids, flea beetles, clubroot, and black rot. To prevent pest and disease problems, practice good garden hygiene. Remove any plant debris from your garden regularly, and rotate your crops each year. Inspect your cauliflower plants regularly for signs of pests or diseases, and take action promptly if you spot any problems. You can use organic pest control methods, such as insecticidal soap or neem oil, to control pests. For diseases, consider using a copper-based fungicide. Companion planting with herbs like rosemary and thyme can also help deter pests.
Q: When and how should I harvest my cauliflower?
A: Cauliflower is typically ready to harvest 50 to 100 days after planting, depending on the variety. The head should be firm, compact, and white (or the color of the variety you’re growing). The curds should be tightly packed together, and the head should be about 6 to 8 inches in diameter. To harvest, use a sharp knife to cut the head from the plant, leaving a few leaves attached to protect the head. Harvest cauliflower in the morning, when the weather is cool. Store harvested cauliflower in the refrigerator for up to a week.
Q: Can I grow cauliflower in containers?
A: Yes, you can grow cauliflower in containers, but you’ll need to choose a large enough pot. A container that is at least 12 inches in diameter and 12 inches deep is recommended. Use a high-quality potting mix that is well-draining and rich in organic matter. Water your container-grown cauliflower plants regularly, and fertilize them every two to three weeks with a balanced fertilizer. Place your containers in a sunny location that receives at least six hours of sunlight per day. Be aware that container-grown cauliflower plants may dry out more quickly than those grown in the ground, so check the soil moisture regularly.
Q: What are some good companion plants for cauliflower?
A: Companion planting can be a great way to improve the health and productivity of your cauliflower plants. Some good companion plants for cauliflower include:
* **Herbs:** Rosemary, thyme, sage, and dill can help deter pests.
* **Flowers:** Marigolds and nasturtiums can attract beneficial insects that prey on pests.
* **Vegetables:** Beans and peas can fix nitrogen in the soil, which benefits cauliflower. Onions and garlic can help deter pests.
Avoid planting cauliflower near broccoli, cabbage, or other members of the brassica family, as they can attract the same pests and diseases.
Q: How do I prevent cauliflower from turning yellow?
A: Cauliflower heads can turn yellow if they are exposed to too much sunlight. To prevent this, you can blanch the heads by tying the outer leaves together over the developing head. This will protect the head from the sun and keep it white. Start blanching when the head is about 2 to 3 inches in diameter. Check the head regularly, and harvest it when it is ready. Alternatively, you can grow cauliflower varieties that are naturally resistant to yellowing.
Q: Can I save seeds from my homegrown cauliflower?
A: Saving seeds from cauliflower can be challenging, as it is a biennial plant, meaning it takes two years to produce seeds. In the first year, the plant produces the head that we eat. In the second year, it will flower and produce seeds. To save seeds, you’ll need to overwinter the plant and allow it to flower in the spring. However, cauliflower is also cross-pollinated, so the seeds you save may not be true to type. If you want to save seeds, choose an open-pollinated variety and isolate it from other brassica plants to prevent cross-pollination.

Leave a Comment