

Grow Pechay on Balcony: Imagine stepping onto your balcony and harvesting fresh, crisp pechay for your dinner, all grown with your own two hands! Sounds idyllic, right? Well, it’s absolutely achievable, even if you’re short on space. For centuries, urban dwellers have found creative ways to cultivate their own food, from window boxes overflowing with herbs to rooftop gardens bursting with vegetables. This connection to nature, even in the heart of the city, is deeply ingrained in our history and provides a sense of well-being.
But why should you bother with growing pechay on your balcony? In today’s world, we’re all increasingly conscious of where our food comes from. Store-bought vegetables can be expensive, and often lack the freshness and flavor of homegrown produce. Plus, there’s the satisfaction of knowing exactly what went into your food – no harmful pesticides or mystery ingredients! This DIY guide will provide you with simple, effective tricks and hacks to successfully grow pechay on balcony, regardless of your gardening experience. I’m here to show you that with a little know-how, you can transform your balcony into a thriving mini-farm, providing you with delicious, healthy pechay and a rewarding connection to the natural world. Let’s get started!
Grow Your Own Delicious Pechay on Your Balcony: A Beginner’s Guide
Hey there, fellow plant enthusiasts! Ever dreamt of snipping fresh, vibrant greens right from your balcony for a quick stir-fry or salad? Well, dream no more! Growing pechay (also known as bok choy) on your balcony is surprisingly easy and rewarding. I’m going to walk you through everything you need to know to cultivate your own little pechay paradise. Let’s get our hands dirty!
What You’ll Need: Your Pechay Starter Kit
Before we dive in, let’s gather our supplies. Here’s a checklist of everything you’ll need to get started:
* Pechay Seeds: Choose a variety that suits your taste and balcony space. Dwarf varieties are great for smaller spaces.
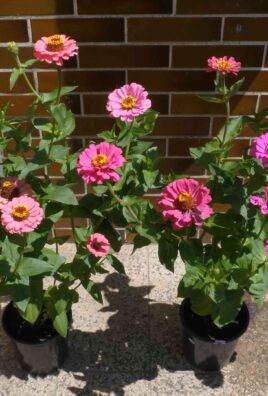
* Containers: Pots, planters, or even repurposed containers will work. Make sure they have drainage holes!
* Potting Mix: Use a well-draining potting mix rich in organic matter. Avoid using garden soil directly, as it can compact and hinder drainage.
* Watering Can or Hose: For gentle and consistent watering.
* Fertilizer: A balanced liquid fertilizer or slow-release granules to nourish your pechay.
* Trowel or Small Shovel: For planting and transplanting.
* Optional:
* Seed starting tray or small pots for starting seeds indoors.
* Organic pest control solutions (like neem oil) to protect your plants.
* Plant labels to keep track of your varieties.
Phase 1: Starting Your Pechay Seeds
You have two options here: direct sowing or starting seeds indoors. I personally prefer starting seeds indoors because it gives me a head start and protects the delicate seedlings from harsh weather.
Option 1: Direct Sowing
This is the simplest method, perfect if you live in a climate with consistently mild temperatures.
1. Prepare Your Container: Fill your chosen container with potting mix, leaving about an inch of space at the top. Gently pat down the soil surface.
2. Sow the Seeds: Sprinkle the pechay seeds evenly over the soil surface. Aim for a spacing of about 1-2 inches between seeds.
3. Cover the Seeds: Lightly cover the seeds with a thin layer of potting mix (about ¼ inch).
4. Water Gently: Use a watering can with a gentle rose attachment to water the soil thoroughly. Avoid overwatering, which can wash away the seeds.
5. Keep Moist: Keep the soil consistently moist but not soggy. You can cover the container with plastic wrap or a clear lid to help retain moisture.
6. Wait for Germination: Pechay seeds typically germinate within 5-10 days. Once the seedlings emerge, remove the plastic wrap or lid.
Option 2: Starting Seeds Indoors
This method is ideal if you want to get a head start or if you live in a colder climate.
1. Prepare Your Seed Starting Tray or Pots: Fill your seed starting tray or small pots with seed starting mix.
2. Sow the Seeds: Sow 2-3 seeds per cell or pot, about ¼ inch deep.
3. Water Gently: Water the soil thoroughly but gently.
4. Provide Light: Place the tray or pots in a warm, sunny location or under grow lights. If using grow lights, keep them on for about 14-16 hours per day.
5. Keep Moist: Keep the soil consistently moist but not soggy.
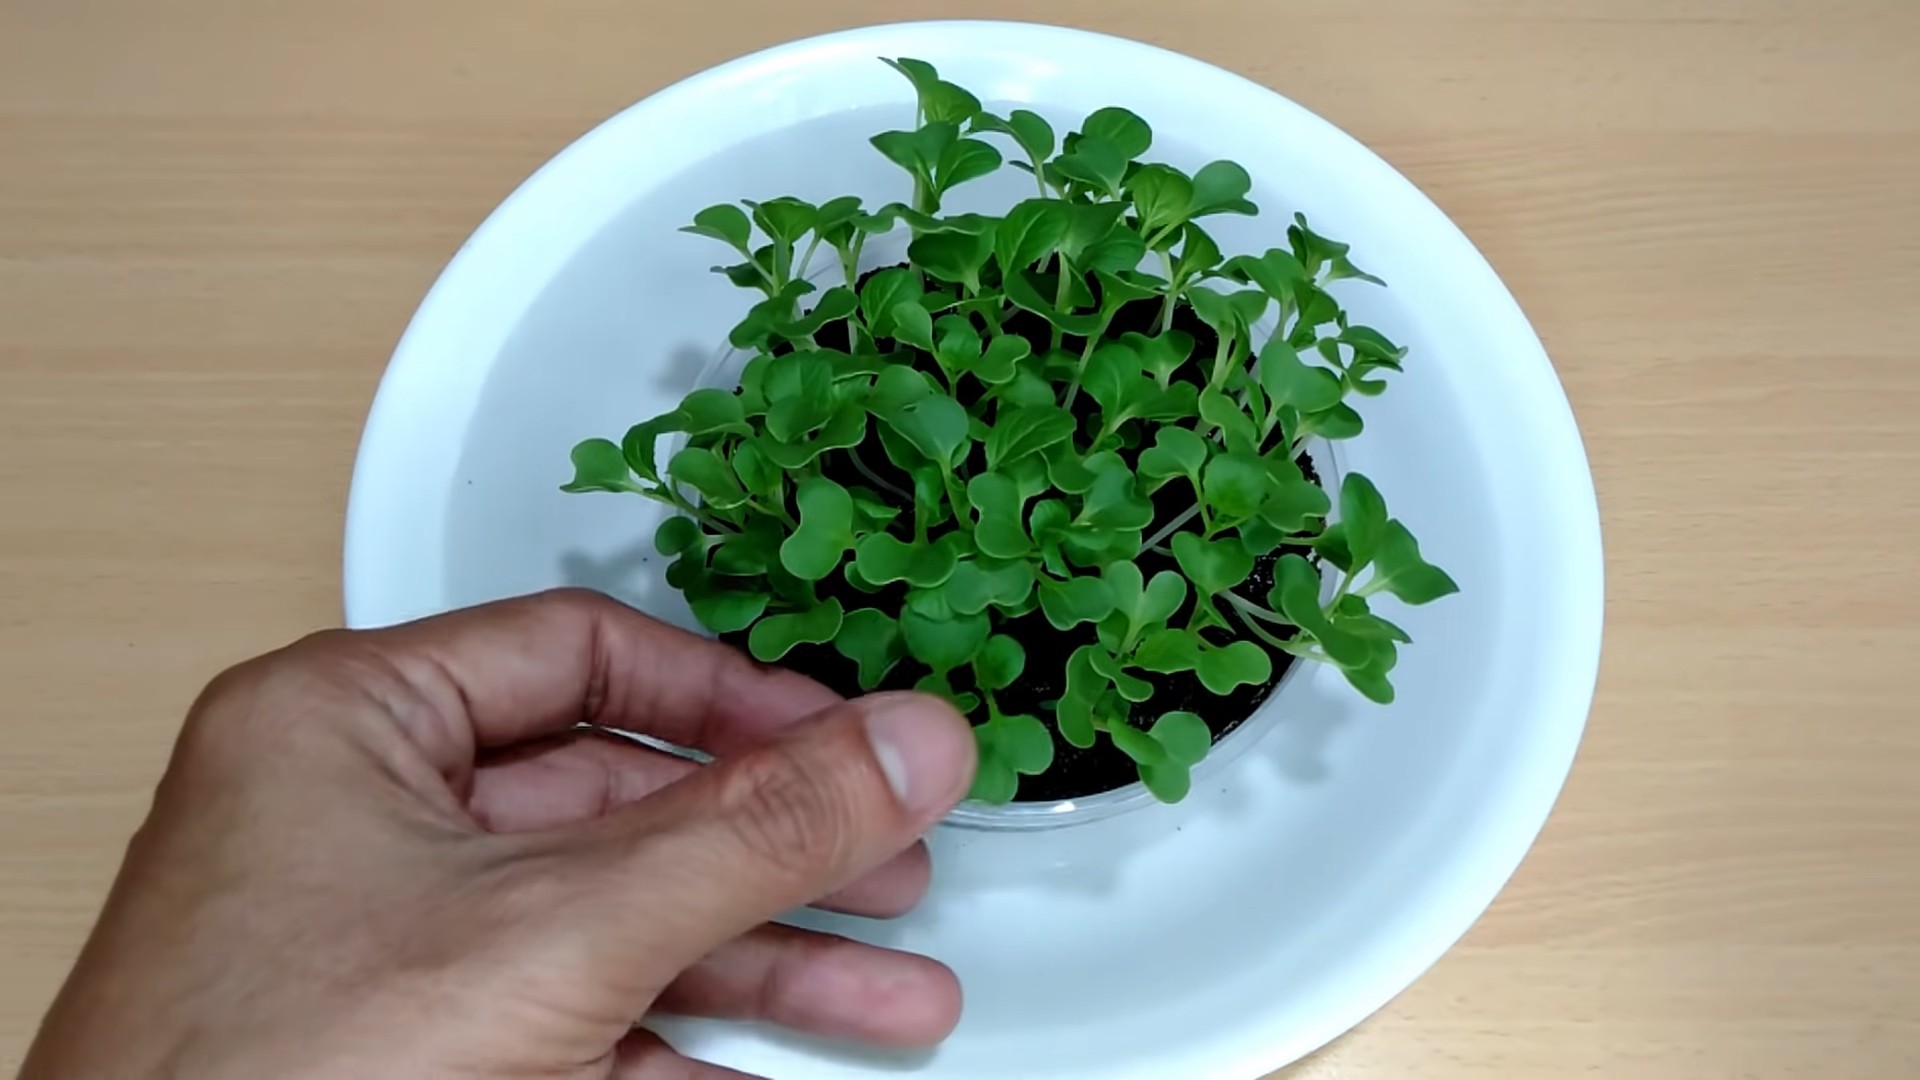
6. Thin the Seedlings: Once the seedlings have developed their first true leaves (the second set of leaves), thin them to one seedling per cell or pot. Choose the strongest, healthiest-looking seedling.
Phase 2: Transplanting Your Pechay Seedlings (If Starting Indoors)
Once your seedlings have developed a few sets of true leaves and are about 2-3 inches tall, it’s time to transplant them to their final containers.
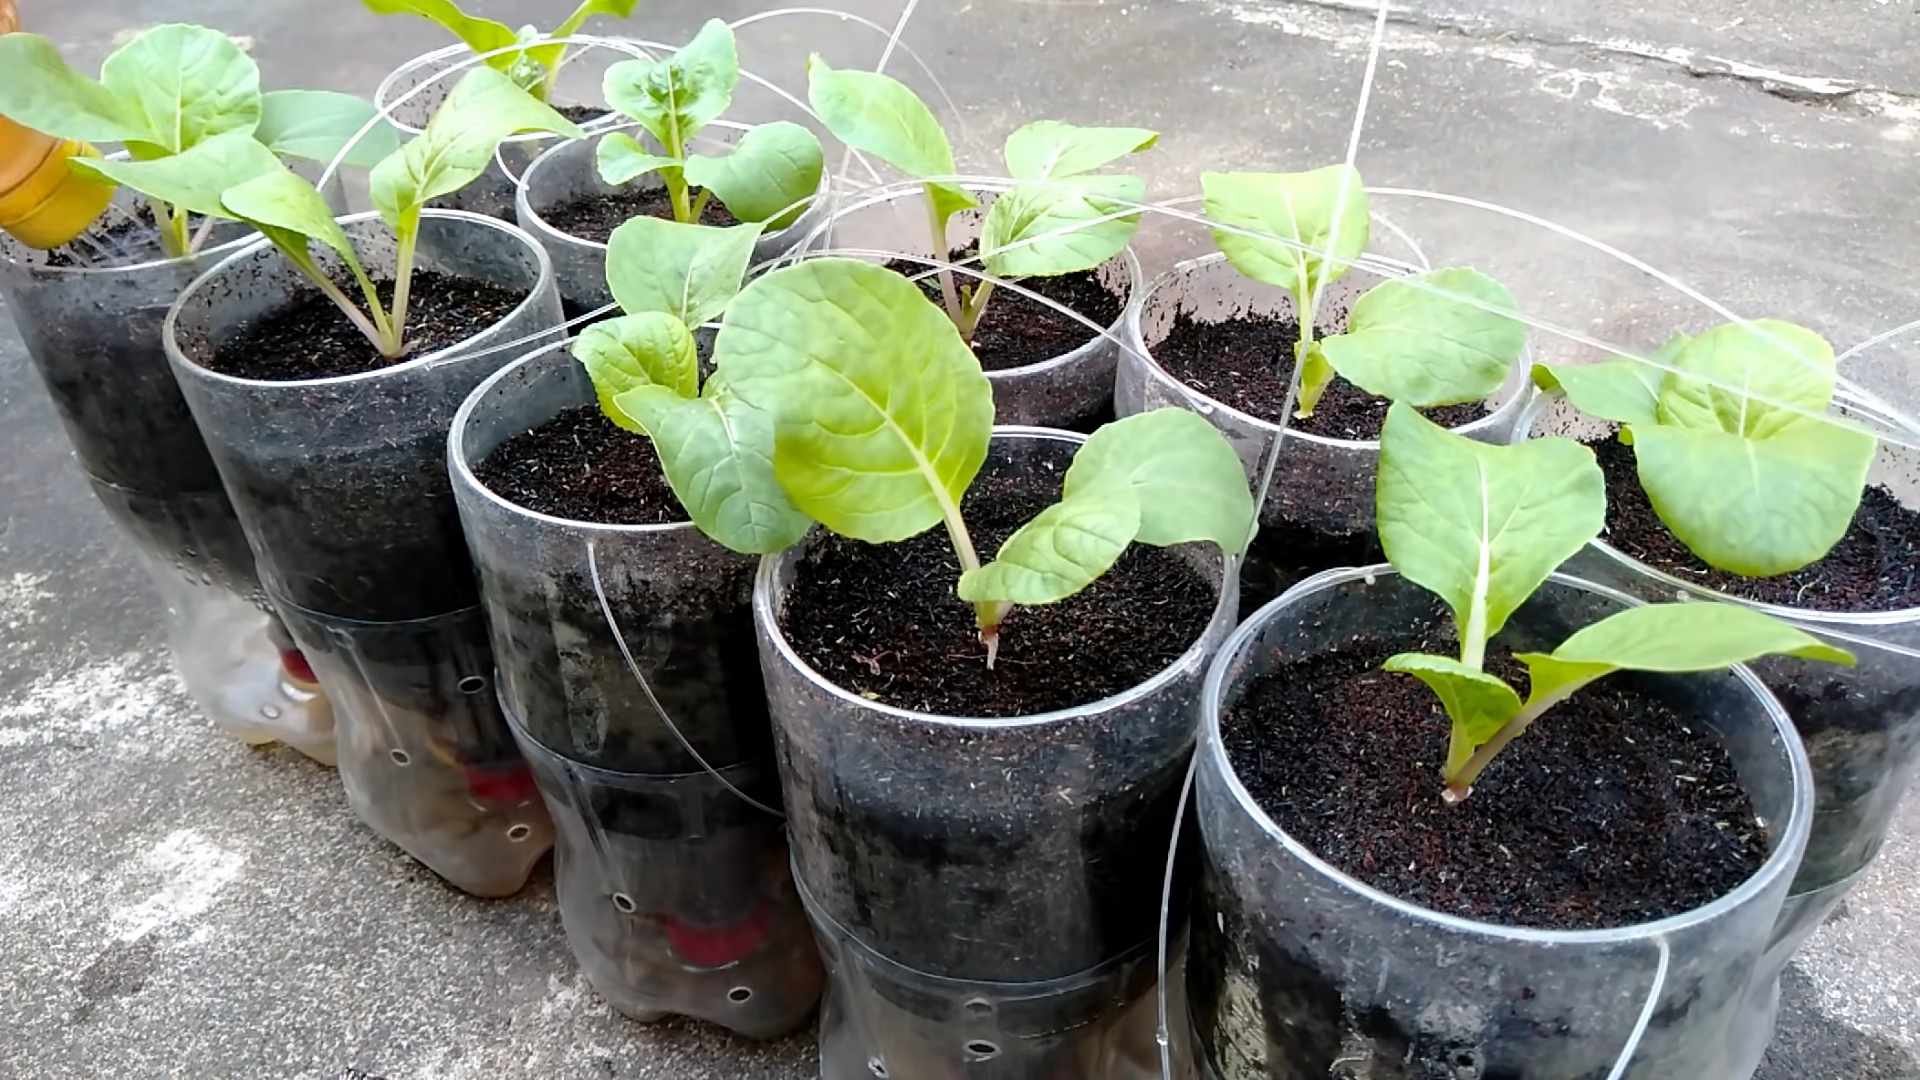
1. Prepare Your Containers: Fill your chosen containers with potting mix, leaving about an inch of space at the top.
2. Gently Remove the Seedlings: Carefully remove the seedlings from their cells or pots. Be gentle to avoid damaging the roots. You can use a small trowel or your fingers to loosen the soil around the seedlings.
3. Plant the Seedlings: Dig a small hole in the potting mix, large enough to accommodate the seedling’s root ball. Place the seedling in the hole and gently backfill with potting mix.
4. Space the Seedlings: Space the seedlings about 6-8 inches apart to allow them room to grow.
5. Water Thoroughly: Water the transplanted seedlings thoroughly.
6. Provide Shade: For the first few days after transplanting, provide some shade to help the seedlings adjust to their new environment.
Phase 3: Caring for Your Growing Pechay
Now that your pechay is planted, it’s time to provide the care it needs to thrive.
1. Watering: Pechay needs consistent moisture, especially during hot weather. Water deeply whenever the top inch of soil feels dry to the touch. Avoid overwatering, which can lead to root rot. Water in the morning to allow the foliage to dry before nightfall, which can help prevent fungal diseases.
2. Sunlight: Pechay prefers partial shade, especially during the hottest part of the day. Aim for at least 4-6 hours of sunlight per day. If your balcony gets intense afternoon sun, consider providing some shade with a shade cloth or by moving the containers to a shadier location.
3. Fertilizing: Pechay is a heavy feeder, so regular fertilization is essential. Use a balanced liquid fertilizer diluted to half strength every 2-3 weeks. Alternatively, you can use slow-release fertilizer granules at planting time.
4. Weeding: Keep your containers free of weeds, which can compete with your pechay for nutrients and water. Hand-pull any weeds that appear.
5. Pest Control: Keep an eye out for common pests like aphids, cabbage worms, and slugs. You can control these pests with organic solutions like neem oil, insecticidal soap, or by hand-picking them off the plants. I’ve found that a strong blast of water from the hose can also dislodge aphids.
6. Bolting: Bolting (when the plant prematurely flowers) can occur in hot weather. This makes the leaves bitter. To prevent bolting, provide shade during the hottest part of the day and ensure consistent watering. Choose bolt-resistant varieties if you live in a hot climate.
Phase 4: Harvesting Your Pechay
The best part! You can start harvesting your pechay when the leaves are about 6-8 inches long.
1. Harvesting Individual Leaves: You can harvest individual leaves as needed, starting with the outer leaves. This allows the plant to continue producing new leaves.
2. Harvesting the Whole Plant: Alternatively, you can harvest the entire plant by cutting it off at the base.
3. Timing: Harvest in the morning when the leaves are crisp and fresh.
4. Storage: Store harvested pechay in the refrigerator for up to a week.
Troubleshooting Common Pechay Problems
Even with the best care, you might encounter some problems along the way. Here are a few common issues and how to address them:
* Yellowing Leaves: This can be caused by overwatering, underwatering, nutrient deficiencies, or pests. Check the soil moisture, fertilize if necessary, and inspect the plants for pests.
* Holes in Leaves: This is often caused by cabbage worms or slugs. Hand-pick the pests off the plants or use organic pest control solutions.
* Stunted Growth: This can be caused by poor soil, lack of sunlight, or nutrient deficiencies. Amend the soil with compost, provide more sunlight, and fertilize regularly.
* Bolting: As mentioned earlier, bolting can occur in hot weather. Provide shade and ensure consistent watering.
Enjoy Your Homegrown Pechay!
Growing pechay on your balcony is a fun and rewarding experience. With a little care and attention, you can enjoy fresh, delicious greens right at your fingertips. So, grab your seeds, get planting, and get ready to savor the taste of homegrown goodness! Happy gardening!
Conclusion
So, there you have it! Growing your own pechay on your balcony isn’t just a fun project; it’s a gateway to fresh, flavorful greens right at your fingertips. We’ve walked you through the simple steps, from selecting the right container to harvesting your bounty. But why is this DIY trick a must-try?
Firstly, consider the unparalleled freshness. Store-bought pechay simply can’t compare to the vibrant taste and crisp texture of greens harvested moments before they hit your plate. You control the entire process, ensuring no harmful pesticides or chemicals come near your food. This is especially important if you’re health-conscious or have young children.
Secondly, growing pechay on your balcony is incredibly rewarding. There’s a unique satisfaction in nurturing a plant from seed to harvest, watching it thrive under your care. It’s a tangible connection to nature, even in the heart of the city. This can be a fantastic stress reliever and a great way to connect with the natural world.
Thirdly, it’s economical! While there’s an initial investment in seeds, soil, and containers, you’ll quickly recoup those costs by reducing your grocery bills. Plus, you can harvest multiple times from a single planting, making it a truly sustainable and budget-friendly option.
But the benefits don’t stop there. Growing your own pechay allows for endless experimentation and customization. Want to try different varieties? Go for it! There are numerous types of pechay, each with its unique flavor and texture. Experiment with different fertilizers and growing mediums to see what works best for your balcony’s microclimate.
Consider these variations to elevate your balcony garden:
* Succession Planting: Plant new seeds every few weeks to ensure a continuous harvest throughout the growing season.
* Companion Planting: Plant herbs like basil or mint alongside your pechay to deter pests and enhance flavor. Marigolds are also excellent companion plants for pest control.
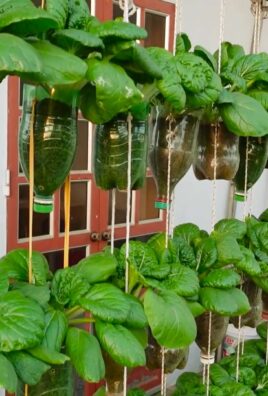
* Vertical Gardening: If you’re short on space, consider using vertical planters or hanging baskets to maximize your growing area.
* Hydroponics: For a more advanced approach, explore hydroponic systems for growing pechay. This method can be highly efficient and requires minimal space.
* Organic Pest Control: Instead of chemical pesticides, use natural remedies like neem oil or insecticidal soap to protect your plants.
We’ve provided you with the knowledge and inspiration to embark on this exciting journey. Now, it’s your turn to get your hands dirty! Don’t be afraid to experiment, learn from your mistakes, and most importantly, have fun.
We are confident that you will find that growing **pechay** on your balcony is a worthwhile endeavor.
So, grab your seeds, prepare your containers, and get ready to enjoy the freshest, most delicious pechay you’ve ever tasted. We can’t wait to hear about your experiences! Share your photos, tips, and challenges in the comments below. Let’s create a community of balcony gardeners and inspire others to grow their own food. Happy gardening!
Frequently Asked Questions (FAQ)
What is the best time of year to grow pechay on my balcony?
Pechay thrives in cooler weather, making spring and fall the ideal seasons for planting. Avoid planting during the hottest months of summer, as high temperatures can cause the plants to bolt (go to seed prematurely), resulting in bitter-tasting leaves. If you live in a region with mild winters, you may be able to grow pechay year-round. Pay attention to the temperature and provide shade during heat waves.
How much sunlight does pechay need?
Pechay requires at least 4-6 hours of direct sunlight per day to grow well. If your balcony doesn’t receive enough sunlight, you can supplement with grow lights. Position the grow lights about 6-12 inches above the plants and keep them on for 12-14 hours per day.
What type of soil is best for growing pechay in containers?
Use a well-draining potting mix that is rich in organic matter. You can also amend your potting mix with compost or aged manure to provide additional nutrients. Avoid using garden soil, as it can become compacted in containers and hinder drainage. A good mix would be equal parts of potting soil, compost, and perlite or vermiculite.
How often should I water my pechay plants?
Water your pechay plants regularly, keeping the soil consistently moist but not waterlogged. Check the soil moisture daily and water when the top inch feels dry to the touch. Avoid overwatering, as this can lead to root rot. During hot weather, you may need to water more frequently.
What are some common pests and diseases that affect pechay?
Common pests that affect pechay include aphids, cabbage worms, and slugs. You can control these pests by handpicking them off the plants, using insecticidal soap, or introducing beneficial insects like ladybugs. Diseases that can affect pechay include downy mildew and damping-off. Prevent these diseases by providing good air circulation, avoiding overwatering, and using disease-resistant varieties.
How do I harvest pechay?
You can harvest pechay when the leaves are about 6-8 inches long. Cut the outer leaves first, leaving the inner leaves to continue growing. This will allow you to harvest multiple times from a single plant. You can also harvest the entire plant at once by cutting it off at the base.
How do I store harvested pechay?
Store harvested pechay in the refrigerator in a plastic bag or container. It will keep for about a week. Wash the leaves just before using them.
Can I grow pechay from seed or seedlings?
You can grow pechay from either seed or seedlings. Starting from seed is more economical, but starting from seedlings will give you a head start. If starting from seed, sow the seeds directly into your containers about 1/4 inch deep. If starting from seedlings, transplant them into your containers when they are about 2-3 inches tall.
How do I fertilize my pechay plants?
Fertilize your pechay plants every 2-3 weeks with a balanced liquid fertilizer. You can also use a slow-release fertilizer at planting time. Avoid over-fertilizing, as this can lead to excessive leaf growth and reduced flavor.
What if my pechay plants start to bolt?
Bolting is when the plant prematurely flowers and goes to seed. This is usually caused by hot weather or stress. Once a plant bolts, the leaves will become bitter and less palatable. To prevent bolting, provide shade during hot weather, water regularly, and harvest the leaves frequently. If a plant does bolt, you can still harvest the leaves, but they may not taste as good. You can also collect the seeds for future planting.
Leave a Comment