

Grow Raspberries at Home and unlock a world of sweet, juicy goodness right in your backyard! Imagine stepping outside and plucking sun-ripened raspberries, bursting with flavor, for your morning yogurt or a delicious afternoon snack. Sounds dreamy, right? Well, it doesn’t have to be just a dream! For centuries, raspberries have been cultivated and cherished, not only for their delectable taste but also for their nutritional benefits. From ancient medicinal uses to becoming a staple in jams and desserts, these little berries have a rich history.
But why should you bother to grow raspberries at home? Let’s face it, store-bought raspberries can be expensive and sometimes lack that fresh, vibrant flavor. Plus, there’s something incredibly rewarding about nurturing your own food from seedling to harvest. This DIY guide will provide you with simple, effective tricks and hacks to successfully cultivate these delightful berries, even if you have limited space or gardening experience. I’m here to show you that growing your own raspberries is easier than you think, and the rewards are oh-so-sweet!
Growing Raspberries: A Beginner’s DIY Guide
Okay, so you want to grow raspberries at home? Awesome! I’m here to tell you it’s totally doable, even if you don’t have a sprawling farm. Raspberries are delicious, relatively easy to care for, and having fresh berries right outside your door is seriously rewarding. This guide will walk you through everything you need to know, from choosing the right variety to harvesting your juicy bounty. Let’s get started!
Choosing Your Raspberry Variety
First things first, you need to decide what kind of raspberries you want to grow. There are two main types:
* Summer-bearing raspberries: These produce one large crop of berries in the summer, usually around June or July. They require more pruning but often yield a bigger harvest at once.
* Everbearing (or fall-bearing) raspberries: These produce two crops – one in the summer (smaller) and another in the fall (larger). They’re generally easier to manage and can be a great choice for beginners.
Within those categories, there are tons of specific varieties. Here are a few popular options:
* ‘Heritage’ (Everbearing): A classic, reliable everbearing variety known for its excellent flavor and hardiness. It’s a great choice for beginners.
* ‘Boyne’ (Summer-bearing): A very cold-hardy summer-bearing variety, perfect for colder climates.
* ‘Caroline’ (Everbearing): Produces large, flavorful berries in the fall. It’s known for its disease resistance.
* ‘Nova’ (Summer-bearing): A high-yielding summer-bearing variety with good disease resistance.
* ‘Golden Queen’ (Everbearing): A unique everbearing variety that produces beautiful golden-yellow raspberries.
Consider your climate, available space, and desired harvest time when making your choice. Local nurseries are a fantastic resource for finding varieties that thrive in your area.
Preparing the Planting Site
Raspberries need a sunny spot with well-drained soil. They prefer slightly acidic soil (pH 6.0-6.8), but they’re fairly adaptable. Here’s how to get your planting site ready:
1. Choose a sunny location: Raspberries need at least 6-8 hours of direct sunlight per day. More sun means more berries!
2. Test your soil: You can buy a soil testing kit at most garden centers or send a sample to your local agricultural extension office. This will tell you the pH and nutrient levels of your soil.
3. Amend the soil: Based on your soil test results, you may need to amend the soil.
* For poor drainage: Add compost, well-rotted manure, or other organic matter to improve drainage. Raised beds are also a great option.
* For acidic soil: Add lime to raise the pH.
* For alkaline soil: Add sulfur to lower the pH.
* For nutrient deficiencies: Incorporate a balanced fertilizer into the soil.
4. Clear the area: Remove any weeds, grass, rocks, or other debris from the planting area. Raspberries don’t like competition!
5. Dig a trench or individual holes: If you’re planting multiple raspberry plants, dig a trench about 12-18 inches wide and 12 inches deep. If you’re planting individual plants, dig holes that are large enough to accommodate the root ball. Space the plants according to the variety’s recommendations (usually 2-3 feet apart for summer-bearing and 1.5-2 feet apart for everbearing).
Planting Your Raspberry Canes
Now for the fun part – planting!
1. Soak the roots: Before planting, soak the roots of your raspberry canes in water for about 30 minutes. This will help them rehydrate and get off to a good start.
2. Plant the canes: Place the canes in the trench or holes, making sure the top of the root ball is level with the soil surface.
3. Backfill with soil: Gently backfill the trench or holes with soil, tamping it down lightly to remove air pockets.
4. Water thoroughly: Water the newly planted canes thoroughly to settle the soil and provide moisture.
5. Mulch: Apply a layer of mulch around the plants to help retain moisture, suppress weeds, and regulate soil temperature. Straw, wood chips, or shredded bark are all good options.
Caring for Your Raspberry Plants
Raspberries need regular care to thrive. Here’s what you need to do:
1. Watering: Raspberries need consistent moisture, especially during dry periods. Water deeply and regularly, aiming for about 1 inch of water per week. Avoid overwatering, which can lead to root rot.
2. Fertilizing: Fertilize your raspberry plants in the spring with a balanced fertilizer. Follow the instructions on the fertilizer package. You can also side-dress with compost or well-rotted manure.
3. Weeding: Keep the area around your raspberry plants free of weeds. Weeds compete for water and nutrients, so it’s important to remove them regularly.
4. Pruning: Pruning is essential for raspberry production. The pruning method depends on the type of raspberry you’re growing.
* Summer-bearing raspberries: After harvesting, prune out the canes that fruited down to the ground. These canes will not produce again. Leave the new, green canes that grew during the summer. These will produce fruit next year.
* Everbearing raspberries: For a single, larger fall crop, cut all the canes down to the ground in late winter or early spring. For two crops, prune the tips of the canes that fruited in the fall after harvesting. These canes will produce a smaller crop in the summer, and then you can prune them down to the ground after the summer harvest.
5. Support: Raspberry canes can get quite tall and heavy, especially when loaded with fruit. Provide support to prevent them from falling over. You can use a trellis, wires, or stakes.
6. Pest and disease control: Raspberries can be susceptible to various pests and diseases. Monitor your plants regularly and take action if you notice any problems. Common pests include aphids, spider mites, and Japanese beetles. Common diseases include cane blight, anthracnose, and root rot. Use organic pest control methods whenever possible.
Building a Simple Raspberry Trellis
Raspberries, especially the summer-bearing varieties, can benefit greatly from a trellis system. It keeps the canes upright, improves air circulation, and makes harvesting easier. Here’s a simple DIY trellis you can build:
Materials You’ll Need:
* Wooden posts (4×4 or 2×4 lumber) – the length will depend on how tall you want your trellis, but 6-8 feet is a good starting point.
* Heavy-gauge wire (like galvanized steel wire)
* Wire staples or U-nails
* Drill
* Measuring tape
* Level
* Post hole digger or shovel
Step-by-Step Instructions:
1. Determine Post Placement: Decide where you want to place your posts. For a row of raspberries, space the posts about 8-10 feet apart. Mark the locations for your post holes.
2. Dig the Post Holes: Use a post hole digger or shovel to dig holes that are at least 2 feet deep. The deeper the holes, the more stable your trellis will be.
3. Set the Posts: Place the posts in the holes and make sure they are plumb (perfectly vertical) using a level. Backfill the holes with soil, tamping it down firmly around the posts to secure them. You can also use concrete for extra stability, but it’s not always necessary.
4. Attach the Wire: Once the posts are securely in place, it’s time to attach the wire. Drill holes through the posts at the desired heights for your wires. A good starting point is to have wires at about 2 feet, 4 feet, and 6 feet above the ground.
5. Thread the Wire: Thread the wire through the holes in the posts, pulling it taut as you go. Secure the wire to the posts using wire staples or U-nails. Make sure the wire is tight enough to support the raspberry canes.
6. Adjust and Tighten: Once all the wires are in place, double-check that they are taut and evenly spaced. You may need to adjust the tension of the wires to ensure they are providing adequate support.
That’s it! Your simple raspberry trellis is complete. As your raspberry canes grow, you can train them to grow along the wires, providing them with the support they need.
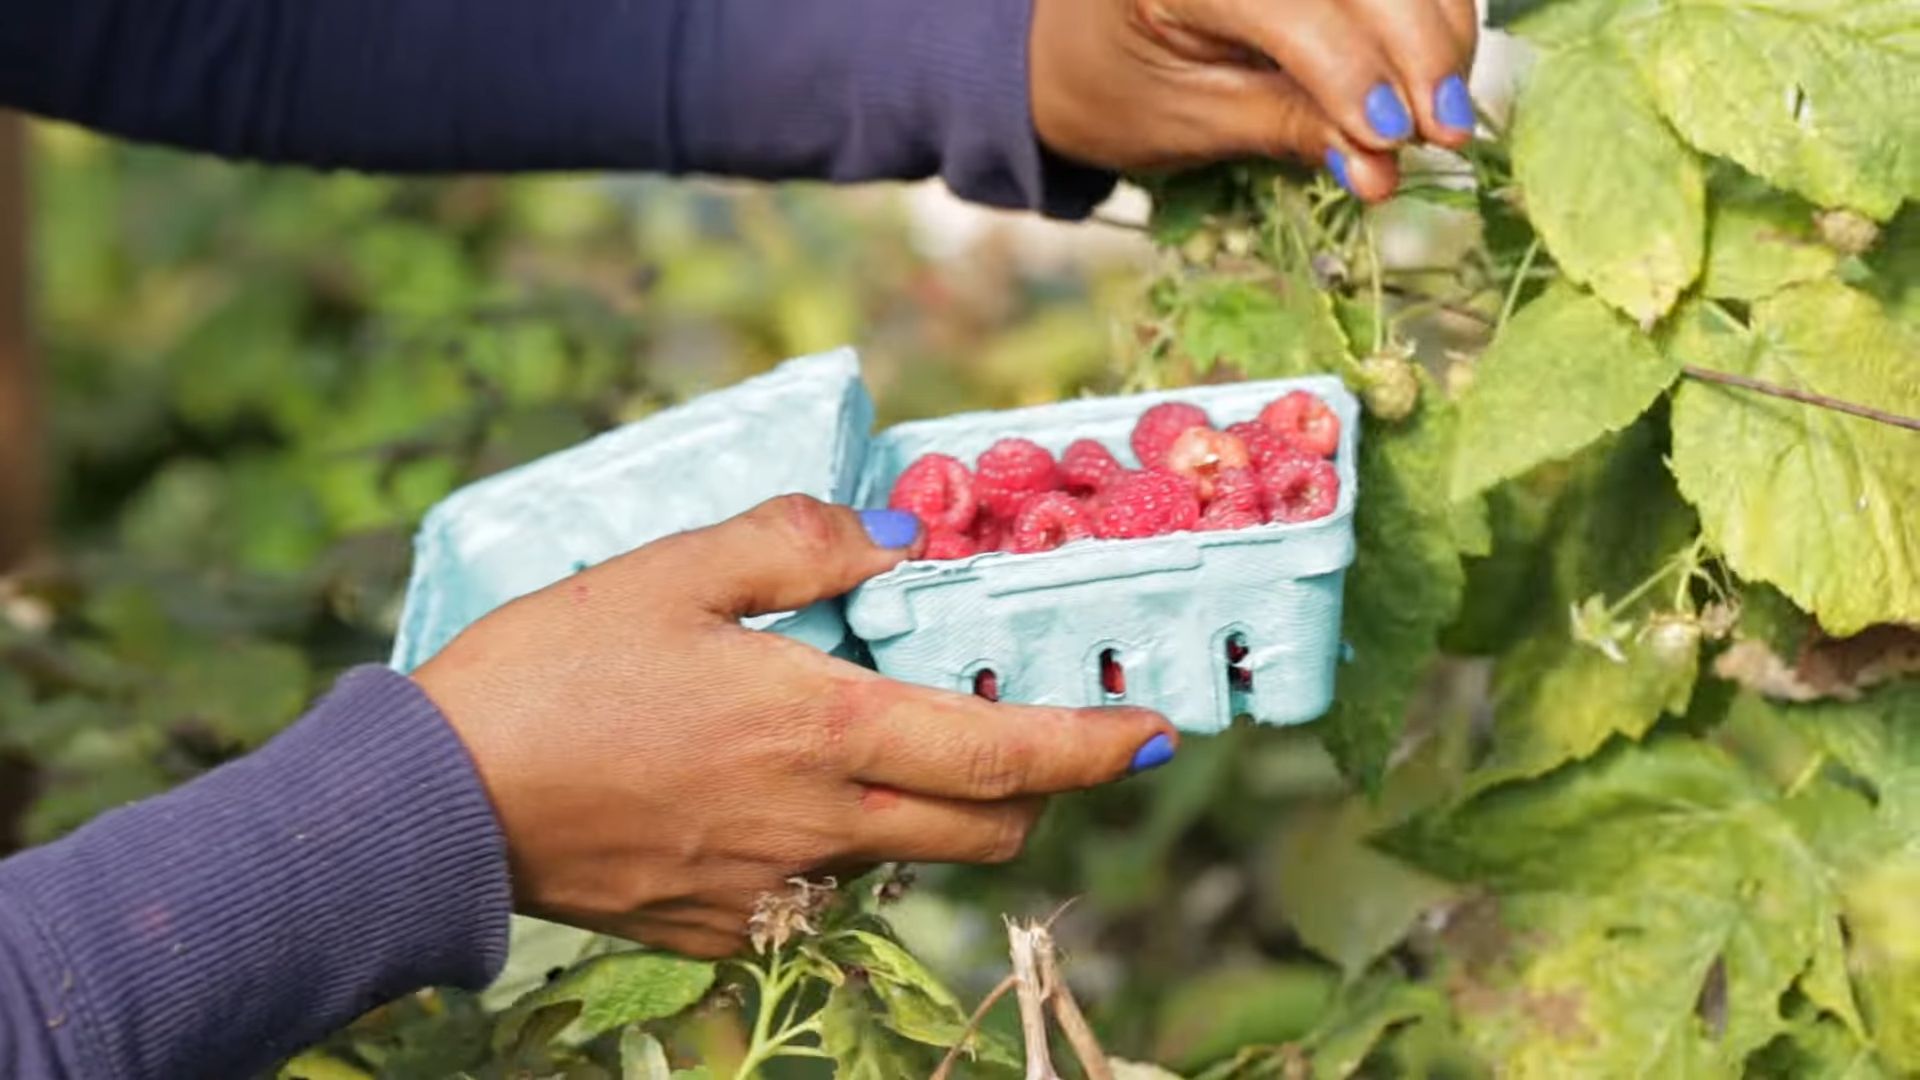
Harvesting Your Raspberries
The moment you’ve been waiting for! Raspberries are usually ready to harvest when they are plump, juicy, and easily pull away from the stem.
1. Check for ripeness:
Conclusion
So, there you have it! Growing raspberries at home isn’t just a gardening project; it’s an investment in fresh, flavorful fruit, a boost to your well-being, and a rewarding connection to nature. We’ve walked you through the essential steps, from selecting the right variety to nurturing your plants for a bountiful harvest. The beauty of this DIY approach is the control you have over the entire process. You know exactly what’s going into your raspberries – no pesticides, no hidden chemicals, just pure, unadulterated goodness.
Why is this a must-try? Because store-bought raspberries simply can’t compare to the taste of freshly picked, sun-ripened berries from your own garden. The flavor is more intense, the texture is more delicate, and the satisfaction of harvesting your own fruit is unparalleled. Plus, you’ll be saving money in the long run, as a single raspberry plant can produce fruit for many years to come.
But the benefits extend beyond just taste and cost savings. Gardening is a fantastic stress reliever, a great way to get some exercise, and a wonderful opportunity to connect with nature. And when you’re growing your own food, you’re also reducing your carbon footprint and supporting sustainable practices.
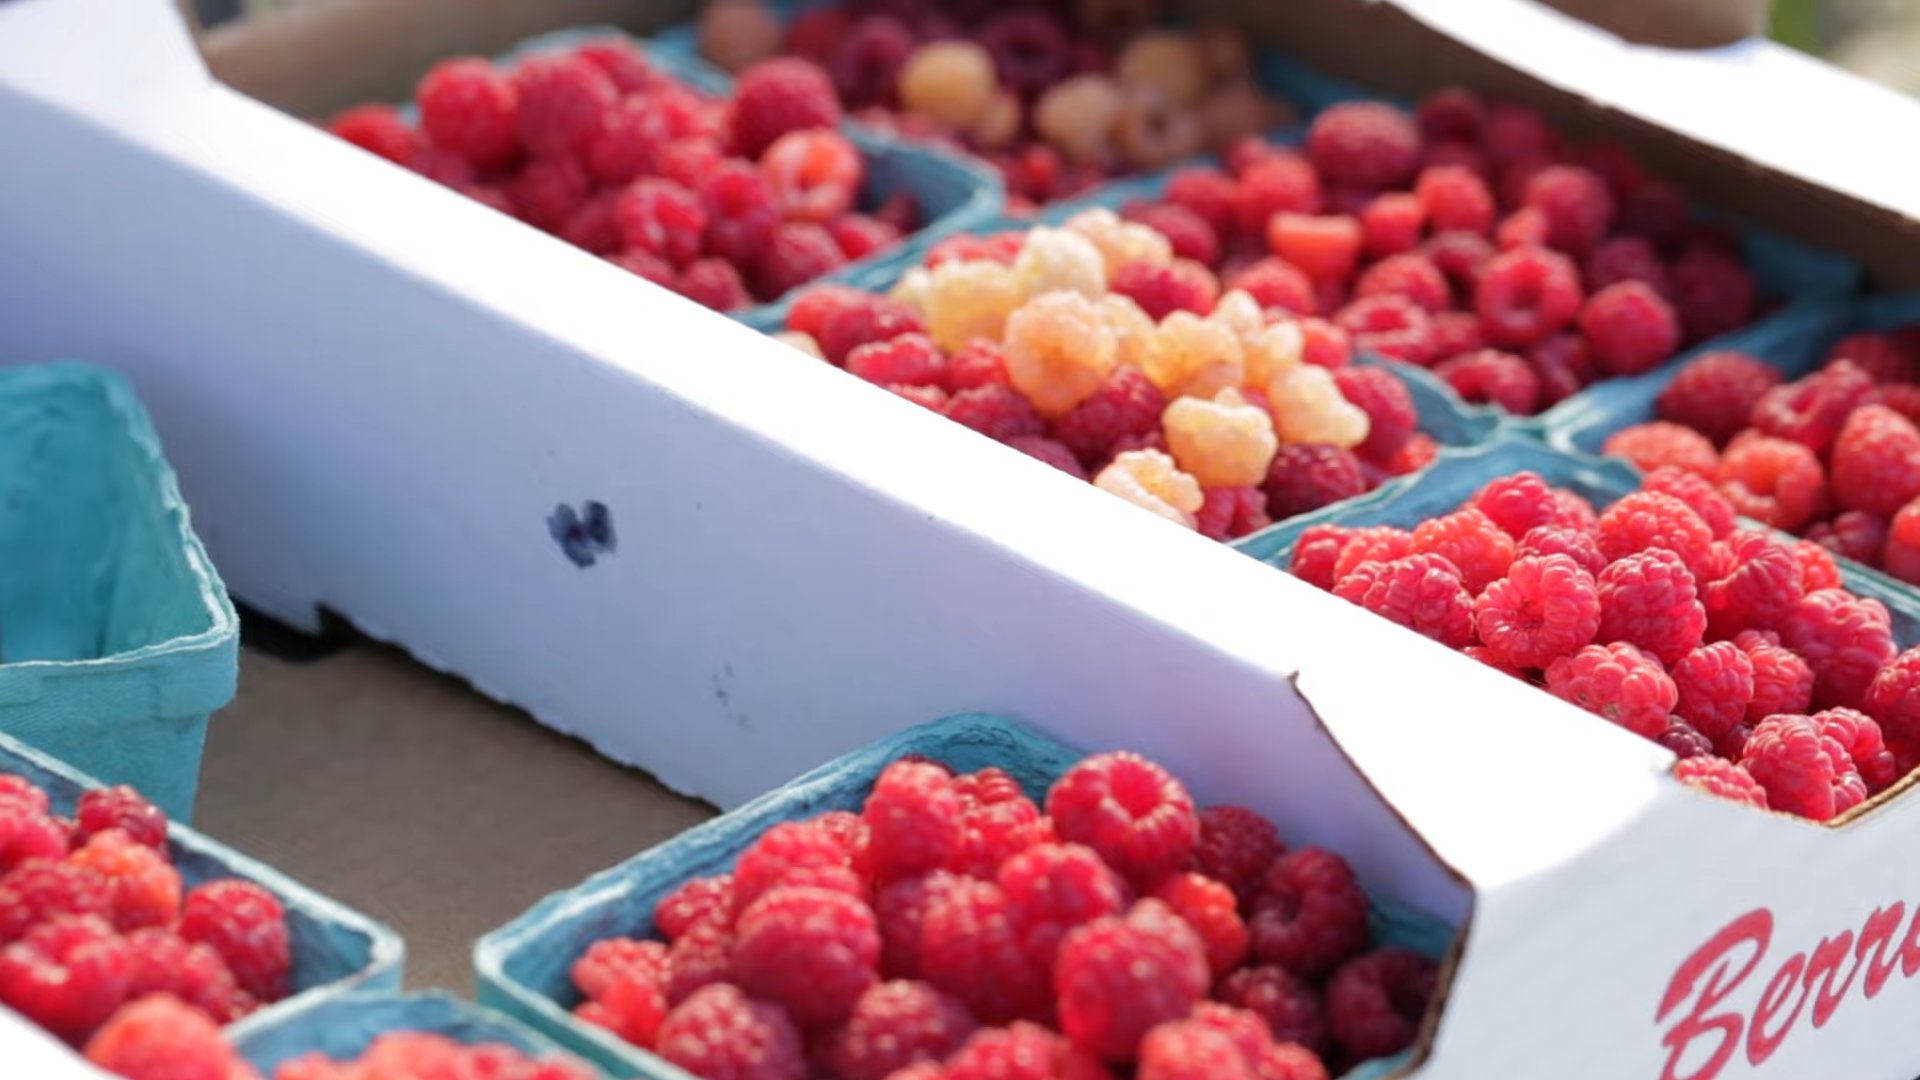
Looking for variations? Consider exploring different raspberry varieties to find your favorites. Yellow raspberries offer a unique sweetness, while black raspberries boast a more intense, earthy flavor. You can also experiment with different growing methods, such as container gardening or raised beds, to suit your space and preferences. If you have limited space, consider dwarf raspberry varieties that are specifically bred for smaller gardens or even balconies. Another fun variation is to create a raspberry trellis or support system. This not only looks beautiful but also helps to keep the berries off the ground and improve air circulation, reducing the risk of disease.
Don’t be intimidated if you’re a beginner gardener. Growing raspberries at home is easier than you might think, and the rewards are well worth the effort. With a little planning, patience, and care, you can enjoy a delicious harvest of fresh raspberries year after year.
We encourage you to give this DIY trick a try. Start small, learn as you go, and don’t be afraid to experiment. And most importantly, share your experience with us! We’d love to hear about your successes, your challenges, and your favorite raspberry recipes. Post pictures of your raspberry plants, share your tips and tricks, and let’s create a community of raspberry-growing enthusiasts. Let us know what variety of raspberries you chose to grow at home and why. Your insights could help other readers embark on their own raspberry-growing journey. Happy gardening!
Frequently Asked Questions (FAQ)
What is the best time of year to plant raspberries?
The best time to plant raspberries depends on your climate and the type of raspberry you’re planting. In general, fall or early spring are the ideal times. Fall planting allows the plants to establish their roots before winter, giving them a head start in the spring. Spring planting should be done as soon as the ground is workable. For bare-root raspberries, early spring is often recommended. Container-grown raspberries can be planted throughout the growing season, as long as you provide them with adequate water and care.
How much sun do raspberries need?
Raspberries need at least 6-8 hours of direct sunlight per day to thrive. More sun is generally better, as it will result in more abundant fruit production. If you live in a hot climate, some afternoon shade may be beneficial to prevent the plants from getting scorched. When choosing a location for your raspberry plants, be sure to select a spot that receives plenty of sunlight throughout the day.
What kind of soil is best for raspberries?
Raspberries prefer well-drained, slightly acidic soil with a pH between 6.0 and 6.8. The soil should be rich in organic matter and have good drainage to prevent root rot. Before planting, amend the soil with compost, well-rotted manure, or other organic materials to improve its fertility and drainage. Avoid planting raspberries in heavy clay soil or areas where water tends to pool.
How often should I water my raspberry plants?
Raspberries need consistent moisture, especially during the growing season. Water deeply and regularly, especially during dry spells. Aim to keep the soil consistently moist but not waterlogged. A good rule of thumb is to water when the top inch of soil feels dry to the touch. Mulching around the plants can help to retain moisture and suppress weeds. During the dormant season, reduce watering frequency.
Do I need to fertilize my raspberry plants?
Yes, raspberries benefit from regular fertilization. Apply a balanced fertilizer in early spring, before new growth begins. You can also use a fertilizer specifically formulated for berries. Avoid over-fertilizing, as this can lead to excessive vegetative growth at the expense of fruit production. Organic fertilizers, such as compost tea or fish emulsion, are also excellent options.
How do I prune my raspberry plants?
Pruning is essential for maintaining healthy and productive raspberry plants. The pruning method depends on the type of raspberry you’re growing (everbearing or summer-bearing). Summer-bearing raspberries produce fruit on the previous year’s canes, so prune out the canes that fruited immediately after harvest. Everbearing raspberries produce fruit on the current year’s canes in the fall, so you can either prune them back to the ground in late winter or prune only the top portion of the canes that fruited. Always remove any dead, damaged, or diseased canes.
What are some common pests and diseases that affect raspberries?
Raspberries can be susceptible to various pests and diseases, including aphids, spider mites, raspberry cane borers, and fungal diseases like powdery mildew and cane blight. Regularly inspect your plants for signs of pests or diseases and take action promptly. Organic pest control methods, such as insecticidal soap or neem oil, can be effective for controlling aphids and spider mites. Proper pruning and good air circulation can help to prevent fungal diseases. Choose disease-resistant raspberry varieties whenever possible.
How long does it take for raspberry plants to produce fruit?
The time it takes for raspberry plants to produce fruit depends on the variety and the planting method. Bare-root raspberries typically take one to two years to produce a significant crop. Container-grown raspberries may produce fruit sooner, sometimes in the first year. Everbearing raspberries may produce a small crop in the fall of the first year, followed by a larger crop in subsequent years.
Can I grow raspberries in containers?
Yes, you can successfully grow raspberries in containers, especially if you have limited space. Choose a large container (at least 15-20 gallons) with good drainage. Use a high-quality potting mix and provide regular watering and fertilization. Dwarf raspberry varieties are particularly well-suited for container gardening. Be sure to protect container-grown raspberries from extreme temperatures during the winter.
How do I harvest raspberries?
Raspberries are ready to harvest when they are fully colored, plump, and easily detach from the stem. Gently pull the berries from the plant, being careful not to crush them. Harvest raspberries frequently, as they ripen quickly. Store harvested raspberries in the refrigerator and use them as soon as possible, as they are highly perishable. Enjoy your homegrown raspberries fresh, in jams, pies, or other delicious treats!


Leave a Comment