

Grow spinach at home? Absolutely! Imagine stepping into your backyard and harvesting fresh, vibrant spinach leaves for your salad, smoothie, or favorite dish. No more trips to the grocery store, no more worrying about pesticides – just pure, homegrown goodness. For centuries, spinach has been a staple in diets across the globe, revered not only for its nutritional value but also for its versatility in the kitchen. From ancient Persia, where it’s believed to have originated, to the tables of modern families, spinach has consistently proven its worth.
But let’s be honest, sometimes gardening can feel a little intimidating, right? That’s where these DIY tricks and hacks come in! I’m here to show you that you don’t need a green thumb or a sprawling garden to grow spinach at home successfully. Whether you have a spacious backyard or just a sunny windowsill, I’ll share simple, step-by-step instructions and clever tips to help you cultivate your own thriving spinach patch. Think of it as unlocking a secret level in the gardening game – a level where fresh, delicious spinach is always within reach. So, grab your gardening gloves, and let’s get started!
“`html
Growing Spinach at Home: A Beginner’s Guide
Hey there, fellow gardening enthusiasts! I’m so excited to share my experience growing spinach at home. It’s surprisingly easy, even if you don’t have a huge garden. Fresh, homegrown spinach is so much tastier than the store-bought stuff, and you know exactly what went into growing it. Let’s get started!
Choosing the Right Spinach Variety
First things first, let’s talk about spinach varieties. There are a few different types, and choosing the right one for your climate and growing conditions is key.
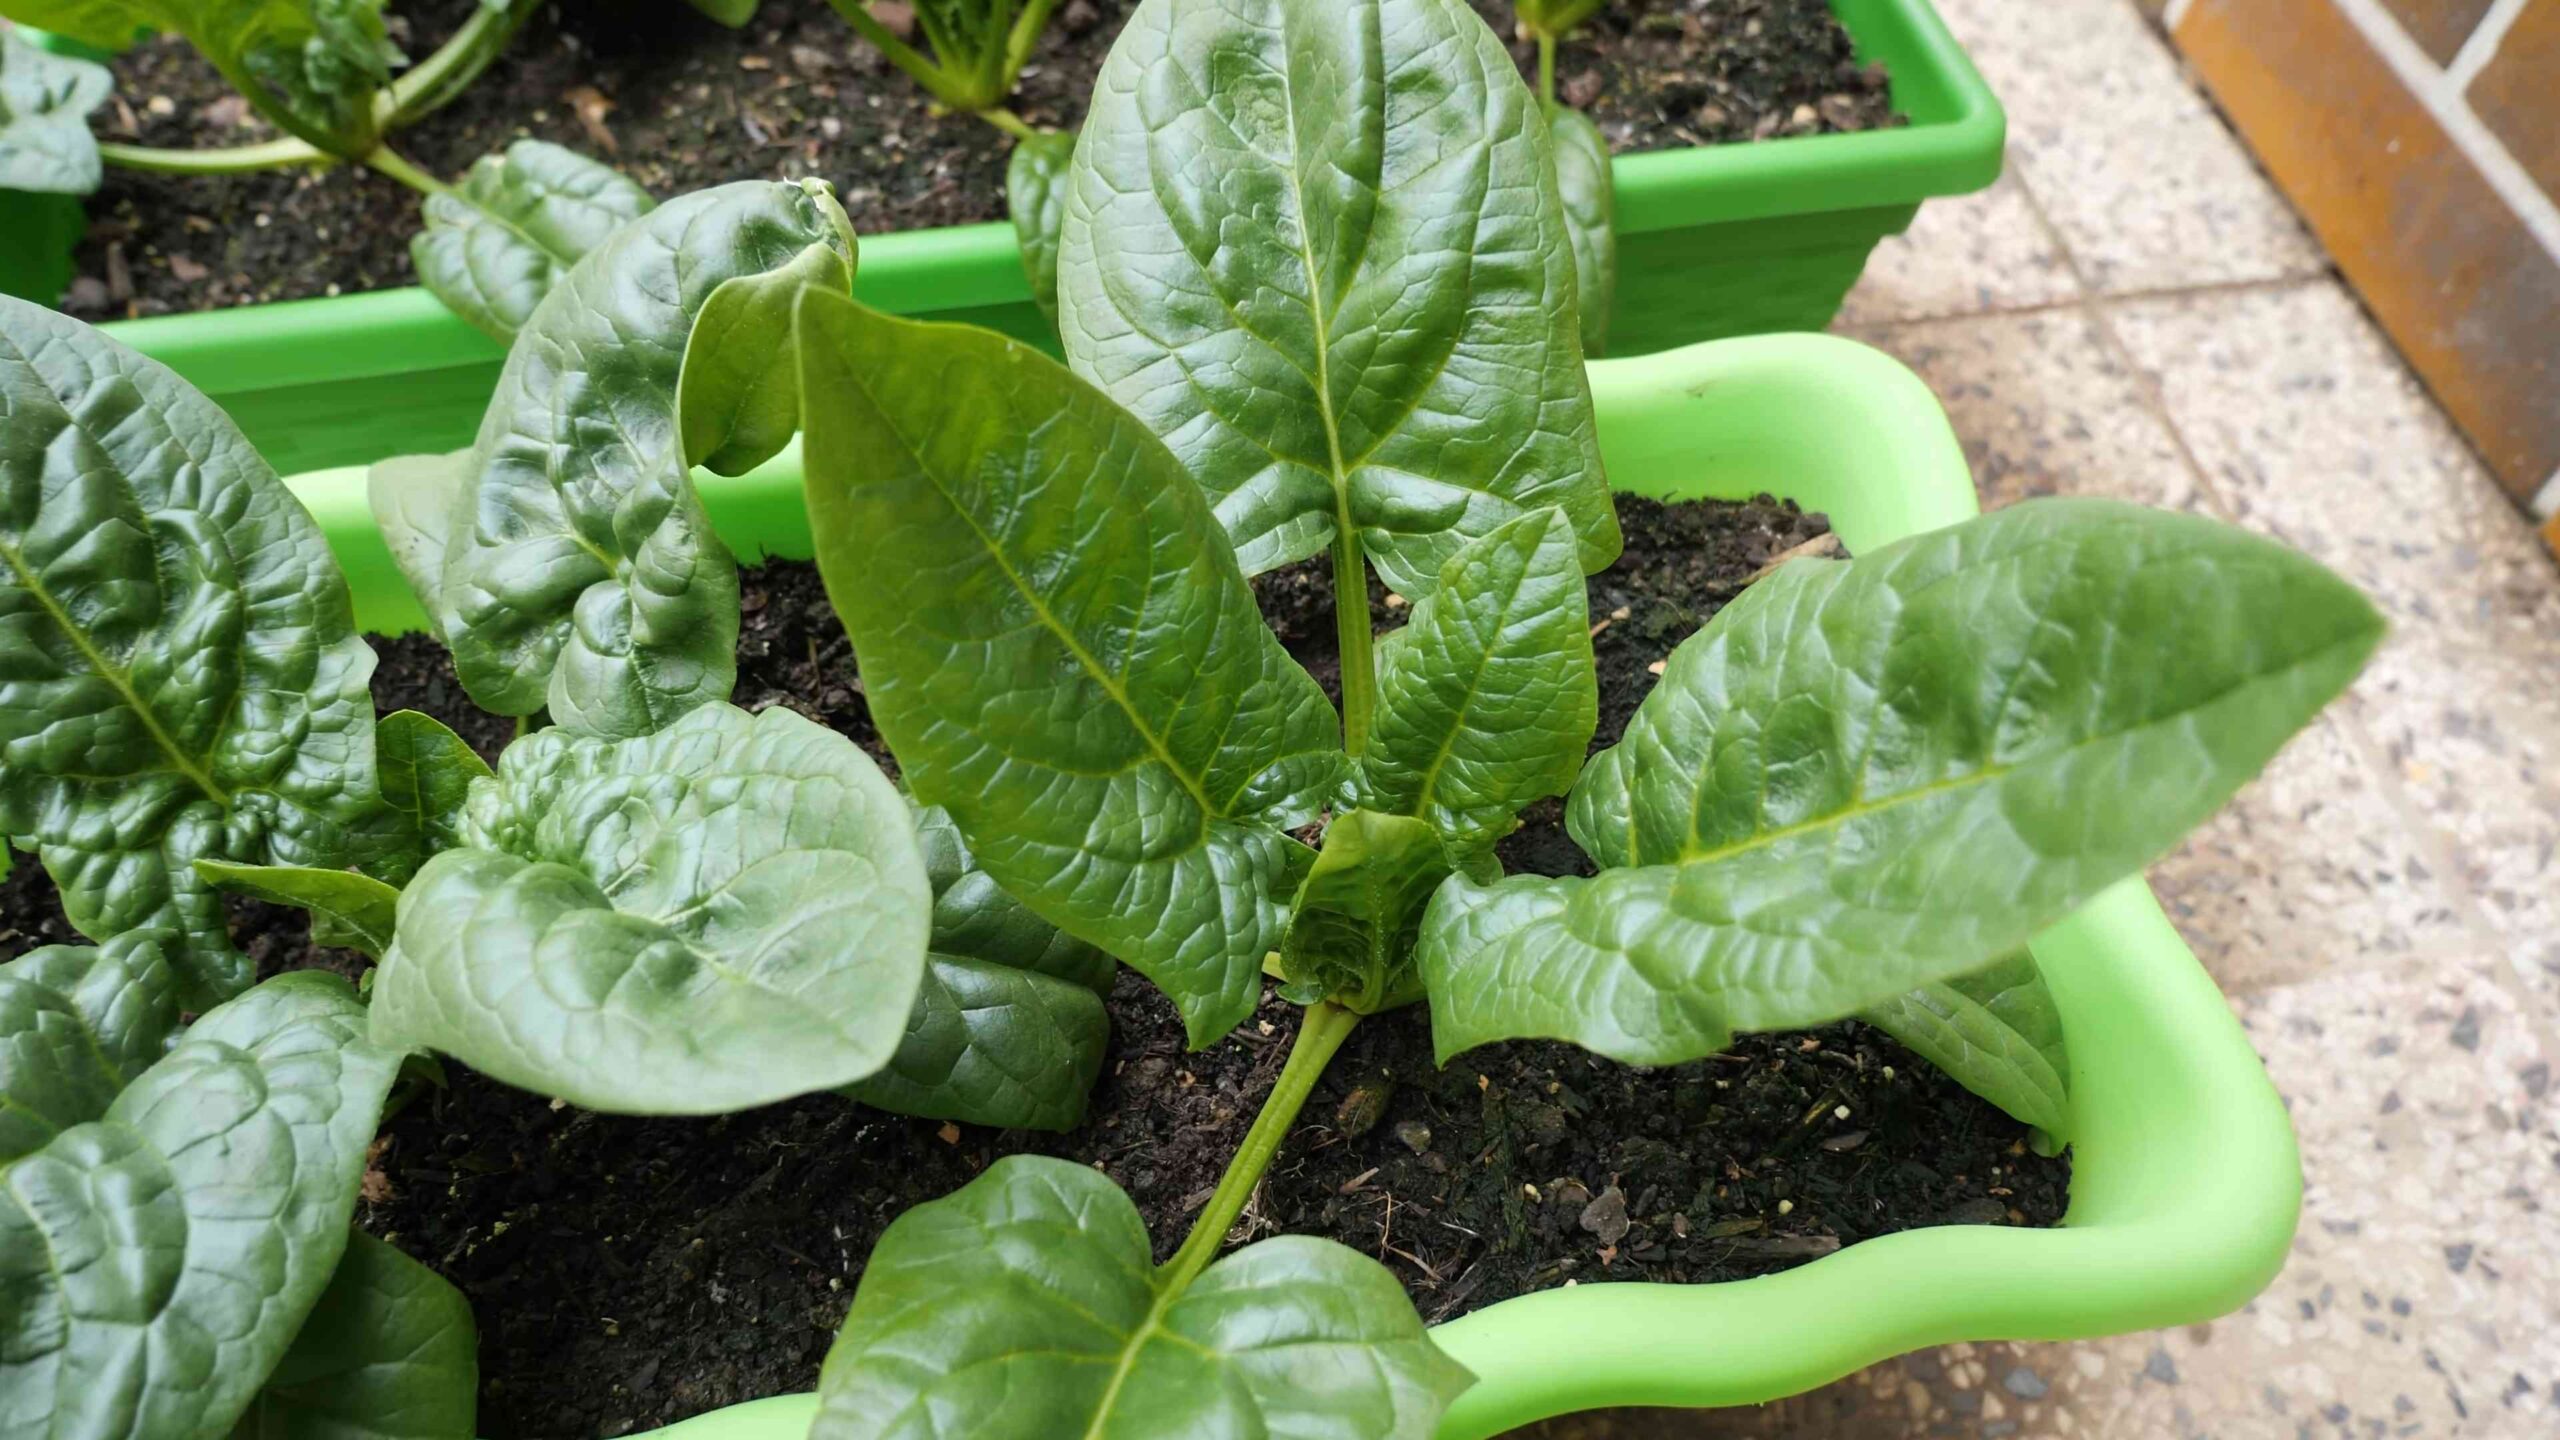
* Savoy Spinach: This type has crinkled, curly leaves. It’s cold-hardy and great for fall and winter crops. Examples include ‘Bloomsdale’ and ‘Melody’. I personally love ‘Bloomsdale’ for its robust flavor.
* Semi-Savoy Spinach: A good middle ground, with slightly crinkled leaves. It’s more bolt-resistant than Savoy spinach, meaning it’s less likely to go to seed quickly in warmer weather. ‘Tyee’ is a popular choice.
* Smooth-Leaf Spinach: As the name suggests, this type has smooth leaves. It’s easier to clean than Savoy spinach and often preferred for processing. ‘Space’ and ‘Giant Nobel’ are good options.
I recommend starting with a semi-savoy variety like ‘Tyee’ if you’re a beginner. It’s pretty forgiving and adapts well to different conditions.
Preparing Your Spinach Bed or Container
Spinach needs well-drained soil that’s rich in organic matter. Here’s how I prepare my spinach beds:
* Sunlight: Spinach needs at least 3-6 hours of sunlight per day. Morning sun is ideal, as it helps to dry the leaves and prevent fungal diseases.
* Soil: Spinach prefers a soil pH between 6.5 and 7.0. You can test your soil with a kit from your local garden center. Amend the soil with compost or well-rotted manure to improve drainage and fertility. I usually add a generous layer of compost – about 2-3 inches – and mix it in well.
* Drainage: Make sure your soil drains well. Spinach doesn’t like to sit in soggy soil. If you have heavy clay soil, consider adding sand or perlite to improve drainage.
* Container Gardening: If you’re growing spinach in containers, choose a pot that’s at least 6-8 inches deep. Use a good quality potting mix that drains well. I like to add a little compost to my potting mix for extra nutrients.
Planting Spinach Seeds
Now for the fun part – planting the seeds!
1. Timing: Spinach is a cool-season crop, so the best time to plant it is in early spring or early fall. In the spring, plant as soon as the soil can be worked. In the fall, plant about 4-6 weeks before the first expected frost. I usually aim for late August or early September for a fall crop.
2. Sowing Seeds: Sow the seeds about ½ inch deep and 1 inch apart. You can sow them in rows or broadcast them over the soil surface. If you’re sowing in rows, space the rows about 12 inches apart.
3. Watering: Gently water the soil after planting. Keep the soil consistently moist until the seeds germinate. I use a watering can with a gentle rose head to avoid disturbing the seeds.
4. Germination: Spinach seeds typically germinate in 5-10 days, depending on the soil temperature.
5. Thinning: Once the seedlings emerge, thin them to about 3-6 inches apart. This will give them enough room to grow and prevent overcrowding. Don’t throw away the thinnings! You can eat them as baby spinach.
Caring for Your Spinach Plants
Once your spinach plants are established, here’s how to keep them happy and healthy:
* Watering: Water regularly, especially during dry periods. Spinach needs consistent moisture to thrive. Aim for about 1 inch of water per week. I check the soil moisture regularly and water when the top inch feels dry.
* Fertilizing: Spinach is a heavy feeder, so it benefits from regular fertilization. I like to use a liquid fertilizer diluted to half strength every 2-3 weeks. You can also side-dress with compost or well-rotted manure.
* Weeding: Keep the area around your spinach plants free of weeds. Weeds compete with spinach for nutrients and water. I hand-pull weeds regularly to keep them under control.
* Pest Control: Spinach is susceptible to a few pests, including aphids, leaf miners, and flea beetles. I inspect my plants regularly for signs of pests. If I find any, I try to control them with organic methods, such as insecticidal soap or neem oil.
* Bolting Prevention: Bolting is when spinach plants send up a flower stalk and go to seed. This makes the leaves bitter and unpalatable. To prevent bolting, keep the soil cool and moist, and harvest your spinach regularly. Shade cloth can also help to keep the plants cool during hot weather.
Harvesting Your Spinach
Harvesting is the most rewarding part!
1. When to Harvest: You can start harvesting spinach leaves when they are about 4-6 inches long. I usually harvest the outer leaves first, leaving the inner leaves to continue growing.
2. How to Harvest: Use a sharp knife or scissors to cut the leaves off at the base of the plant. Be careful not to damage the crown of the plant.
3. Succession Planting: To ensure a continuous harvest, plant spinach seeds every 2-3 weeks. This is called succession planting. I usually plant a new batch of spinach seeds as I’m harvesting the previous batch.
4. Storage: Freshly harvested spinach is best eaten right away. However, you can store it in the refrigerator for up to a week. Wash the spinach thoroughly and dry it before storing it in a plastic bag or container.
Troubleshooting Common Spinach Problems
Even with the best care, you might encounter a few problems when growing spinach. Here are some common issues and how to deal with them:
* Yellowing Leaves: This can be caused by a nutrient deficiency, overwatering, or underwatering. Check the soil moisture and fertilize if necessary.
* Holes in Leaves: This is often caused by pests, such as flea beetles or slugs. Inspect your plants for pests and take appropriate action.
* Bolting: As mentioned earlier, bolting is when spinach plants send up a flower stalk. To prevent bolting, keep the soil cool and moist, and harvest your spinach regularly.
* Downy Mildew: This is a fungal disease that can cause yellow spots on the leaves. To prevent downy mildew, provide good air circulation and avoid overhead watering. If you see signs of downy mildew, remove the affected leaves and spray the plants with a fungicide.
Enjoying Your Homegrown Spinach
Now that you’ve harvested your delicious homegrown spinach, it’s time to enjoy it! Here are a few of my favorite ways to use fresh spinach:
* Salads: Spinach is a great addition to salads. I love to combine it with other greens, such as lettuce and arugula, and add some tomatoes, cucumbers, and a vinaigrette dressing.
* Smoothies: Spinach is a great way to add nutrients to your smoothies. It has a mild flavor that blends well with other fruits and vegetables.
* Sautéed Spinach: Sautéed spinach is a quick and easy side dish. I like to sauté it with garlic and olive oil.
* Spinach Dip: Spinach dip is a classic appetizer that’s always a hit.
* Spinach Pie: Spinach pie is a delicious and hearty meal.
Growing spinach at home is a rewarding experience that anyone can enjoy. With a little bit of planning and care, you can have a continuous supply of fresh, delicious spinach right in your own backyard. Happy gardening!
“`

Conclusion
So, there you have it! Growing your own spinach at home is not only achievable, but it’s also incredibly rewarding. From the vibrant, fresh taste that surpasses anything you can buy in a store, to the sheer satisfaction of nurturing something from seed to table, this DIY project is a game-changer for any home cook or gardening enthusiast. Forget those pre-packaged bags of spinach that wilt before you even get them home. With a little effort, you can have a constant supply of crisp, nutritious spinach right at your fingertips.
Why is this a must-try? Because it’s about more than just spinach. It’s about connecting with your food, understanding where it comes from, and enjoying the unparalleled flavor of homegrown produce. It’s about reducing your carbon footprint by cutting down on transportation and packaging. And it’s about having access to the freshest, most nutrient-rich spinach possible, free from harmful pesticides and chemicals.
But the best part? It’s adaptable! Feel like experimenting? Try different varieties of spinach, like baby spinach for salads or savoy spinach for cooking. Consider companion planting with other vegetables like radishes or carrots to maximize your garden space and deter pests. You can even grow spinach indoors during the colder months using grow lights, ensuring a year-round supply of this leafy green.
Don’t be intimidated if you’re a beginner gardener. Growing spinach at home is surprisingly easy, and the rewards are well worth the effort. Start small, follow the simple steps outlined, and watch your spinach thrive.
We are confident that once you taste the difference between store-bought and homegrown spinach, you’ll never go back. So, grab your seeds, prepare your soil, and get ready to embark on a delicious and fulfilling gardening adventure.
We encourage you to try this DIY trick and experience the joy of growing your own spinach. And most importantly, we want to hear about your experiences! Share your tips, tricks, and photos in the comments below. Let’s create a community of home gardeners who are passionate about fresh, flavorful spinach. What are you waiting for? Get growing!
Frequently Asked Questions (FAQ)
Q: What is the best time of year to plant spinach?
A: Spinach is a cool-season crop, meaning it thrives in cooler temperatures. The best time to plant spinach is in early spring or early fall. For a spring crop, sow seeds as soon as the ground can be worked, typically 4-6 weeks before the last expected frost. For a fall crop, plant seeds 6-8 weeks before the first expected frost. In warmer climates, you can grow spinach throughout the winter. Avoid planting during the hottest months of summer, as high temperatures can cause spinach to bolt (go to seed), resulting in bitter-tasting leaves.
Q: What kind of soil does spinach need?
A: Spinach prefers well-drained soil that is rich in organic matter. The ideal soil pH is between 6.5 and 7.0. Before planting, amend your soil with compost or well-rotted manure to improve its fertility and drainage. If your soil is heavy clay, consider adding sand or other amendments to improve drainage. A soil test can help you determine the pH and nutrient levels of your soil and guide you in making necessary amendments.
Q: How much sunlight does spinach need?
A: Spinach needs at least 3-6 hours of sunlight per day. While it can tolerate some shade, especially during the hottest part of the day, more sunlight will result in healthier, more productive plants. If you are growing spinach indoors, use grow lights to provide adequate light.
Q: How often should I water spinach?
A: Spinach needs consistent moisture to thrive. Water deeply and regularly, especially during dry periods. Aim to keep the soil consistently moist but not waterlogged. Overwatering can lead to root rot, while underwatering can cause the leaves to wilt and become bitter. A good rule of thumb is to water when the top inch of soil feels dry to the touch. Mulching around your spinach plants can help retain moisture and suppress weeds.
Q: How do I fertilize spinach?
A: Spinach is a heavy feeder, so it benefits from regular fertilization. Before planting, incorporate a slow-release fertilizer into the soil. During the growing season, fertilize every 2-3 weeks with a balanced fertilizer or a fertilizer specifically formulated for leafy greens. Avoid over-fertilizing, as this can lead to excessive leaf growth and reduced flavor. Organic options like compost tea or fish emulsion are also excellent choices.
Q: How do I harvest spinach?
A: You can begin harvesting spinach leaves as soon as they are large enough to eat, typically when they are 4-6 inches long. Harvest the outer leaves first, leaving the inner leaves to continue growing. This cut-and-come-again method allows you to harvest spinach continuously throughout the growing season. Use scissors or a knife to cut the leaves at the base of the plant. Harvest in the morning, when the leaves are crisp and cool.
Q: What are some common pests and diseases that affect spinach?
A: Spinach can be susceptible to several pests and diseases, including aphids, leaf miners, flea beetles, and downy mildew. To prevent pest and disease problems, practice good garden hygiene, such as removing weeds and debris, and providing adequate air circulation. Inspect your plants regularly for signs of pests or diseases and take action promptly. Organic pest control methods, such as insecticidal soap or neem oil, can be effective for controlling aphids and other pests. Downy mildew can be prevented by choosing disease-resistant varieties and avoiding overhead watering.
Q: Can I grow spinach in containers?
A: Yes, spinach grows well in containers. Choose a container that is at least 6-8 inches deep and has drainage holes. Use a high-quality potting mix and follow the same planting and care instructions as for growing spinach in the ground. Container-grown spinach may need more frequent watering and fertilization than spinach grown in the ground.
Q: How do I store harvested spinach?
A: To store harvested spinach, wash it thoroughly and remove any damaged or yellowing leaves. Dry the spinach leaves using a salad spinner or by patting them dry with a clean towel. Store the spinach in a plastic bag or container in the refrigerator. Spinach is best used within a few days of harvesting.
Q: My spinach is bolting (going to seed). What should I do?
A: Bolting is a common problem with spinach, especially during hot weather. Once spinach bolts, the leaves become bitter and unpalatable. To prevent bolting, choose bolt-resistant varieties and plant spinach during the cooler months. If your spinach does bolt, you can still harvest the leaves for a short time, but they will likely be bitter. You can also allow the plants to go to seed and collect the seeds for planting next season.
Q: What are some ways to use homegrown spinach?
A: Homegrown spinach can be used in a variety of dishes. Enjoy it fresh in salads, smoothies, or sandwiches. Cook it in soups, stews, or stir-fries. Sauté it with garlic and olive oil for a simple and delicious side dish. Add it to omelets, quiches, or pasta dishes. The possibilities are endless!
Q: Is homegrown spinach more nutritious than store-bought spinach?
A: Yes, homegrown spinach is generally more nutritious than store-bought spinach. This is because homegrown spinach is harvested at its peak ripeness and consumed shortly after harvesting, preserving its nutrients. Store-bought spinach, on the other hand, may be harvested before it is fully ripe and may spend several days in transit and storage, resulting in nutrient loss.


Leave a Comment