

Grow Tomatoes at Home, and unlock a world of fresh, juicy flavor right outside your door! Imagine biting into a sun-ripened tomato, bursting with sweetness, knowing you nurtured it from seed to table. Forget those bland, store-bought imposters – this year, we’re taking control of our tomato destiny with some simple, yet effective, DIY tricks.
For centuries, tomatoes have been a symbol of abundance and vitality. Originating in South America, they made their way across the globe, becoming a staple in countless cuisines. From the vibrant sauces of Italy to the refreshing salads of the Mediterranean, the tomato’s versatility is undeniable. But the true magic happens when you grow tomatoes at home.
Why should you bother with a DIY approach? Because let’s face it, life is busy! We all crave fresh, healthy food, but often lack the time or space for elaborate gardening. That’s where these clever hacks come in. I’m going to share easy-to-implement strategies that will help you maximize your yield, combat common tomato problems, and enjoy a bountiful harvest, even if you only have a small balcony or patio. Get ready to transform your space into a tomato-growing paradise!
Growing Tomatoes at Home: A Comprehensive DIY Guide
Hey there, fellow gardening enthusiasts! I’m so excited to share my tried-and-true method for growing delicious, juicy tomatoes right in your own backyard (or even on your balcony!). Forget those bland, store-bought tomatoes – nothing beats the taste of homegrown goodness. This guide will walk you through every step, from choosing the right variety to harvesting your bountiful crop. Let’s get started!
Choosing the Right Tomato Variety
Before we even think about planting, we need to decide what kind of tomatoes we want to grow. There are literally hundreds of varieties, each with its own unique flavor, size, and growing requirements. Here’s a breakdown to help you choose:
* **Determinate vs. Indeterminate:** This is the most important distinction.
* **Determinate tomatoes** grow to a certain size and then stop, producing all their fruit at once. They’re great for canning or making sauce because you’ll have a large harvest all at the same time. Think Roma or Celebrity varieties. They are also more compact, making them suitable for smaller spaces.
* **Indeterminate tomatoes** keep growing and producing fruit throughout the season. They need staking or caging to support their growth. These are your slicing tomatoes like Beefsteak, Early Girl, or cherry tomatoes like Sungold.
* **Tomato Size:**
* **Cherry tomatoes:** Small, sweet, and perfect for snacking.
* **Grape tomatoes:** Similar to cherry tomatoes but more oblong in shape.
* **Plum tomatoes:** Oval-shaped, meaty, and ideal for sauces.
* **Slicing tomatoes:** Large, round tomatoes perfect for sandwiches and salads.
* **Beefsteak tomatoes:** The giants of the tomato world, known for their meaty texture and rich flavor.
* **Disease Resistance:** Look for varieties that are resistant to common tomato diseases like Fusarium wilt (F), Verticillium wilt (V), and Tomato Mosaic Virus (TMV). This will save you a lot of headaches down the road.
* **Days to Maturity:** This tells you how long it will take for the tomato to ripen after transplanting. Choose varieties that are suitable for your climate and growing season.
My personal favorites are Sungold cherry tomatoes (so sweet!) and Early Girl for reliable slicing tomatoes.
Starting Seeds Indoors (Optional but Recommended)
Starting your tomato seeds indoors gives you a head start on the growing season, especially if you live in a cooler climate. I highly recommend this method!
1. **Gather Your Supplies:**
* Tomato seeds (of course!)
* Seed starting trays or small pots
* Seed starting mix (this is different from regular potting soil – it’s lighter and better for germination)
* A spray bottle
* A heat mat (optional, but it speeds up germination)
* A grow light (also optional, but it prevents leggy seedlings)
2. **Sow the Seeds:**
* Moisten the seed starting mix with the spray bottle. It should be damp but not soggy.
* Fill the seed starting trays or pots with the moistened mix.
* Make a small indentation (about ¼ inch deep) in the center of each cell or pot.
* Place 2-3 seeds in each indentation. This increases your chances of at least one seed germinating.
* Gently cover the seeds with more seed starting mix.
* Lightly mist the surface with the spray bottle.
3. **Provide Warmth and Light:**
* Place the seed starting trays or pots on a heat mat (if using).
* Cover the trays or pots with a clear plastic dome or plastic wrap to create a humid environment.
* Place the trays or pots under a grow light (if using) or in a sunny window.
4. **Monitor and Water:**
* Check the soil moisture daily. Keep it consistently moist but not waterlogged. Mist with the spray bottle as needed.
* Once the seeds germinate (usually within 5-10 days), remove the plastic dome or plastic wrap.
* If using a grow light, keep it a few inches above the seedlings.
5. **Thin the Seedlings:**
* Once the seedlings have their first true leaves (the second set of leaves that appear after the initial seed leaves), thin them to one seedling per cell or pot. Choose the strongest, healthiest-looking seedling and snip off the others at the soil line with scissors. Don’t pull them out, as this can disturb the roots of the remaining seedling.
6. **Harden Off the Seedlings:**
* About a week before you plan to transplant the seedlings outdoors, you need to “harden them off.” This means gradually exposing them to outdoor conditions so they can adjust to the sun, wind, and temperature changes.
* Start by placing the seedlings outdoors in a sheltered location for an hour or two each day.
* Gradually increase the amount of time they spend outdoors each day, and also gradually expose them to more direct sunlight.
* By the end of the week, they should be able to tolerate a full day of outdoor conditions.
Preparing the Garden Bed
Whether you’re growing in the ground or in containers, proper soil preparation is crucial for healthy tomato plants.
1. **Choose a Sunny Location:** Tomatoes need at least 6-8 hours of direct sunlight per day.
2. **Test the Soil:** A soil test will tell you the pH level and nutrient content of your soil. Tomatoes prefer a slightly acidic soil with a pH of 6.0-6.8. You can purchase a soil testing kit at most garden centers.
3. **Amend the Soil:**
* If your soil is heavy clay or sandy, amend it with compost or other organic matter to improve drainage and fertility.
* If your soil is acidic, add lime to raise the pH.
* If your soil is alkaline, add sulfur to lower the pH.
* Incorporate a slow-release fertilizer into the soil to provide essential nutrients. I like to use a fertilizer specifically formulated for tomatoes.
4. **Prepare the Planting Holes:** Dig holes that are large enough to accommodate the root balls of your tomato seedlings. Space the holes about 2-3 feet apart for indeterminate varieties and 1-2 feet apart for determinate varieties.
Transplanting the Tomato Seedlings
Now for the exciting part – getting those little seedlings into the ground!
1. **Choose the Right Time:** Transplant your tomato seedlings outdoors after the last frost. Make sure the soil has warmed up to at least 60°F (15°C).
2. **Water the Seedlings:** Water the seedlings thoroughly before transplanting them. This will help them to handle the transplant shock.
3. **Remove the Seedlings from Their Containers:** Gently squeeze the sides of the seed starting trays or pots to loosen the root balls. Carefully remove the seedlings, being careful not to damage the roots.
4. **Plant the Seedlings Deep:** This is a trick I learned years ago, and it makes a huge difference! Tomatoes can grow roots along their stems, so planting them deep will encourage a stronger root system. Remove the bottom leaves from the seedling and plant it so that the lowest remaining leaves are just above the soil line.
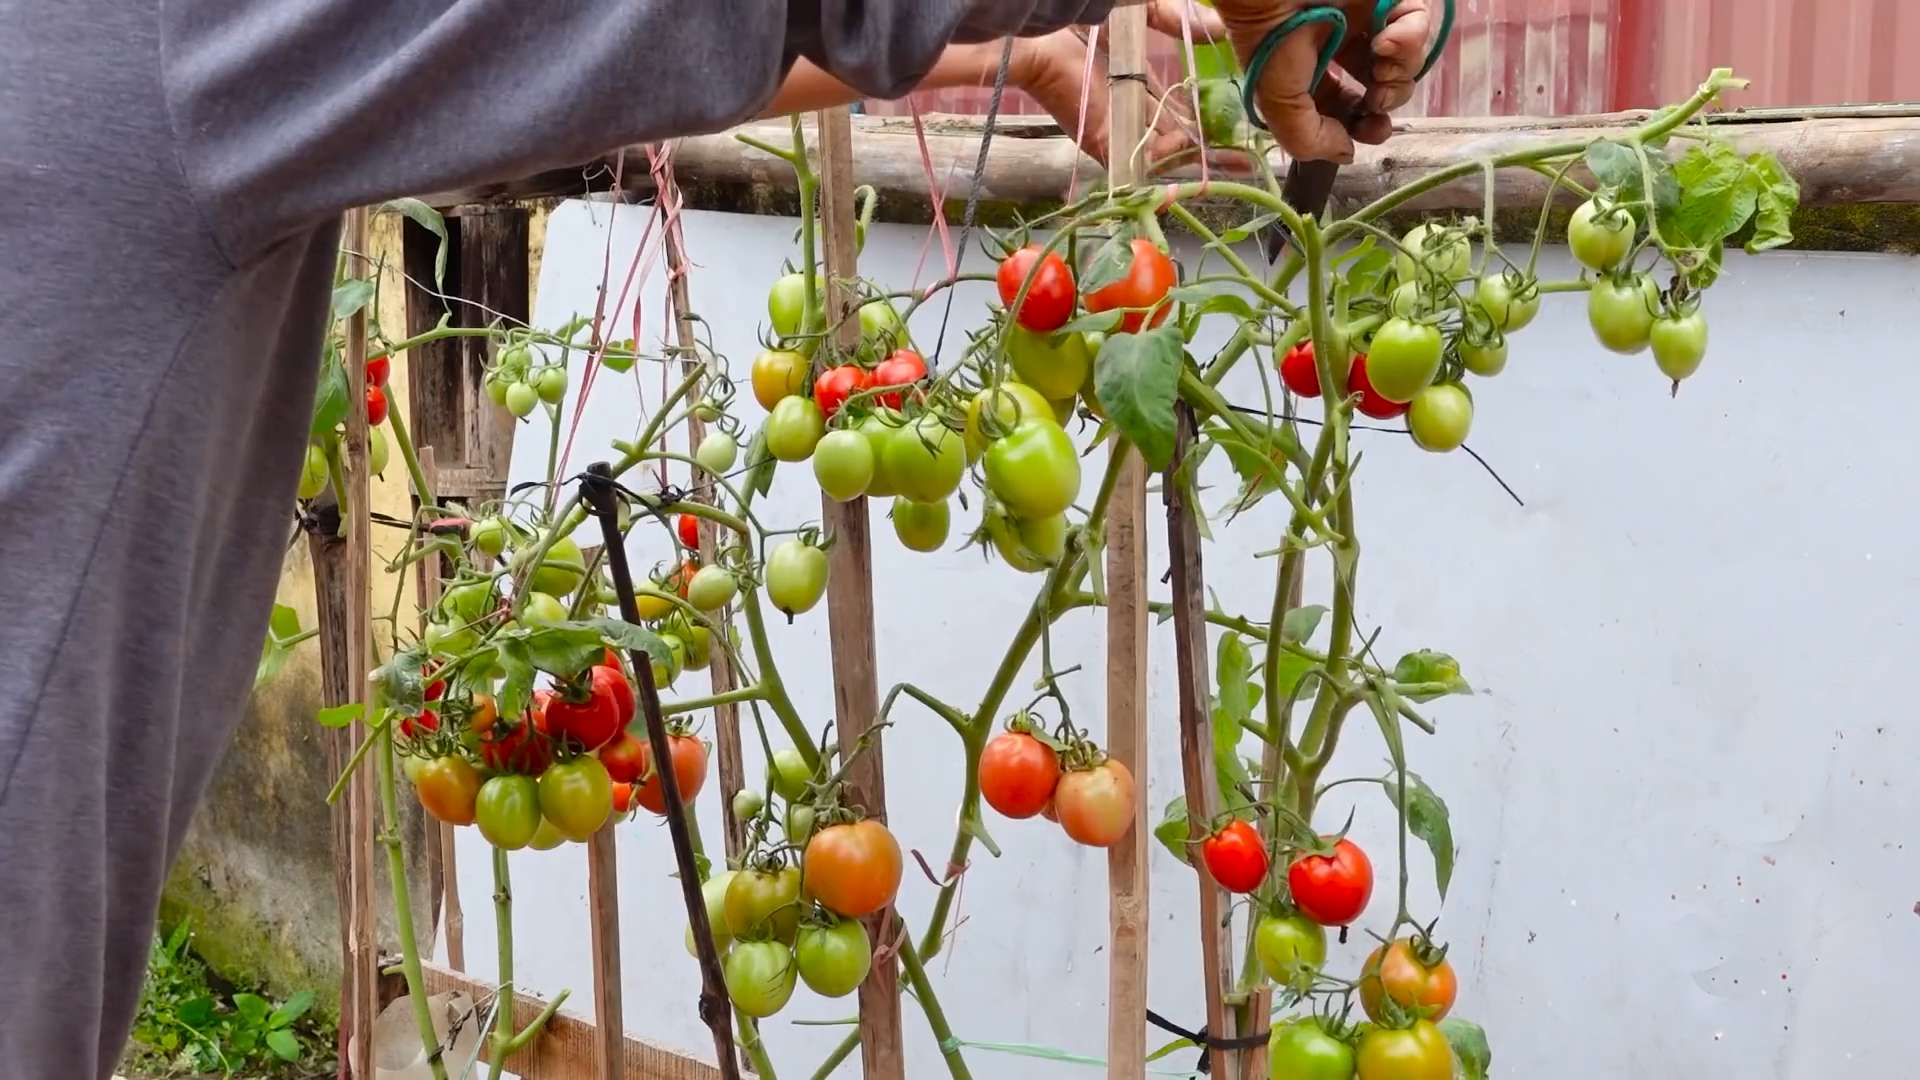
5. **Add Support:** Install stakes or cages at the time of planting, especially for indeterminate varieties. This will prevent the plants from sprawling on the ground and will make it easier to harvest the tomatoes.
6. **Water Thoroughly:** Water the newly transplanted seedlings thoroughly to help them settle in.
7. **Mulch:** Apply a layer of mulch around the base of the plants to help retain moisture, suppress weeds, and regulate soil temperature. I like to use straw or shredded leaves.
Caring for Your Tomato Plants
Once your tomato plants are in the ground, it’s important to provide them with the care they need to thrive.
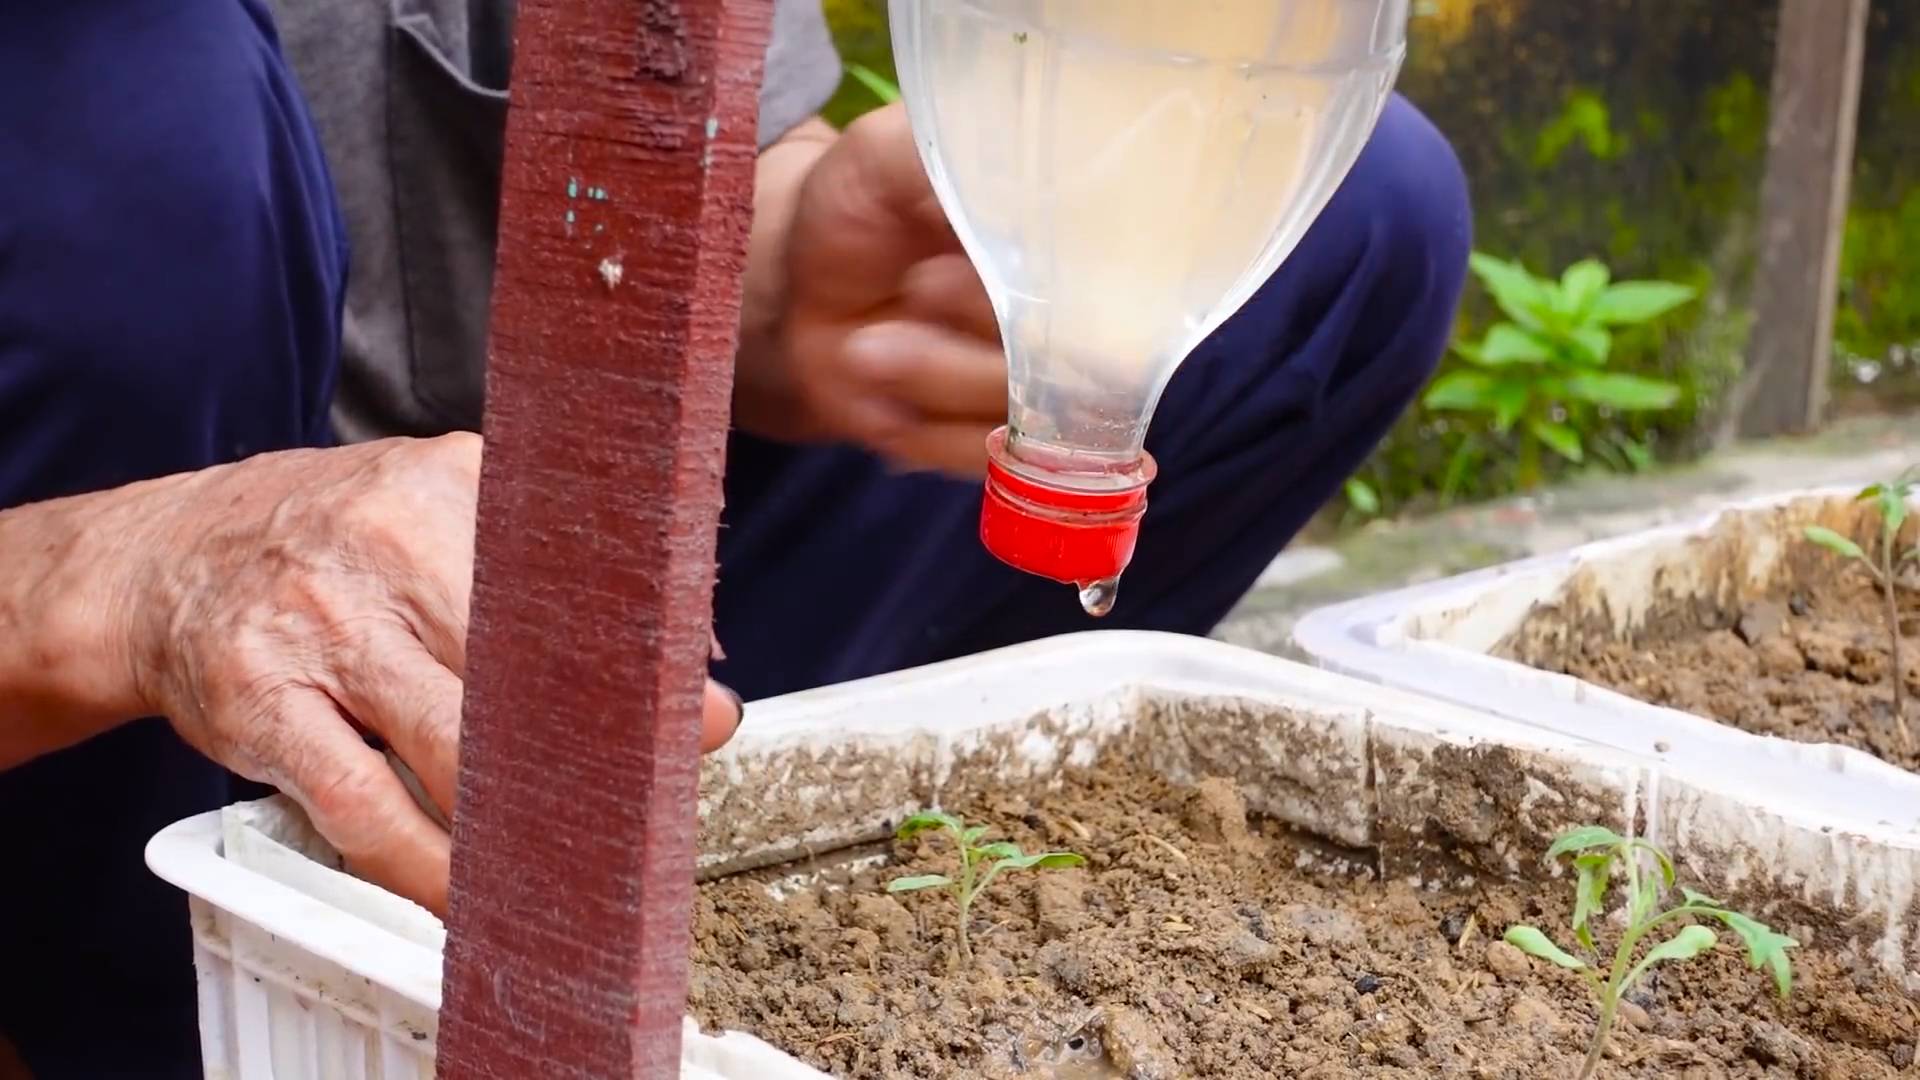
1. **Watering:** Water deeply and regularly, especially during hot, dry weather. Aim to water at the base of the plants to avoid wetting the foliage, which can lead to disease.
2. **Fertilizing:** Fertilize your tomato plants every 2-3 weeks with a balanced fertilizer. Follow the instructions on the fertilizer package.
3. **Pruning:** Pruning is important for indeterminate tomato varieties. Remove the suckers (the small shoots that grow between the main stem and the branches) to encourage the plant to focus its energy on producing fruit.
4. **Pest and Disease Control:** Monitor your tomato plants regularly for pests and diseases. Common tomato pests include aphids, tomato hornworms, and whiteflies. Common tomato diseases include early blight, late blight, and blossom end rot.
* For pests, you can try hand-picking them off the plants or using insecticidal soap or neem oil.
* For diseases, you can try removing infected leaves or using a fungicide.
* Prevention is key! Make sure your plants have good air circulation and avoid overwatering.
5. **Support:** As the tomato plants grow,
Conclusion
So, there you have it! Growing tomatoes at home isn’t just a gardening project; it’s an investment in flavor, freshness, and a deeper connection to your food. We’ve explored a simple yet powerful DIY trick that can significantly boost your tomato yield and overall plant health. From selecting the right variety for your climate to providing consistent watering and support, every step contributes to a bountiful harvest.
But why is this DIY trick a must-try? Because it addresses a fundamental need of tomato plants: strong root development and efficient nutrient uptake. By burying a significant portion of the stem, you’re encouraging the plant to sprout roots along its length, creating a more robust and resilient root system. This translates to a plant that’s better equipped to absorb water and nutrients, leading to healthier growth, increased fruit production, and greater resistance to disease. Think of it as giving your tomato plants a supercharged start!
Beyond the basic technique, there’s plenty of room for experimentation. Consider adding different amendments to the planting hole. Bone meal can provide a slow-release source of phosphorus, which is crucial for root development and flowering. Epsom salts can supply magnesium, which helps with chlorophyll production and overall plant health. You could also try companion planting, surrounding your tomatoes with basil, marigolds, or other beneficial plants that deter pests and attract pollinators.
Another variation involves the type of support you provide. While stakes are a common choice, cages can offer more comprehensive support, especially for larger, indeterminate tomato varieties. You can even get creative and build your own support structures using recycled materials. The possibilities are endless!
Ultimately, the success of growing tomatoes at home depends on your willingness to experiment, observe, and adapt. Don’t be afraid to try different techniques, monitor your plants closely, and adjust your approach as needed. Remember, gardening is a learning process, and every season brings new opportunities to improve your skills.
We wholeheartedly encourage you to try this DIY trick for growing tomatoes at home. It’s a simple, effective, and rewarding way to enhance your gardening experience and enjoy the taste of homegrown tomatoes. And once you’ve reaped the rewards of your labor, we’d love to hear about your experience! Share your photos, tips, and stories in the comments below. Let’s build a community of tomato-growing enthusiasts and learn from each other’s successes and challenges. Happy gardening!
Frequently Asked Questions (FAQs)
1. What exactly is the DIY trick you’re referring to?
The DIY trick involves burying a significant portion of the tomato plant’s stem when transplanting it into the garden or a larger container. This encourages the plant to develop roots along the buried stem, creating a more extensive and robust root system. The deeper root system allows the plant to absorb more water and nutrients, leading to healthier growth and increased fruit production.
2. Why does burying the stem help tomato plants grow better?
Tomato plants have the unique ability to sprout roots from their stems. When you bury a portion of the stem, it comes into contact with the soil, which is moist and conducive to root development. The plant then sends out roots from the buried stem, effectively expanding its root system. A larger root system means the plant can access more water and nutrients from the soil, resulting in stronger growth, more abundant flowering, and a higher yield of tomatoes. It also makes the plant more resilient to drought and other environmental stresses.
3. What kind of tomato plants benefit most from this trick?
All types of tomato plants can benefit from this DIY trick, but it’s particularly helpful for leggy or overgrown seedlings. If your seedlings have become tall and spindly before you have a chance to transplant them, burying the stem can help them develop a stronger root system and become more stable. Indeterminate tomato varieties, which continue to grow and produce fruit throughout the season, also benefit greatly from the increased nutrient uptake provided by the expanded root system. Determinate varieties, which grow to a certain size and then produce all their fruit at once, can still benefit from the stronger root system, but the impact may be less dramatic.
4. How deep should I bury the tomato plant stem?
You can bury up to two-thirds of the tomato plant’s stem. Remove the lower leaves from the stem that will be buried to prevent them from rotting. Dig a hole deep enough to accommodate the root ball and the buried stem. Gently place the plant in the hole, ensuring that the remaining leaves are above the soil line. Backfill the hole with soil, gently firming it around the stem. Water thoroughly after planting.
5. What kind of soil should I use when transplanting tomatoes?
Use a well-draining soil that is rich in organic matter. You can amend your garden soil with compost, aged manure, or other organic materials to improve its fertility and drainage. A slightly acidic soil pH (around 6.0 to 6.8) is ideal for tomatoes. You can test your soil pH with a soil testing kit and amend it accordingly.
6. Can I use this trick when planting tomatoes in containers?
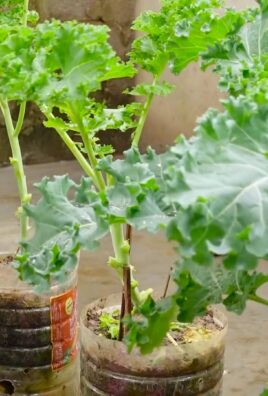
Yes, you can absolutely use this trick when planting tomatoes in containers. Choose a container that is large enough to accommodate the mature size of the tomato plant. A 5-gallon container is generally sufficient for determinate varieties, while indeterminate varieties may require a 10-gallon or larger container. Use a high-quality potting mix that is specifically formulated for containers. Follow the same steps for burying the stem as you would when planting in the ground.
7. What are some common mistakes to avoid when growing tomatoes at home?
Some common mistakes to avoid include:
* **Overwatering or underwatering:** Tomatoes need consistent moisture, but they don’t like to sit in soggy soil. Water deeply and less frequently, allowing the soil to dry out slightly between waterings.
* **Not providing adequate support:** Tomato plants, especially indeterminate varieties, need support to prevent them from falling over and breaking. Use stakes, cages, or other support structures to keep the plants upright.
* **Not pruning suckers:** Suckers are small shoots that grow in the crotch between the main stem and the branches. Removing suckers can improve air circulation and direct the plant’s energy towards fruit production.
* **Not fertilizing properly:** Tomatoes are heavy feeders and need regular fertilization to produce abundant fruit. Use a balanced fertilizer that is specifically formulated for tomatoes.
* **Ignoring pests and diseases:** Monitor your plants regularly for signs of pests or diseases. Take action promptly to prevent problems from spreading.
8. How often should I water my tomato plants?
Water deeply whenever the top inch of soil feels dry to the touch. The frequency of watering will depend on the weather, the type of soil, and the size of the plant. In hot, dry weather, you may need to water daily. In cooler, wetter weather, you may only need to water every few days.
9. What are some signs that my tomato plant is not getting enough nutrients?
Signs of nutrient deficiencies in tomato plants can include:
* **Yellowing leaves:** This can indicate a nitrogen deficiency.
* **Purple leaves:** This can indicate a phosphorus deficiency.
* **Curling leaves:** This can indicate a potassium deficiency.
* **Blossom end rot:** This is caused by a calcium deficiency.
If you suspect a nutrient deficiency, amend the soil with the appropriate fertilizer or soil amendment.
10. How long does it take for tomatoes to ripen after they appear on the plant?
The time it takes for tomatoes to ripen depends on the variety, the weather, and the growing conditions. Generally, it takes about 6 to 8 weeks for tomatoes to ripen after they appear on the plant. Tomatoes will ripen faster in warm, sunny weather. You can also speed up the ripening process by placing tomatoes in a paper bag with a ripe banana or apple.
Leave a Comment