

Growing Bottle Gourd Backyard can be an incredibly rewarding experience, transforming even the smallest outdoor space into a thriving source of fresh produce! Have you ever dreamed of harvesting your own homegrown bottle gourds, ready to be transformed into delicious curries, refreshing juices, or even unique handicrafts? Well, you’re in the right place! This article is packed with simple, yet effective DIY tricks and hacks to help you cultivate a bountiful bottle gourd harvest right in your own backyard.
Bottle gourds, also known as calabash, boast a rich history, dating back thousands of years. Evidence suggests they were among the first cultivated plants, predating even pottery! Across cultures, they’ve served as food, containers, musical instruments, and even medicine. Imagine connecting with this ancient tradition by growing bottle gourd backyard yourself!
But why should you bother with these DIY tricks? Because let’s face it, gardening can sometimes feel overwhelming. Pests, diseases, and unpredictable weather can quickly derail your efforts. That’s where these hacks come in. They’re designed to simplify the process, maximize your yield, and minimize the frustration. I’m here to share my tried-and-true methods for creating the perfect environment for your bottle gourds to flourish, ensuring you enjoy a plentiful harvest season after season. So, grab your gardening gloves, and let’s get started!
Growing Bottle Gourds in Your Backyard: A Comprehensive DIY Guide
Hey there, fellow gardening enthusiasts! I’m so excited to share my experience and guide you through growing your own bottle gourds right in your backyard. It’s a rewarding process, and nothing beats the satisfaction of harvesting your own homegrown produce. Bottle gourds, also known as calabash, are versatile and can be used for cooking, crafting, and even making musical instruments! Let’s dive in!
Choosing the Right Variety and Location
Before we get our hands dirty, let’s talk about selecting the right bottle gourd variety and finding the perfect spot in your backyard.
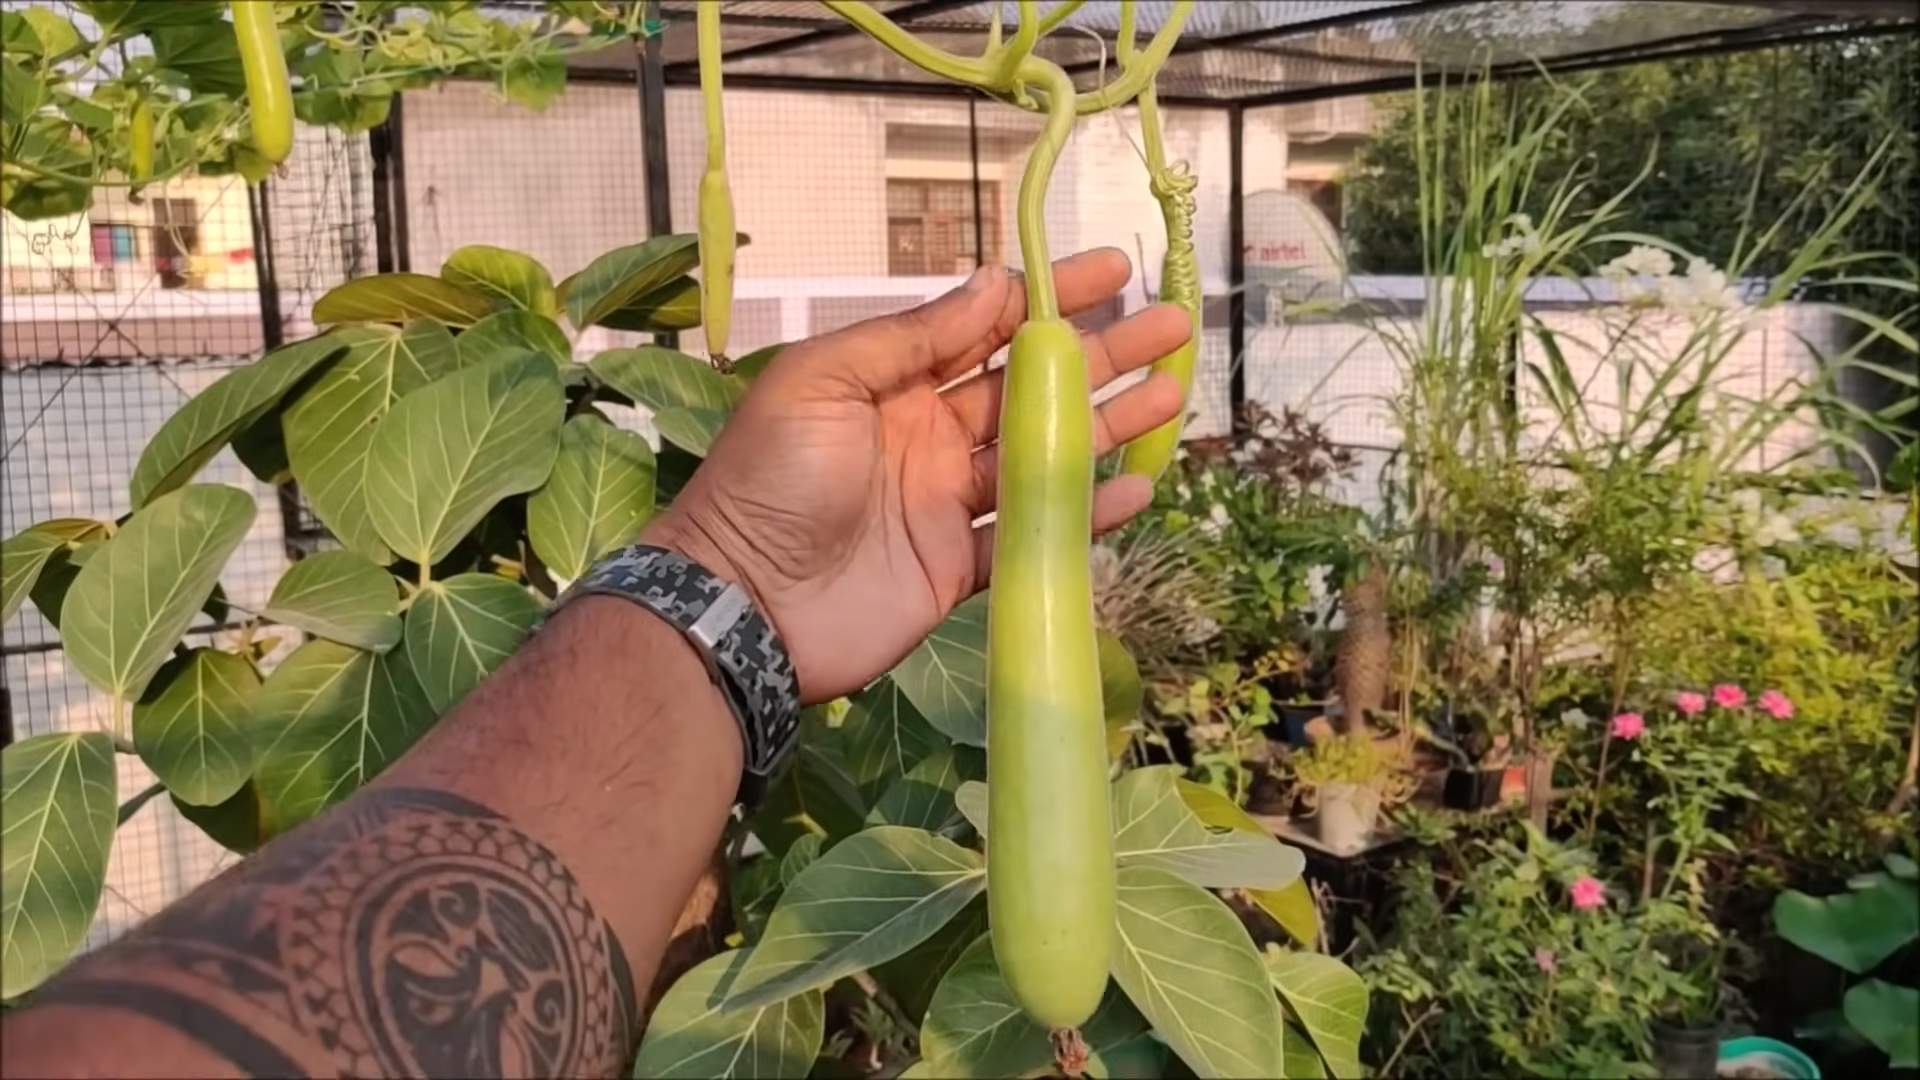
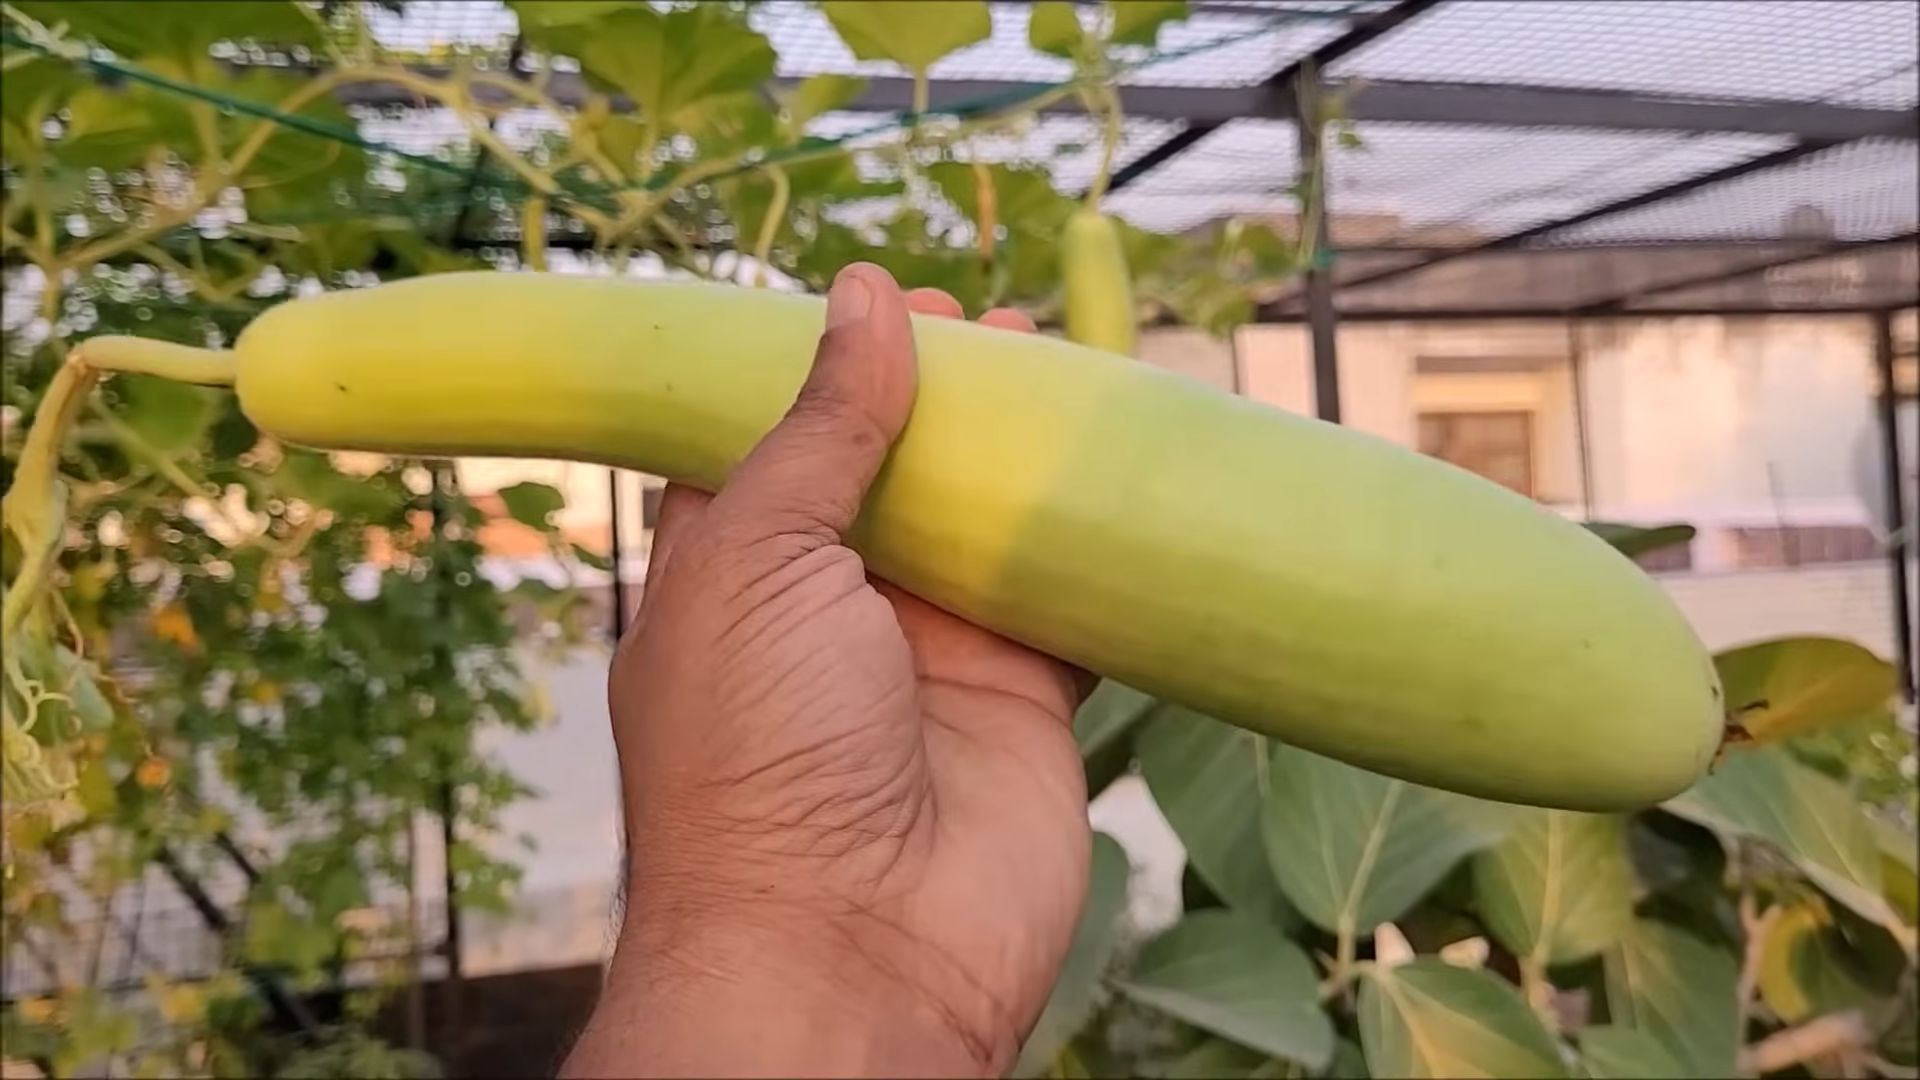
* Variety Selection: There are several varieties of bottle gourds, each with its unique shape and size. Some popular choices include the long bottle gourd, round bottle gourd, and club-shaped bottle gourd. Consider your intended use for the gourds when making your selection. If you plan to use them for crafting, a specific shape might be more suitable. For cooking, the long bottle gourd is a common choice. I personally love the long variety because it’s so versatile in the kitchen.
* Sunlight Requirements: Bottle gourds are sun-loving plants and need at least 6-8 hours of direct sunlight daily. Choose a location in your backyard that receives ample sunlight throughout the day.
* Soil Preparation: Bottle gourds thrive in well-drained, fertile soil. Before planting, amend the soil with compost or well-rotted manure to improve its fertility and drainage. The soil pH should be slightly acidic to neutral (6.0-7.0). I always add a generous amount of compost to my garden beds before planting anything – it makes a huge difference!
* Support Structure: Bottle gourds are vigorous climbers and require a strong support structure to grow on. This could be a trellis, pergola, fence, or even a sturdy archway. Make sure the structure is strong enough to support the weight of the mature vines and gourds. I’ve used a simple trellis made of bamboo poles in the past, and it worked great!
Step-by-Step Planting Guide
Now that we’ve covered the basics, let’s get to the actual planting process.
1. Starting Seeds Indoors (Optional): You can start bottle gourd seeds indoors 4-6 weeks before the last expected frost. This gives them a head start, especially in cooler climates.
* Sow the seeds in small pots or seedling trays filled with seed-starting mix.
* Keep the soil moist and warm (around 70-80°F).
* Once the seedlings have developed a few true leaves, they’re ready to be transplanted outdoors.
I usually soak my seeds in water for 24 hours before planting – it helps them germinate faster.
2. Direct Sowing: If you live in a warmer climate with a longer growing season, you can directly sow the seeds into the ground after the last frost.
* Prepare the soil by loosening it and adding compost or manure.
* Sow the seeds about 1 inch deep and 2-3 feet apart.
* Water the soil gently and keep it moist until the seeds germinate.
3. Transplanting Seedlings: If you started your seeds indoors, it’s time to transplant them into the garden.
* Choose a cloudy day to minimize transplant shock.
* Dig a hole slightly larger than the root ball of the seedling.
* Gently remove the seedling from the pot and place it in the hole.
* Backfill the hole with soil and water thoroughly.
* Space the seedlings 2-3 feet apart.
4. Providing Support: As the bottle gourd vines start to grow, guide them towards the support structure you’ve provided.
* Tie the vines loosely to the structure using soft twine or plant ties.
* Continue to train the vines as they grow, ensuring they have adequate support.
I like to use old strips of cloth to tie the vines – they’re soft and won’t damage the plants.
Caring for Your Bottle Gourd Plants
Once your bottle gourd plants are established, it’s important to provide them with proper care to ensure healthy growth and a bountiful harvest.
* Watering: Bottle gourds need consistent watering, especially during hot and dry weather. Water deeply and regularly, ensuring the soil remains moist but not waterlogged. I usually water my plants early in the morning to allow the foliage to dry before nightfall, which helps prevent fungal diseases.
* Fertilizing: Feed your bottle gourd plants with a balanced fertilizer every 2-3 weeks. You can use a liquid fertilizer or a slow-release granular fertilizer. Look for a fertilizer that is rich in phosphorus and potassium, which promote flowering and fruit development. I like to use compost tea as a natural fertilizer – it’s packed with nutrients and beneficial microbes.
* Pruning: Pruning can help improve air circulation and encourage fruit production. Remove any yellowing or diseased leaves. You can also prune the lateral branches to encourage the plant to focus its energy on producing gourds.
* Pest and Disease Control: Bottle gourds can be susceptible to certain pests and diseases, such as aphids, squash bugs, and powdery mildew. Regularly inspect your plants for any signs of infestation or disease.
* For aphids, you can spray the plants with a strong stream of water or use insecticidal soap.
* For squash bugs, handpick them off the plants or use row covers to protect the plants.
* For powdery mildew, improve air circulation by pruning the plants and apply a fungicide if necessary.
I’ve found that neem oil is a great natural remedy for many common garden pests and diseases.
Pollination: Hand-Pollinating for Success
Bottle gourds have separate male and female flowers. The female flowers have a small gourd-like structure at the base, while the male flowers do not. Sometimes, natural pollination by insects can be insufficient, especially in areas with low pollinator activity. In such cases, hand-pollination can significantly increase your chances of getting a good harvest.
1. Identifying Male and Female Flowers: As mentioned earlier, the easiest way to distinguish between male and female flowers is to look for the small gourd-like structure at the base of the female flower. Male flowers grow on long stems, while female flowers are closer to the main vine.
2. Hand-Pollination Process:
* The best time to hand-pollinate is early in the morning when the flowers are fully open.
* Gently pluck a male flower from the vine.
* Remove the petals of the male flower to expose the stamen (the pollen-bearing part).
* Carefully rub the stamen of the male flower onto the stigma (the receptive part) of the female flower.
* Repeat this process for all the open female flowers.
I usually use a small paintbrush to transfer the pollen – it’s a bit more precise.
3. Marking Pollinated Flowers: After hand-pollinating, mark the pollinated flowers with a small piece of ribbon or tape. This will help you keep track of which flowers have been pollinated and monitor their development.
Harvesting and Curing Your Bottle Gourds
The time it takes for bottle gourds to mature depends on the variety and growing conditions. Generally, they are ready to harvest in 100-120 days.
* Harvesting: Harvest the gourds when they are mature and the skin is hard and dry. The stem should also be dry and brown. Use a sharp knife or pruning shears to cut the gourd from the vine, leaving a few inches of stem attached.
* Curing: Curing is an important step in preparing bottle gourds for long-term storage and use.
* Clean the gourds with a soft cloth to remove any dirt or debris.
* Place the gourds in a well-ventilated area, away from direct sunlight and moisture.
* Turn the gourds regularly to ensure even drying.
* The curing process can take several weeks or even months, depending on the size of the gourds and the humidity levels. The gourds are fully cured when they are lightweight and the seeds rattle inside.
I like to cure my gourds in my garage, where it’s dry and well-ventilated.
Using Your Homegrown Bottle Gourds
Now for the fun part – using your homegrown bottle gourds! As I mentioned earlier, they are incredibly versatile.
* Cooking: Young, tender bottle gourds can be used in a variety of culinary dishes. They have a mild, slightly sweet flavor and can be steamed, boiled, stir-fried, or added to soups and stews. In Indian cuisine, bottle gourd is often used to make curries, stews, and desserts.
* Crafting: Dried bottle gourds can be used to create a wide range of crafts, including bowls, vases, birdhouses, musical instruments, and decorative items. The possibilities are endless!
* Storage:
Conclusion
So, there you have it! Growing bottle gourd in your backyard isn’t just a gardening project; it’s an experience. It’s about connecting with nature, nurturing life from a tiny seed, and reaping the rewards of your labor with fresh, homegrown produce. This DIY trick, focusing on optimizing soil conditions and providing sturdy support, is a game-changer for anyone looking to cultivate healthy and productive bottle gourd vines.
Why is this a must-try? Because it simplifies the process, maximizes your yield, and minimizes common problems like stunted growth or fruit rot. By focusing on well-draining, nutrient-rich soil and a robust trellis system, you’re setting your bottle gourds up for success from the very beginning. Forget struggling with weak vines and disappointing harvests. This method empowers you to grow impressive, healthy bottle gourds right in your own backyard.
Looking to add your own personal touch? Consider these variations:
* **Vertical Gardening with a Twist:** Instead of a traditional trellis, experiment with repurposing old ladders or creating a living wall structure. This adds visual appeal to your garden while providing ample support for your growing bottle gourds.
* **Companion Planting Power:** Enhance your garden’s ecosystem by planting companion plants like marigolds (to deter pests) or basil (to attract pollinators) near your bottle gourds. This natural approach can boost growth and improve the overall health of your plants.
* **Seed Starting Secrets:** For an even earlier harvest, start your bottle gourd seeds indoors a few weeks before the last expected frost. This gives them a head start and ensures a longer growing season.
* **Gourd Art Potential:** Beyond culinary uses, consider the artistic possibilities of your homegrown bottle gourds. Once dried, they can be transformed into beautiful crafts, decorative items, or even musical instruments.
We’re confident that this DIY trick will revolutionize your bottle gourd growing experience. It’s simple, effective, and yields impressive results. Don’t just take our word for it – try it yourself! We encourage you to embrace this method, adapt it to your specific garden conditions, and witness the transformation firsthand.
More importantly, we want to hear about your journey! Share your experiences, successes, and even challenges in the comments below. What variations did you try? What unexpected results did you encounter? Your insights will not only enrich our community but also help other gardeners discover the joy of growing bottle gourd in their backyards. Let’s cultivate a thriving community of bottle gourd enthusiasts! So, get your hands dirty, plant those seeds, and prepare to be amazed by the bounty of your own backyard. Happy gardening!
Frequently Asked Questions (FAQ)
What is the best time to plant bottle gourd seeds?
The ideal time to plant bottle gourd seeds is after the last frost, when the soil temperature has warmed up to at least 70°F (21°C). Bottle gourds are warm-season crops and are sensitive to cold temperatures. Planting too early can result in poor germination or stunted growth. In most regions, this typically falls between late spring and early summer. If you live in an area with a shorter growing season, consider starting your seeds indoors 4-6 weeks before the last expected frost to give them a head start.
How much sunlight do bottle gourds need?
Bottle gourds require at least 6-8 hours of direct sunlight per day to thrive. Sunlight is crucial for photosynthesis, which fuels the plant’s growth and fruit production. Choose a planting location that receives ample sunlight throughout the day. If your garden has limited sunlight, try to position your bottle gourds in the area that receives the most sun. Insufficient sunlight can lead to weak vines, reduced flowering, and smaller, less flavorful gourds.
What type of soil is best for growing bottle gourds?
Bottle gourds prefer well-draining, fertile soil that is rich in organic matter. The soil pH should be slightly acidic to neutral, ideally between 6.0 and 7.0. Before planting, amend your soil with compost, well-rotted manure, or other organic materials to improve its fertility and drainage. Avoid heavy clay soils that retain too much water, as this can lead to root rot. If you have clay soil, consider adding sand or perlite to improve drainage. A soil test can help you determine the pH and nutrient levels of your soil and guide you in making necessary amendments.
How often should I water my bottle gourd plants?
Bottle gourds need consistent watering, especially during hot and dry weather. Water deeply and regularly, aiming to keep the soil consistently moist but not waterlogged. The frequency of watering will depend on factors such as the weather, soil type, and the size of your plants. As a general rule, water deeply 2-3 times per week, or more often during periods of intense heat. Use a soaker hose or drip irrigation system to deliver water directly to the roots, minimizing water loss through evaporation and reducing the risk of fungal diseases. Check the soil moisture regularly by inserting your finger into the soil about an inch deep. If the soil feels dry, it’s time to water.
What kind of support system do bottle gourds need?
Bottle gourds are vigorous climbers and require a strong support system to grow properly. A sturdy trellis, fence, or arbor is essential to support the weight of the vines and developing gourds. The support system should be at least 6-8 feet tall and strong enough to withstand strong winds. Train the vines to climb the support system by gently guiding them and tying them loosely with twine or plant ties. Regular pruning can help to keep the vines manageable and prevent them from becoming too heavy. A well-constructed support system will not only support the plants but also improve air circulation, reducing the risk of fungal diseases.
How do I prevent common pests and diseases in bottle gourds?
Several pests and diseases can affect bottle gourds, including aphids, squash bugs, vine borers, powdery mildew, and downy mildew. To prevent these problems, practice good garden hygiene, such as removing weeds and debris that can harbor pests and diseases. Inspect your plants regularly for signs of infestation or disease and take action promptly. Use organic pest control methods, such as insecticidal soap or neem oil, to control aphids and squash bugs. Wrap the base of the vines with aluminum foil to deter vine borers. Improve air circulation by pruning the vines and spacing the plants properly. Apply a fungicide if necessary to control powdery mildew or downy mildew. Crop rotation can also help to prevent soilborne diseases.
When and how do I harvest bottle gourds?
The time to harvest bottle gourds depends on their intended use. For culinary purposes, harvest young, tender gourds when they are about 6-8 inches long and the skin is still soft. These gourds can be used in soups, stews, and other dishes. For ornamental purposes, allow the gourds to mature fully on the vine until the skin becomes hard and the stem begins to dry. Harvest mature gourds before the first frost. To harvest, cut the gourd from the vine with a sharp knife or pruning shears, leaving a few inches of stem attached. Handle the gourds carefully to avoid bruising or damaging the skin.
How do I dry bottle gourds for crafts?
Drying bottle gourds for crafts requires patience and proper technique. After harvesting mature gourds, wash them thoroughly with soap and water and dry them completely. Place the gourds in a well-ventilated area, such as a garage or shed, where they will not be exposed to direct sunlight or moisture. Elevate the gourds on a rack or screen to allow air to circulate around them. It may take several months for the gourds to dry completely. You’ll know they are dry when they feel lightweight and the seeds rattle inside. Check the gourds regularly for signs of mold or rot and discard any that are affected. Once the gourds are dry, they can be sanded, painted, or carved for various craft projects.
Leave a Comment