

Growing Cauliflower at Home might seem daunting, but trust me, with a few simple tricks and a little DIY spirit, you can harvest your own delicious, creamy cauliflower right from your backyard! Imagine serving a vibrant, homegrown cauliflower cheese at your next dinner party – the taste is simply unmatched.
Cauliflower, a member of the Brassica family, has a fascinating history. Originating in the Mediterranean, it was cultivated for centuries before making its way to our tables. In ancient Rome, it was considered a delicacy, and its popularity has only grown since. For generations, gardeners have sought the secrets to perfect cauliflower cultivation, passing down tips and tricks to ensure a bountiful harvest.
But why bother with the effort? Well, store-bought cauliflower often lacks the freshness and flavor of homegrown varieties. Plus, growing cauliflower at home allows you to control exactly what goes into your food, avoiding harmful pesticides and ensuring the highest quality produce for you and your family. In this article, I’m going to share some easy-to-follow DIY hacks that will help you overcome common challenges and enjoy a thriving cauliflower patch. From soil preparation to pest control, I’ve got you covered. Let’s get started and unlock the secrets to a successful cauliflower harvest!
Growing Cauliflower at Home: A Beginner’s Guide
Okay, so you want to grow cauliflower at home? Awesome! It might seem a little intimidating at first, but trust me, with a little patience and the right know-how, you can totally pull this off. I’ve grown cauliflower successfully for years, and I’m here to share all my secrets. Let’s get started!
Choosing the Right Cauliflower Variety
First things first, you need to pick the right cauliflower variety for your climate and growing season. Different varieties mature at different rates, so consider your local weather patterns.
* Early Varieties: These mature in about 50-60 days. Great for shorter growing seasons or if you want an early harvest. Examples include ‘Snowball Y Improved’ and ‘Early White Hybrid’.
* Mid-Season Varieties: These take around 70-80 days to mature. A good all-around choice. ‘Amazing’ and ‘Cheddar’ (which produces orange heads!) are popular options.
* Late-Season Varieties: These need 80+ days to mature. Best for areas with long, cool growing seasons. ‘Giant of Naples’ is a classic late-season choice.
* Colored Varieties: Don’t forget about the fun colored varieties! Purple (‘Graffiti’), orange (‘Cheddar’), and green (‘Romanesco’) cauliflower add a splash of color to your garden and plate.
I usually opt for a mix of early and mid-season varieties to extend my harvest.
Starting Your Cauliflower Seeds
You can either start your cauliflower seeds indoors or directly sow them in your garden, depending on your climate. I prefer starting them indoors because it gives them a head start and protects them from pests.
* When to Start Seeds Indoors: About 4-6 weeks before the last expected frost.
* When to Direct Sow: 2-3 weeks before the last expected frost, or in late summer for a fall harvest.
Starting Seeds Indoors:
1. Gather Your Supplies: You’ll need seed starting trays or small pots, seed starting mix (I recommend a peat-based mix), cauliflower seeds, a spray bottle, and a heat mat (optional, but helpful).
2. Fill the Trays/Pots: Moisten the seed starting mix and fill your trays or pots, leaving about half an inch of space at the top.
3. Sow the Seeds: Plant 2-3 seeds per cell or pot, about ¼ inch deep. Gently cover the seeds with more seed starting mix.
4. Water Gently: Use a spray bottle to mist the soil. You want it to be moist, but not soggy.
5. Provide Warmth: Place the trays or pots on a heat mat (if using) and cover them with a humidity dome or plastic wrap to create a greenhouse effect.
6. Germination: Keep the soil consistently moist and the temperature around 70-75°F (21-24°C). The seeds should germinate in about 5-10 days.
7. Provide Light: Once the seedlings emerge, remove the humidity dome or plastic wrap and place them under grow lights or in a sunny window. They need at least 12-14 hours of light per day.
8. Thin the Seedlings: Once the seedlings have their first true leaves (the second set of leaves), thin them to one seedling per cell or pot. Choose the strongest seedling and snip off the others at the soil line.
9. Harden Off: About a week before you plan to transplant the seedlings outdoors, you need to harden them off. This means gradually exposing them to outdoor conditions. Start by placing them outside for an hour or two each day, gradually increasing the time over the course of a week. Protect them from direct sunlight and strong winds at first.
Direct Sowing:
1. Prepare the Soil: Choose a sunny spot in your garden with well-drained soil. Amend the soil with compost or well-rotted manure to improve its fertility.
2. Sow the Seeds: Sow the seeds about ½ inch deep and 18-24 inches apart.
3. Water Gently: Water the soil gently to keep it moist.
4. Thin the Seedlings: Once the seedlings emerge, thin them to one plant every 18-24 inches.
Transplanting Cauliflower Seedlings
Once your seedlings are hardened off and the danger of frost has passed, it’s time to transplant them into your garden.
1. Prepare the Soil: Choose a sunny spot with well-drained soil. Cauliflower needs at least 6 hours of sunlight per day. Amend the soil with compost or well-rotted manure. Cauliflower are heavy feeders!
2. Dig Holes: Dig holes that are slightly larger than the root balls of your seedlings, spacing them 18-24 inches apart.
3. Transplant the Seedlings: Gently remove the seedlings from their trays or pots and place them in the holes. Make sure the top of the root ball is level with the surrounding soil.
4. Fill the Holes: Fill the holes with soil and gently firm it around the seedlings.
5. Water Thoroughly: Water the seedlings thoroughly after transplanting.
6. Mulch: Apply a layer of mulch around the plants to help retain moisture, suppress weeds, and regulate soil temperature. I like to use straw or shredded leaves.
Caring for Your Cauliflower Plants
Cauliflower needs consistent care to thrive. Here’s what you need to do:
* Watering: Water your cauliflower plants regularly, especially during dry periods. Aim for about 1-1.5 inches of water per week. Water deeply and less frequently, rather than shallowly and often.
* Fertilizing: Cauliflower is a heavy feeder, so you’ll need to fertilize it regularly. Use a balanced fertilizer (like 10-10-10) or a fertilizer specifically formulated for vegetables. Follow the instructions on the fertilizer package. I like to side-dress my cauliflower plants with compost tea every few weeks.
* Weeding: Keep the area around your cauliflower plants free of weeds. Weeds compete with the cauliflower for nutrients and water.
* Pest Control: Cauliflower is susceptible to several pests, including cabbage worms, aphids, and flea beetles. Inspect your plants regularly for signs of pests. You can use insecticidal soap or neem oil to control these pests. I also like to use row covers to protect my plants from pests.
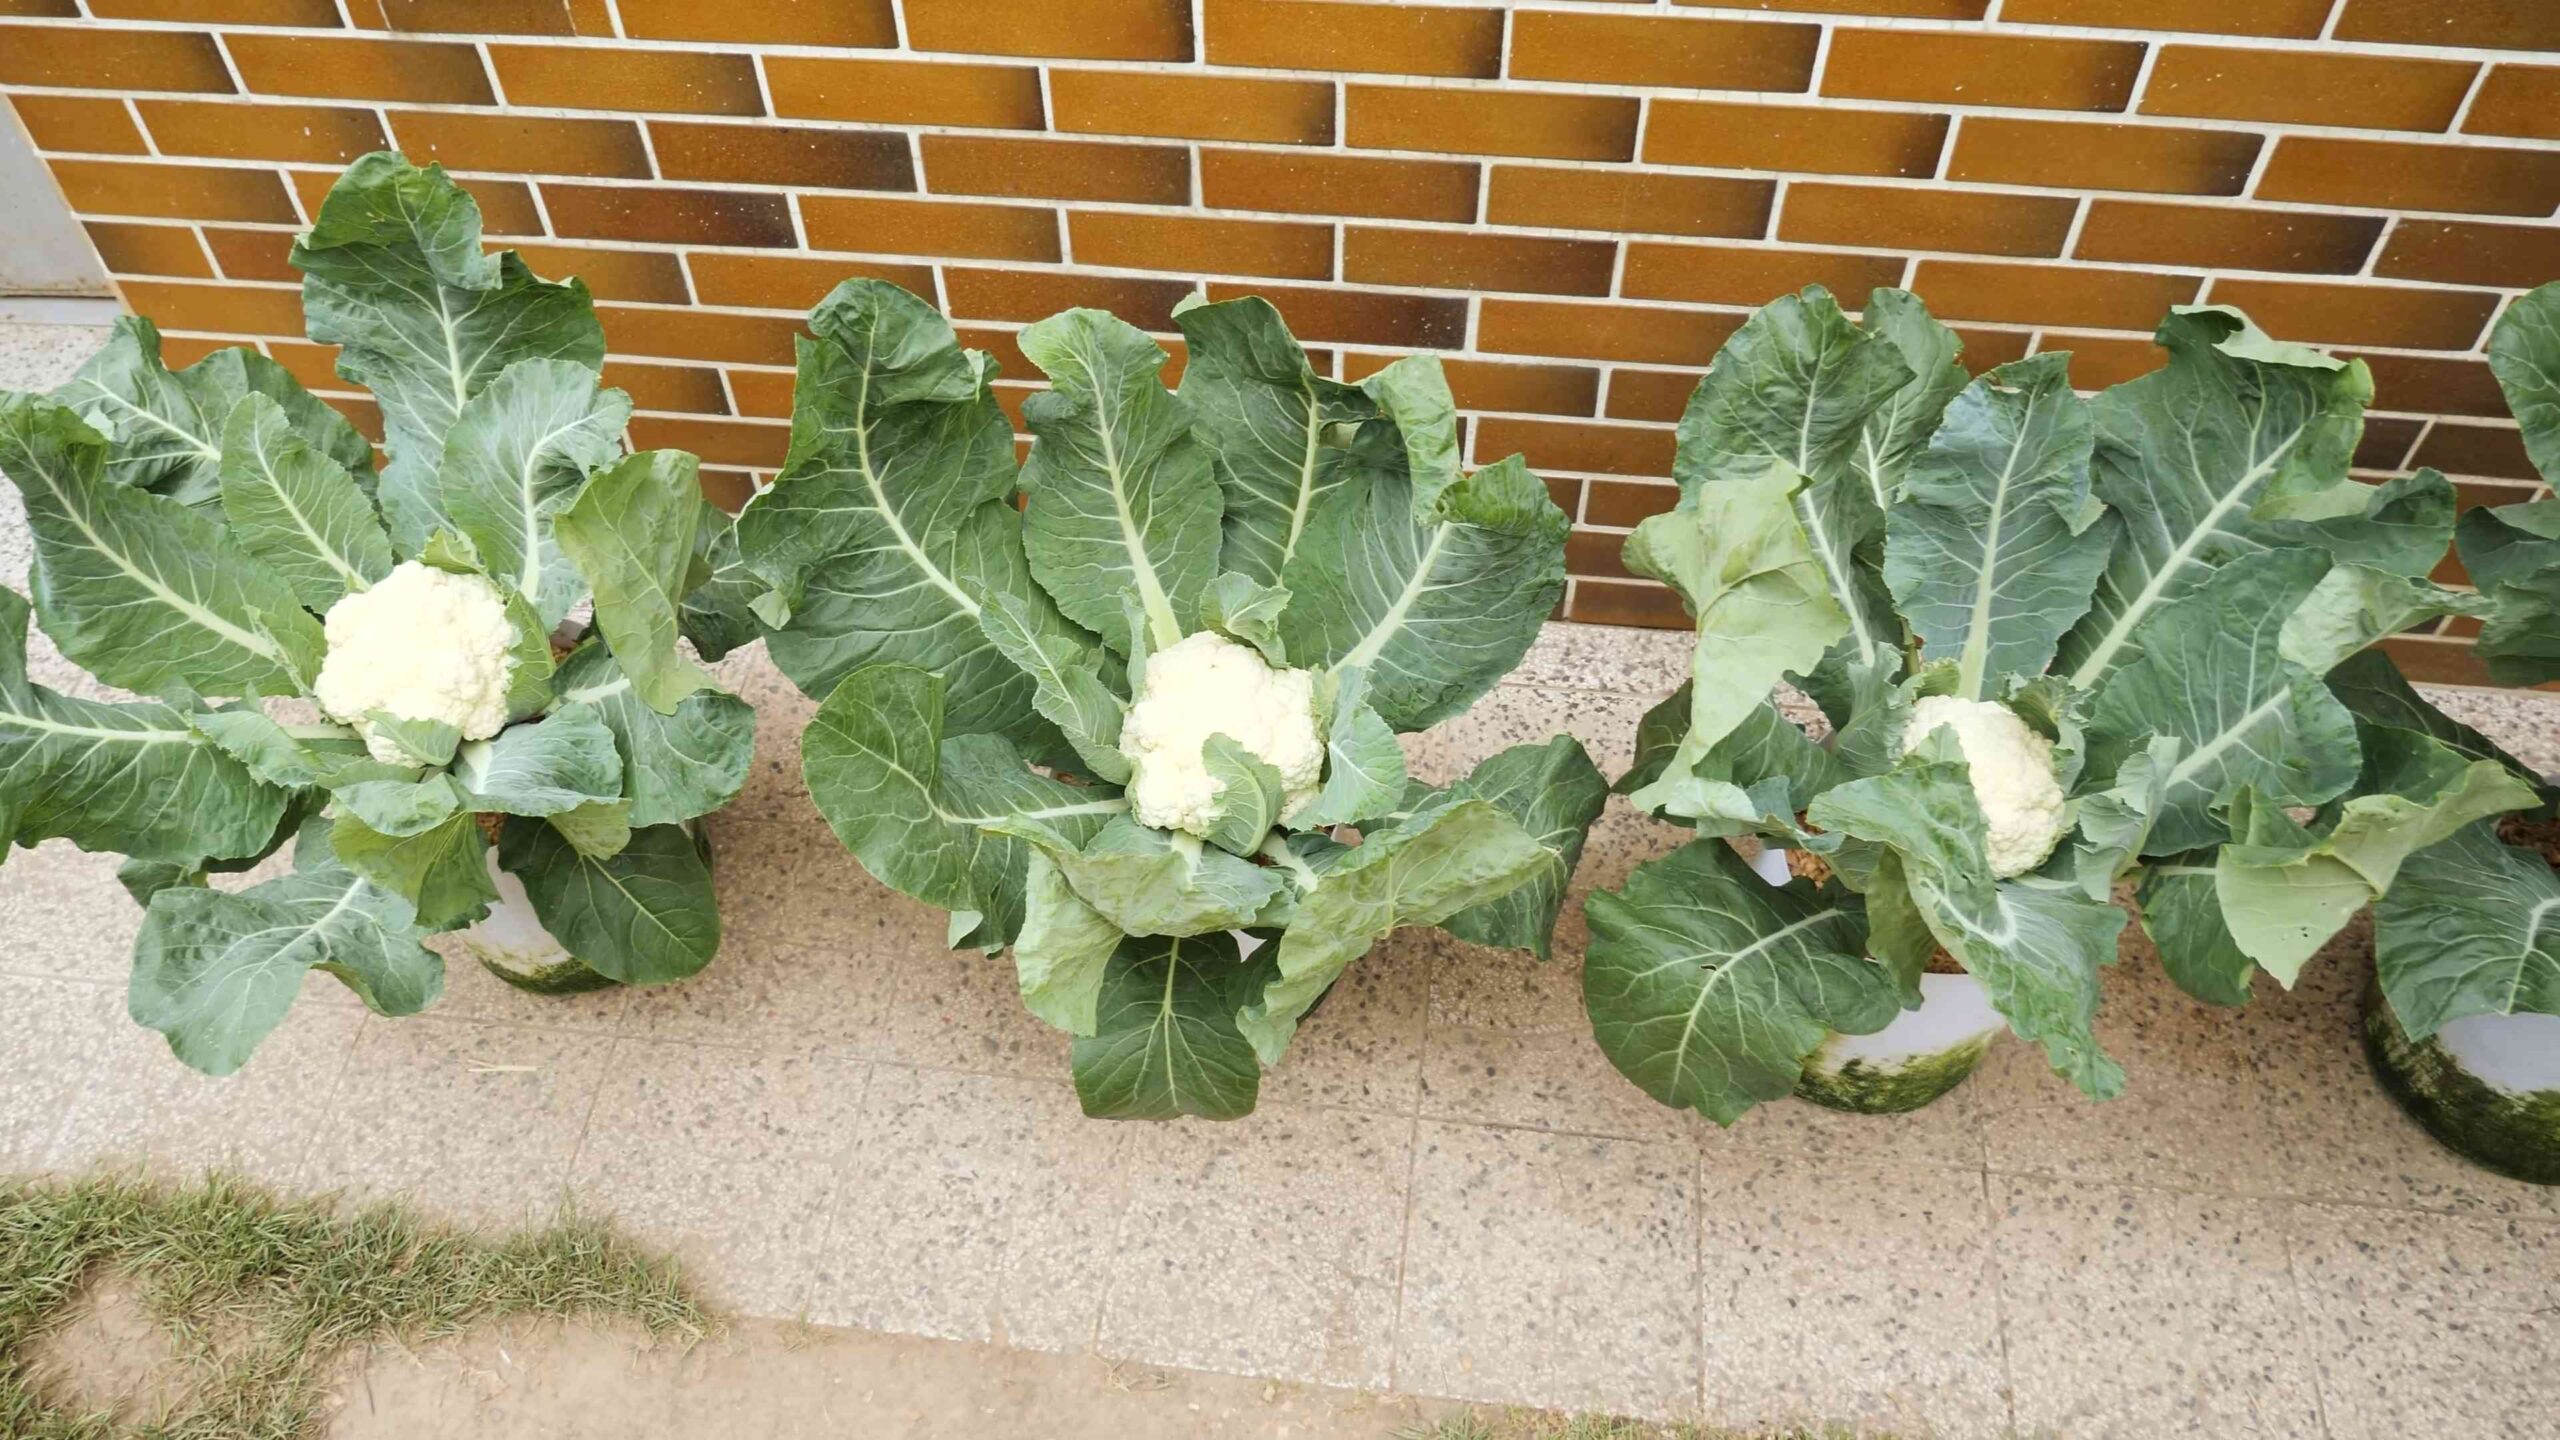
* Blanching (Optional): Blanching is the process of covering the cauliflower head to prevent it from turning yellow or brown. This is optional, but it will result in a whiter, more attractive head. To blanch, simply fold the large outer leaves over the head and secure them with twine or rubber bands. Do this when the head is about 2-3 inches in diameter.
Harvesting Your Cauliflower
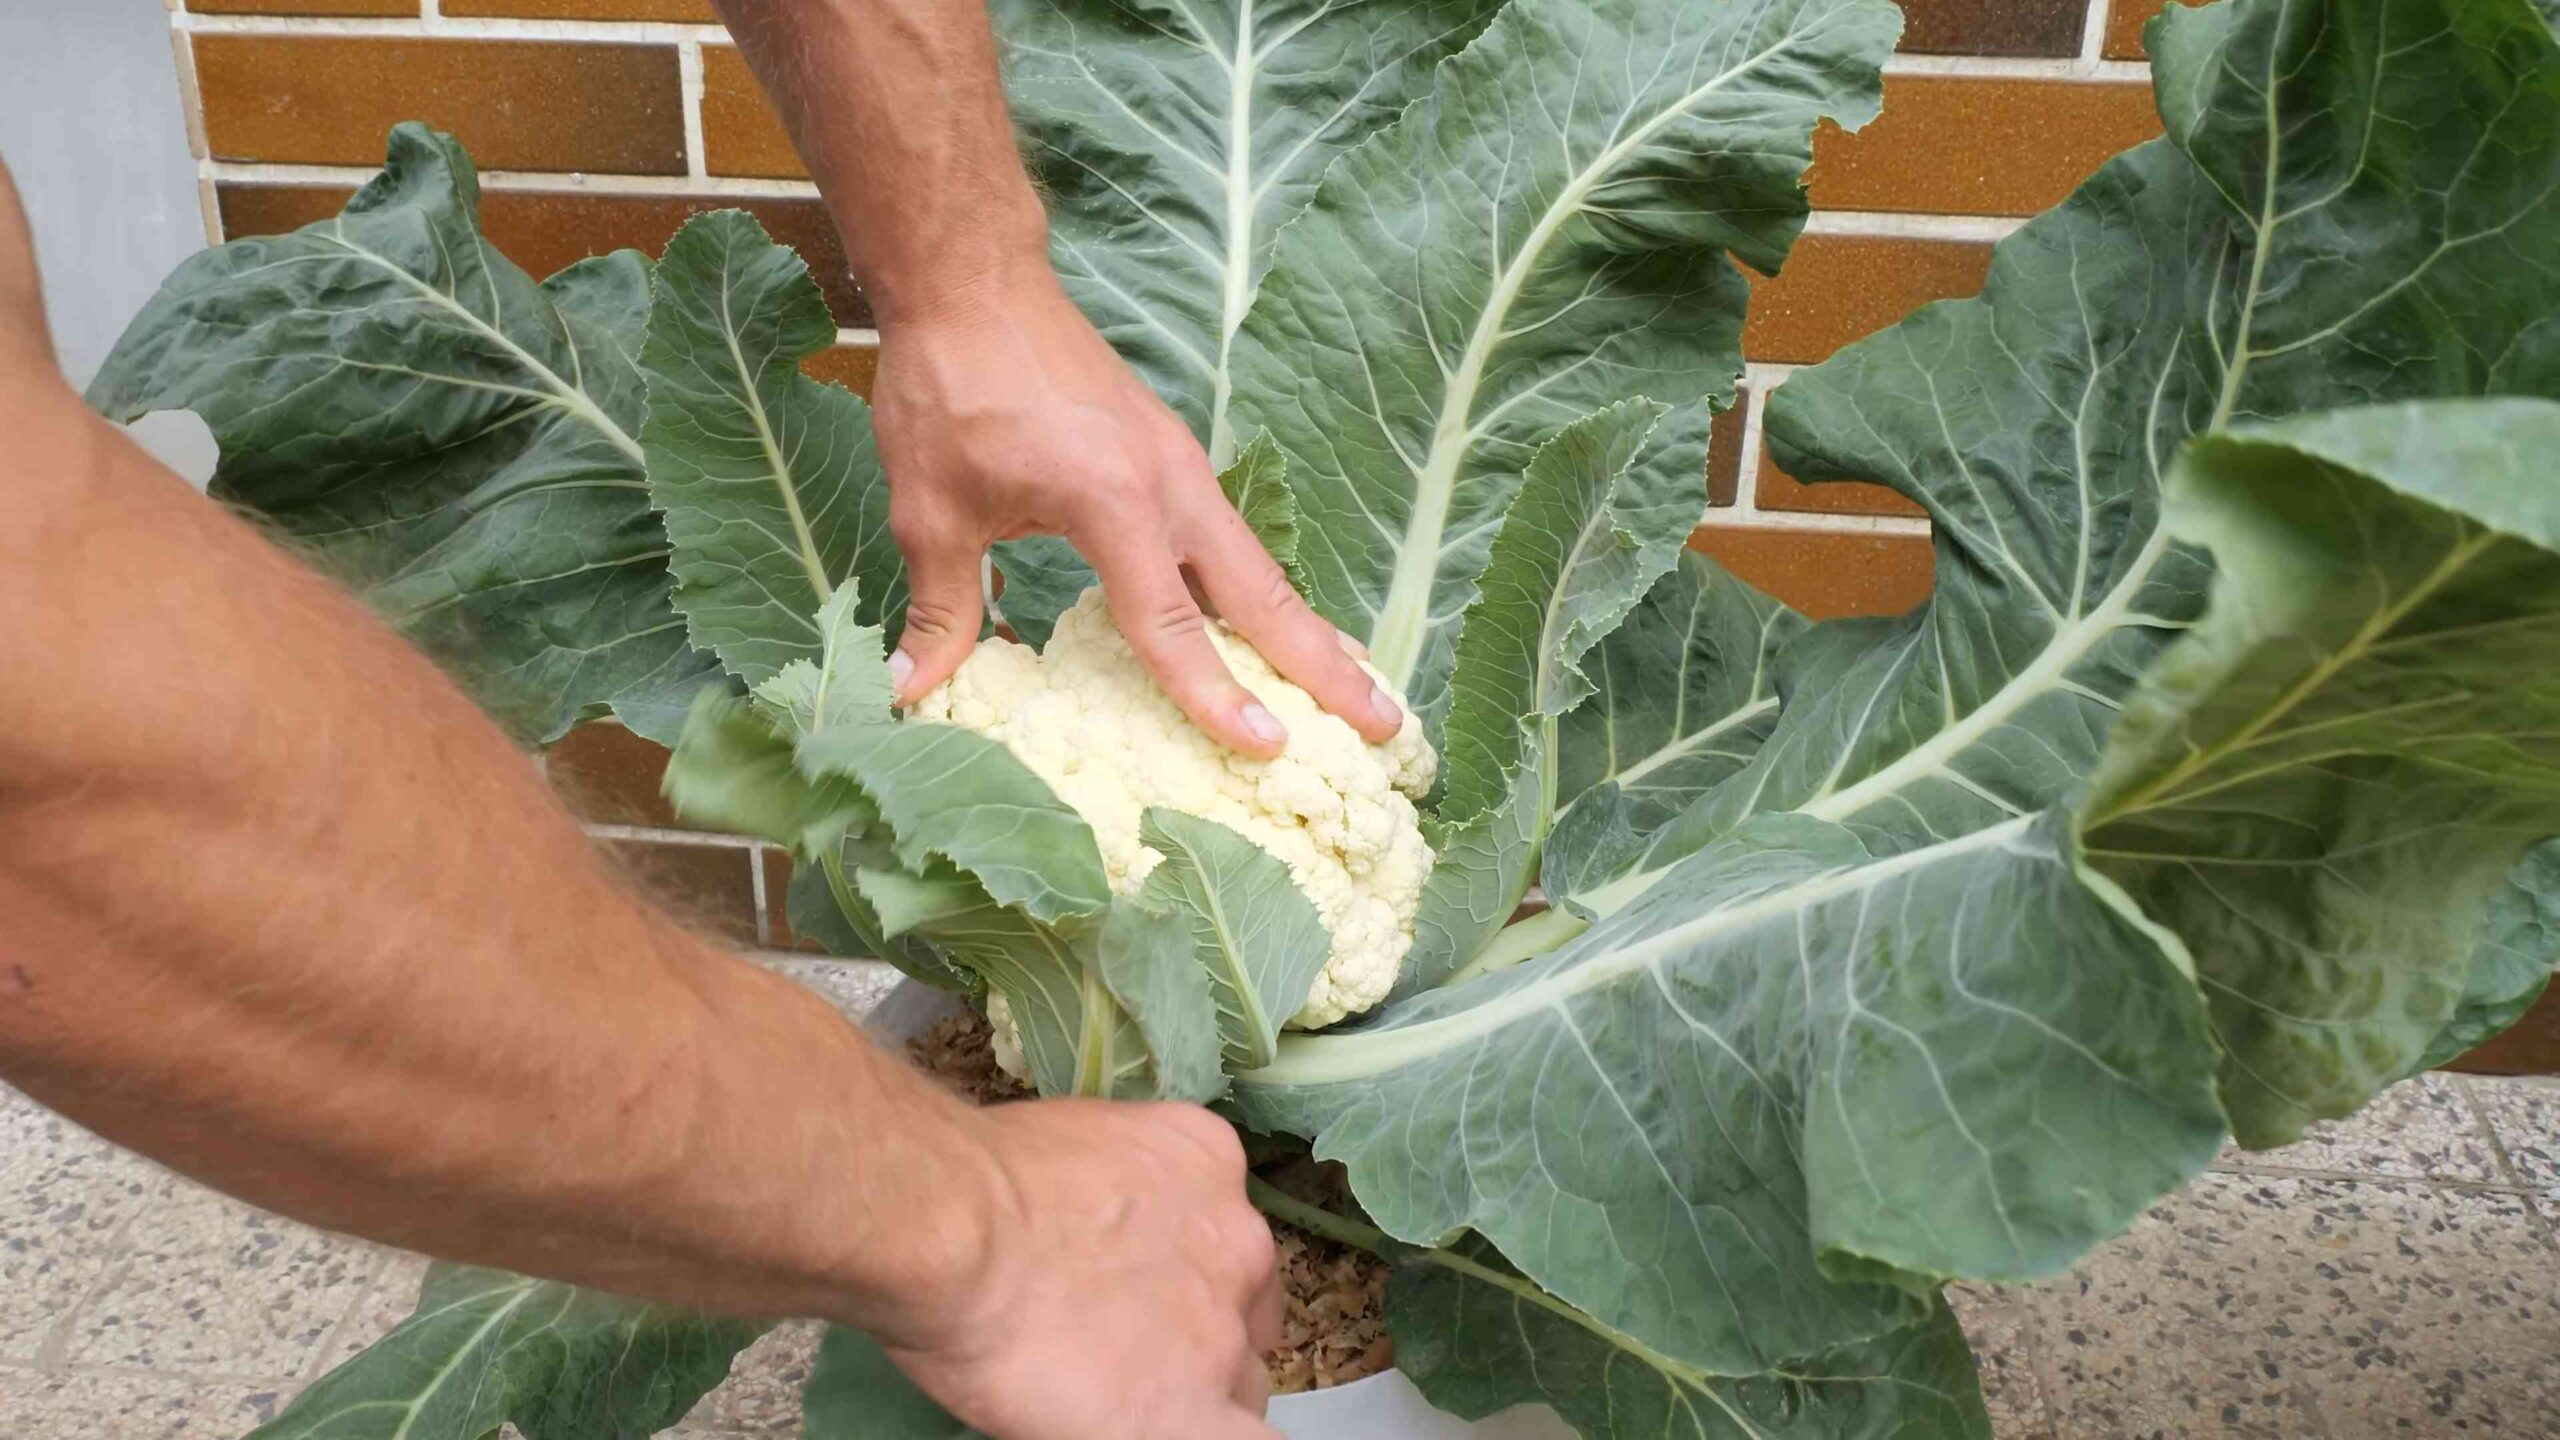
Your cauliflower is ready to harvest when the head is firm, compact, and about 6-8 inches in diameter. The exact size will depend on the variety.
1. Check for Readiness: Gently press on the head. It should feel firm and dense.
2. Cut the Head: Use a sharp knife to cut the head from the plant, leaving a few leaves attached to protect the head.
3. Harvest in the Morning: Harvest your cauliflower in the morning, when the temperatures are cooler.
4. Store Properly: Store your cauliflower in the refrigerator for up to a week.
Troubleshooting Common Problems
Even with the best care, you might encounter some problems when growing cauliflower. Here are a few common issues and how to deal with them:
* Buttoning: This is when the cauliflower head forms prematurely and remains small. It’s usually caused by stress, such as lack of water or nutrients. Make sure your plants are getting enough water and fertilizer.
* Ricey Heads: This is when the cauliflower head has a loose, grainy texture. It’s usually caused by hot weather or inconsistent watering. Try to provide shade for your plants during hot weather and water them consistently.
* Clubroot: This is a soilborne disease that causes the roots of the plant to swell and become distorted. It can be prevented by rotating your crops and amending the soil with lime to raise the pH.
* Pests: As mentioned earlier, cauliflower is susceptible to several pests. Inspect your plants regularly and take action to control pests as soon as you see them.
Enjoying Your Homegrown Cauliflower
Congratulations! You’ve successfully grown cauliflower at home. Now it’s time to enjoy the fruits (or rather, vegetables) of your labor. Cauliflower is incredibly versatile and can be used in a variety of dishes. You can roast it, steam it, boil it, mash it, or even eat it raw. I love to roast cauliflower with olive oil, garlic, and parmesan cheese. It’
Conclusion
So, there you have it! Growing cauliflower at home, while it might seem daunting at first, is a deeply rewarding experience that puts fresh, flavorful, and often more affordable produce right at your fingertips. We’ve walked through the key steps, from selecting the right variety and preparing your soil to nurturing your plants and harvesting your beautiful, homegrown heads.
Why is this DIY trick a must-try? Because beyond the cost savings and the sheer satisfaction of nurturing something from seed to table, you gain complete control over the growing process. You can choose organic methods, avoid harmful pesticides, and select varieties that aren’t typically available in your local grocery store. Imagine the vibrant purple or Romanesco cauliflower gracing your dinner table – a conversation starter and a testament to your gardening prowess!
But the benefits don’t stop there. Freshly harvested cauliflower boasts a superior flavor and texture compared to store-bought options. The subtle sweetness and crispness are truly unmatched. Plus, you’ll be reducing your carbon footprint by cutting down on transportation and packaging.
Looking to experiment? Consider these variations:
* Colored Cauliflower: Venture beyond the traditional white and try growing purple, orange, or green varieties. These add visual appeal and often boast slightly different nutrient profiles.
* Container Gardening: If you’re short on space, cauliflower can be successfully grown in large containers. Just ensure they have adequate drainage and are placed in a sunny location.
* Succession Planting: Extend your harvest season by planting cauliflower seeds or seedlings every few weeks. This will ensure a continuous supply of fresh cauliflower throughout the growing season.
* Companion Planting: Enhance your cauliflower’s growth and deter pests by planting it alongside beneficial companions like rosemary, thyme, or marigolds.
Ultimately, the success of growing cauliflower at home hinges on your dedication and willingness to learn. Don’t be afraid to experiment, adapt to your local climate, and most importantly, have fun! The journey is just as rewarding as the harvest.
We wholeheartedly encourage you to give this DIY trick a try. Start small, learn from your mistakes, and celebrate your successes. And most importantly, we want to hear about your experience! Share your photos, tips, and challenges in the comments below. Let’s build a community of home gardeners who are passionate about growing their own food. Your insights could inspire others to embark on their own cauliflower-growing adventure. So, grab your seeds, get your hands dirty, and discover the joy of growing your own delicious and nutritious cauliflower!
Frequently Asked Questions (FAQ)
What is the best time of year to plant cauliflower?
The best time to plant cauliflower depends on your climate. Cauliflower thrives in cool weather, so it’s typically planted in the spring for a fall harvest or in the late summer for a winter harvest in milder climates. In areas with hot summers, avoid planting cauliflower during the hottest months, as high temperatures can cause the heads to button (form small, premature heads). Check your local frost dates and plan accordingly. Generally, you’ll want to start seeds indoors 6-8 weeks before the last expected frost in spring or 12-14 weeks before the first expected frost in fall.
How much sunlight does cauliflower need?
Cauliflower requires at least 6 hours of direct sunlight per day to thrive. Choose a planting location that receives ample sunlight throughout the day. If you’re growing cauliflower in containers, make sure to place them in a sunny spot. Insufficient sunlight can lead to leggy plants and small, underdeveloped heads.
What kind of soil is best for growing cauliflower?
Cauliflower prefers well-drained, fertile soil that is rich in organic matter. The ideal soil pH is between 6.0 and 7.0. Before planting, amend your soil with compost or well-rotted manure to improve its fertility and drainage. You can also add a slow-release fertilizer to provide essential nutrients throughout the growing season. Avoid heavy clay soils, as they can retain too much moisture and lead to root rot.
How often should I water cauliflower?
Cauliflower needs consistent moisture to grow properly. Water deeply and regularly, especially during dry periods. Aim to keep the soil consistently moist but not waterlogged. Mulching around the plants can help retain moisture and suppress weeds. Check the soil moisture regularly by sticking your finger into the soil about an inch deep. If it feels dry, it’s time to water.
How do I prevent pests and diseases from affecting my cauliflower?
Several pests and diseases can affect cauliflower, including cabbage worms, aphids, and clubroot. To prevent these problems, practice good garden hygiene, such as removing plant debris and weeds. Use row covers to protect young plants from pests. Inspect your plants regularly for signs of pests or diseases and take action promptly. Organic pest control methods, such as insecticidal soap or Bacillus thuringiensis (Bt), can be effective against many common pests. Ensure proper spacing between plants to promote air circulation and reduce the risk of fungal diseases. Crop rotation can also help prevent soilborne diseases.
When is cauliflower ready to harvest?
Cauliflower is typically ready to harvest when the head is firm, compact, and reaches the desired size (usually 6-8 inches in diameter). The exact time to harvest will depend on the variety and growing conditions. Check the head regularly for signs of maturity. The curds should be tightly packed and not starting to separate or turn yellow. To harvest, cut the stem just below the head, leaving a few leaves attached for protection.
Why is my cauliflower head small or not forming?
There are several reasons why your cauliflower head might be small or not forming. Common causes include insufficient sunlight, poor soil fertility, inconsistent watering, and high temperatures. Make sure your plants are receiving at least 6 hours of direct sunlight per day, and amend your soil with compost or fertilizer to provide essential nutrients. Water regularly to keep the soil consistently moist. If you’re growing cauliflower during hot weather, provide shade during the hottest part of the day. Also, ensure you’ve chosen a variety suitable for your climate and planting season.
Can I grow cauliflower in containers?
Yes, cauliflower can be successfully grown in containers, but you’ll need to choose a large container (at least 5 gallons) with good drainage. Use a high-quality potting mix and provide regular watering and fertilization. Container-grown cauliflower may require more frequent watering than plants grown in the ground. Place the container in a sunny location that receives at least 6 hours of direct sunlight per day.
How do I blanch cauliflower?
Blanching cauliflower involves covering the developing head with its own leaves to prevent it from turning yellow or brown. This is typically done when the head is about 2-3 inches in diameter. To blanch, simply fold the large outer leaves over the head and secure them with twine or rubber bands. Check the head regularly and re-secure the leaves as needed. Blanching is not always necessary, especially for colored varieties, but it can help maintain the white color of traditional cauliflower.
What can I do with my cauliflower leaves?
Don’t discard your cauliflower leaves! They are edible and nutritious. You can cook them like kale or collard greens, sauté them with garlic and olive oil, or add them to soups and stews. They have a slightly stronger flavor than the head but are packed with vitamins and minerals.

Leave a Comment