

Growing Dragon Beans might sound like something straight out of a fantasy novel, but trust me, it’s a real and rewarding experience you can have right in your own backyard! Have you ever dreamt of adding a touch of the exotic to your garden, something that not only looks stunning but also tastes delicious? Well, look no further! Dragon beans, with their vibrant colors and impressive length, are the perfect choice.
These fascinating legumes, also known as asparagus beans or yardlong beans, have a rich history rooted in Southeast Asia, where they’ve been cultivated for centuries. They’re a staple in many Asian cuisines, prized for their tender texture and subtly sweet flavor. But beyond their culinary appeal, growing dragon beans offers a unique opportunity to connect with nature and experience the satisfaction of nurturing something truly special.
In today’s fast-paced world, taking the time to cultivate your own food is more important than ever. Not only does it provide you with fresh, healthy produce, but it also offers a therapeutic escape from the stresses of daily life. And let’s be honest, who wouldn’t want to impress their friends and family with a garden overflowing with these eye-catching beans? This DIY guide will equip you with all the knowledge and tricks you need to successfully grow dragon beans, even if you’re a complete beginner. So, grab your gardening gloves, and let’s embark on this exciting adventure together!
Growing Dragon Beans: A DIY Guide to a Bountiful Harvest
Okay, so you want to grow Dragon Beans? Awesome! These vibrant, long beans are not only visually stunning but also incredibly delicious and rewarding to grow. I’m going to walk you through everything you need to know, from seed to table. Trust me, with a little patience and these tips, you’ll be harvesting a dragon’s hoard of beans in no time!
What You’ll Need: The Dragon Bean Arsenal
Before we dive in, let’s gather our supplies. Having everything ready beforehand will make the whole process smoother and more enjoyable.
* Dragon Bean Seeds: Obviously! You can find these online or at your local garden center. Look for reputable suppliers to ensure good germination rates.
* Well-Draining Soil: Dragon beans aren’t fans of soggy feet. A good potting mix or garden soil amended with compost is ideal.
* Large Pots or Garden Bed: These beans are climbers, so they need space to spread out. If you’re using pots, make sure they’re at least 12 inches in diameter.
* Trellis or Support Structure: Essential for vertical growth! A trellis, bamboo stakes, or even a sturdy fence will work.
* Watering Can or Hose: For keeping your beans hydrated.
* Fertilizer (Optional): A balanced fertilizer can give your beans a boost, but it’s not strictly necessary.
* Gardening Gloves: To keep your hands clean and protected.
* Hand Trowel or Shovel: For planting and transplanting.
* Mulch (Optional): Helps retain moisture and suppress weeds.
Phase 1: Starting Your Dragon Bean Seeds
You can either direct sow your dragon bean seeds into the garden or start them indoors for a head start. I personally prefer starting them indoors, especially if you live in an area with a shorter growing season.
1. Soaking the Seeds (Optional but Recommended): To speed up germination, soak your dragon bean seeds in lukewarm water for 12-24 hours before planting. This helps soften the seed coat and encourages sprouting.
2. Preparing Seed Starting Trays or Pots: Fill your seed starting trays or small pots with well-draining potting mix. Moisten the soil thoroughly but don’t let it become waterlogged.
3. Planting the Seeds: Make a small hole about 1 inch deep in each cell or pot. Place one or two dragon bean seeds in each hole and cover them gently with soil.
4. Watering and Providing Warmth: Water the seeds gently to avoid disturbing them. Place the trays or pots in a warm location, ideally between 70-80°F (21-27°C). A heat mat can be helpful if you’re starting seeds indoors during cooler months.
5. Waiting for Germination: Keep the soil consistently moist but not soggy. Dragon bean seeds typically germinate within 7-14 days.
6. Providing Light: Once the seedlings emerge, provide them with plenty of light. If you’re growing them indoors, place them under grow lights or near a sunny window. Rotate the trays or pots regularly to ensure even growth.
Phase 2: Transplanting Your Dragon Bean Seedlings
Once your seedlings have developed a few sets of true leaves and the weather has warmed up, it’s time to transplant them into their permanent home.
1. Hardening Off the Seedlings: Before transplanting, you need to “harden off” your seedlings. This means gradually exposing them to outdoor conditions over a period of 7-10 days. Start by placing them in a sheltered location for a few hours each day, gradually increasing the amount of time they spend outdoors. This will help them adjust to the sun, wind, and temperature changes.
2. Preparing the Planting Site: Choose a sunny location with well-draining soil. Amend the soil with compost or other organic matter to improve its fertility and drainage. If you’re planting in pots, make sure they’re large enough to accommodate the mature plants.
3. Setting Up the Trellis or Support Structure: Before transplanting, install your trellis or support structure. Dragon beans need something to climb on, so make sure it’s sturdy and tall enough to support their growth.
4. Transplanting the Seedlings: Gently remove the seedlings from their trays or pots, being careful not to damage the roots. Dig a hole that’s slightly larger than the root ball and place the seedling in the hole. Backfill with soil and gently firm it around the base of the plant. Space the seedlings about 6-8 inches apart.
5. Watering and Mulching: Water the transplanted seedlings thoroughly. Apply a layer of mulch around the base of the plants to help retain moisture and suppress weeds.
Phase 3: Caring for Your Dragon Bean Plants
Now that your dragon bean plants are in the ground, it’s time to provide them with the care they need to thrive.
1. Watering: Dragon beans need consistent moisture, especially during hot, dry weather. Water them deeply whenever the top inch of soil feels dry to the touch. Avoid overwatering, as this can lead to root rot.
2. Fertilizing (Optional): If you want to give your dragon bean plants a boost, you can fertilize them every few weeks with a balanced fertilizer. Follow the instructions on the fertilizer package.
3. Weeding: Keep the area around your dragon bean plants free of weeds. Weeds compete with the beans for nutrients and water.
4. Training the Vines: As your dragon bean plants grow, you’ll need to train the vines to climb the trellis or support structure. Gently guide the vines in the direction you want them to grow and tie them to the trellis if necessary.
5. Pest and Disease Control: Dragon beans are generally resistant to pests and diseases, but they can sometimes be affected by aphids, bean beetles, or fungal diseases. Inspect your plants regularly for signs of pests or diseases and take action if necessary. You can use insecticidal soap or neem oil to control aphids and bean beetles. For fungal diseases, improve air circulation and avoid overwatering.
6. Pruning (Optional): You can prune your dragon bean plants to encourage bushier growth and increase yields. Pinch off the tips of the vines to promote branching. Remove any yellowing or dead leaves.
Phase 4: Harvesting Your Dragon Beans
The most exciting part! Harvesting your dragon beans is the culmination of all your hard work.
1. Knowing When to Harvest: Dragon beans are typically ready to harvest about 60-70 days after planting. The beans should be long and slender, about 12-18 inches in length. They should be firm and snap easily when bent.
2. Harvesting the Beans: Use scissors or pruning shears to cut the beans from the vine. Be careful not to damage the plant.
3. Harvesting Regularly: Harvest your dragon beans regularly to encourage continued production. The more you harvest, the more beans your plants will produce.
4. Enjoying Your Harvest: Dragon beans can be eaten raw, steamed, stir-fried, or added to soups and stews. They’re a versatile and delicious vegetable that you can enjoy in a variety of ways.
Troubleshooting: Common Dragon Bean Growing Problems
Even with the best care, you might encounter some problems while growing your dragon beans. Here are a few common issues and how to address them:
* Poor Germination: If your dragon bean seeds aren’t germinating, it could be due to several factors, such as old seeds, cold soil, or overwatering. Make sure you’re using fresh seeds, planting in warm soil, and avoiding overwatering.
* Yellowing Leaves: Yellowing leaves can be a sign of nutrient deficiency, overwatering, or disease. Check the soil drainage and fertilize if necessary.
* Lack of Flowers or Beans: If your dragon bean plants are growing well but not producing flowers or beans, it could be due to a lack of sunlight, poor pollination, or excessive nitrogen fertilizer. Make sure your plants are getting at least 6 hours of sunlight per day, encourage pollination by attracting bees and other pollinators, and avoid using fertilizers that are high in nitrogen.
* Pest Infestations: Aphids, bean beetles, and other pests can damage your dragon bean plants. Inspect your plants regularly for signs of pests and take action if necessary. Use insecticidal soap or neem oil to control pests.
Extra Tips for Dragon Bean Success
Here are a few extra tips to help you grow the best dragon beans possible:
* Choose the Right Variety: There are several different varieties of dragon beans available, so choose one that’s well-suited to your climate and growing conditions.
* Provide Adequate Support: Dragon beans need a strong and sturdy trellis or support structure to climb on. Make sure your trellis is tall enough to accommodate the mature plants.
* Water Deeply and Regularly: Dragon

Conclusion
So, there you have it! Growing dragon beans is not only achievable but also incredibly rewarding, especially when you embrace this simple yet effective DIY trick. It’s a game-changer for anyone looking to maximize their yield, protect their precious plants, and enjoy a truly bountiful harvest. This method, focusing on creating a supportive and nurturing environment, allows your dragon beans to thrive, reaching their full potential in both size and flavor.
Why is this DIY approach a must-try? Because it addresses the core needs of dragon beans: strong support for their vigorous growth, protection from pests and diseases, and optimized access to sunlight and air circulation. By implementing this trick, you’re essentially giving your dragon beans a head start, ensuring they have everything they need to flourish. Forget flimsy store-bought supports that buckle under the weight of these impressive vines. This DIY solution is sturdy, customizable, and cost-effective.
But the beauty of this method lies in its adaptability. Feel free to experiment with variations to suit your specific needs and resources. For instance, if you’re short on space, consider a vertical tower design using repurposed materials like old tires or plastic bottles. This not only saves space but also adds a unique, eco-friendly touch to your garden. Alternatively, if you live in an area with strong winds, reinforce your structure with extra stakes or netting to provide added stability. You can also incorporate companion planting around your dragon beans to deter pests naturally. Marigolds, for example, are known to repel many common garden pests.
Don’t be afraid to get creative and personalize your DIY dragon bean support system. The most important thing is to provide a strong, stable, and well-ventilated environment for your plants to climb and thrive. Remember, gardening is all about experimentation and learning.
We wholeheartedly encourage you to try this DIY trick for growing dragon beans. It’s a simple, effective, and rewarding way to enhance your gardening experience and enjoy a delicious harvest. Once you’ve given it a go, we’d love to hear about your experience! Share your photos, tips, and stories in the comments below. Let’s create a community of dragon bean enthusiasts and learn from each other’s successes and challenges. Your insights could be invaluable to other gardeners embarking on their own dragon bean growing journey. So, get your hands dirty, embrace the DIY spirit, and prepare to be amazed by the results! Happy gardening!
Frequently Asked Questions (FAQ)
What exactly are dragon beans, and why should I grow them?
Dragon beans, also known as yardlong beans or asparagus beans, are a type of legume characterized by their exceptionally long pods, often reaching lengths of up to three feet. They are not only visually striking but also incredibly delicious and nutritious. They offer a unique flavor profile, often described as a cross between green beans and asparagus, with a slightly nutty undertone. Dragon beans are also packed with vitamins, minerals, and fiber, making them a healthy and satisfying addition to any diet. Growing them yourself ensures you have access to fresh, organic produce right in your backyard. Plus, their vigorous growth and impressive yields make them a rewarding crop for any gardener.
What kind of support structure is best for growing dragon beans?
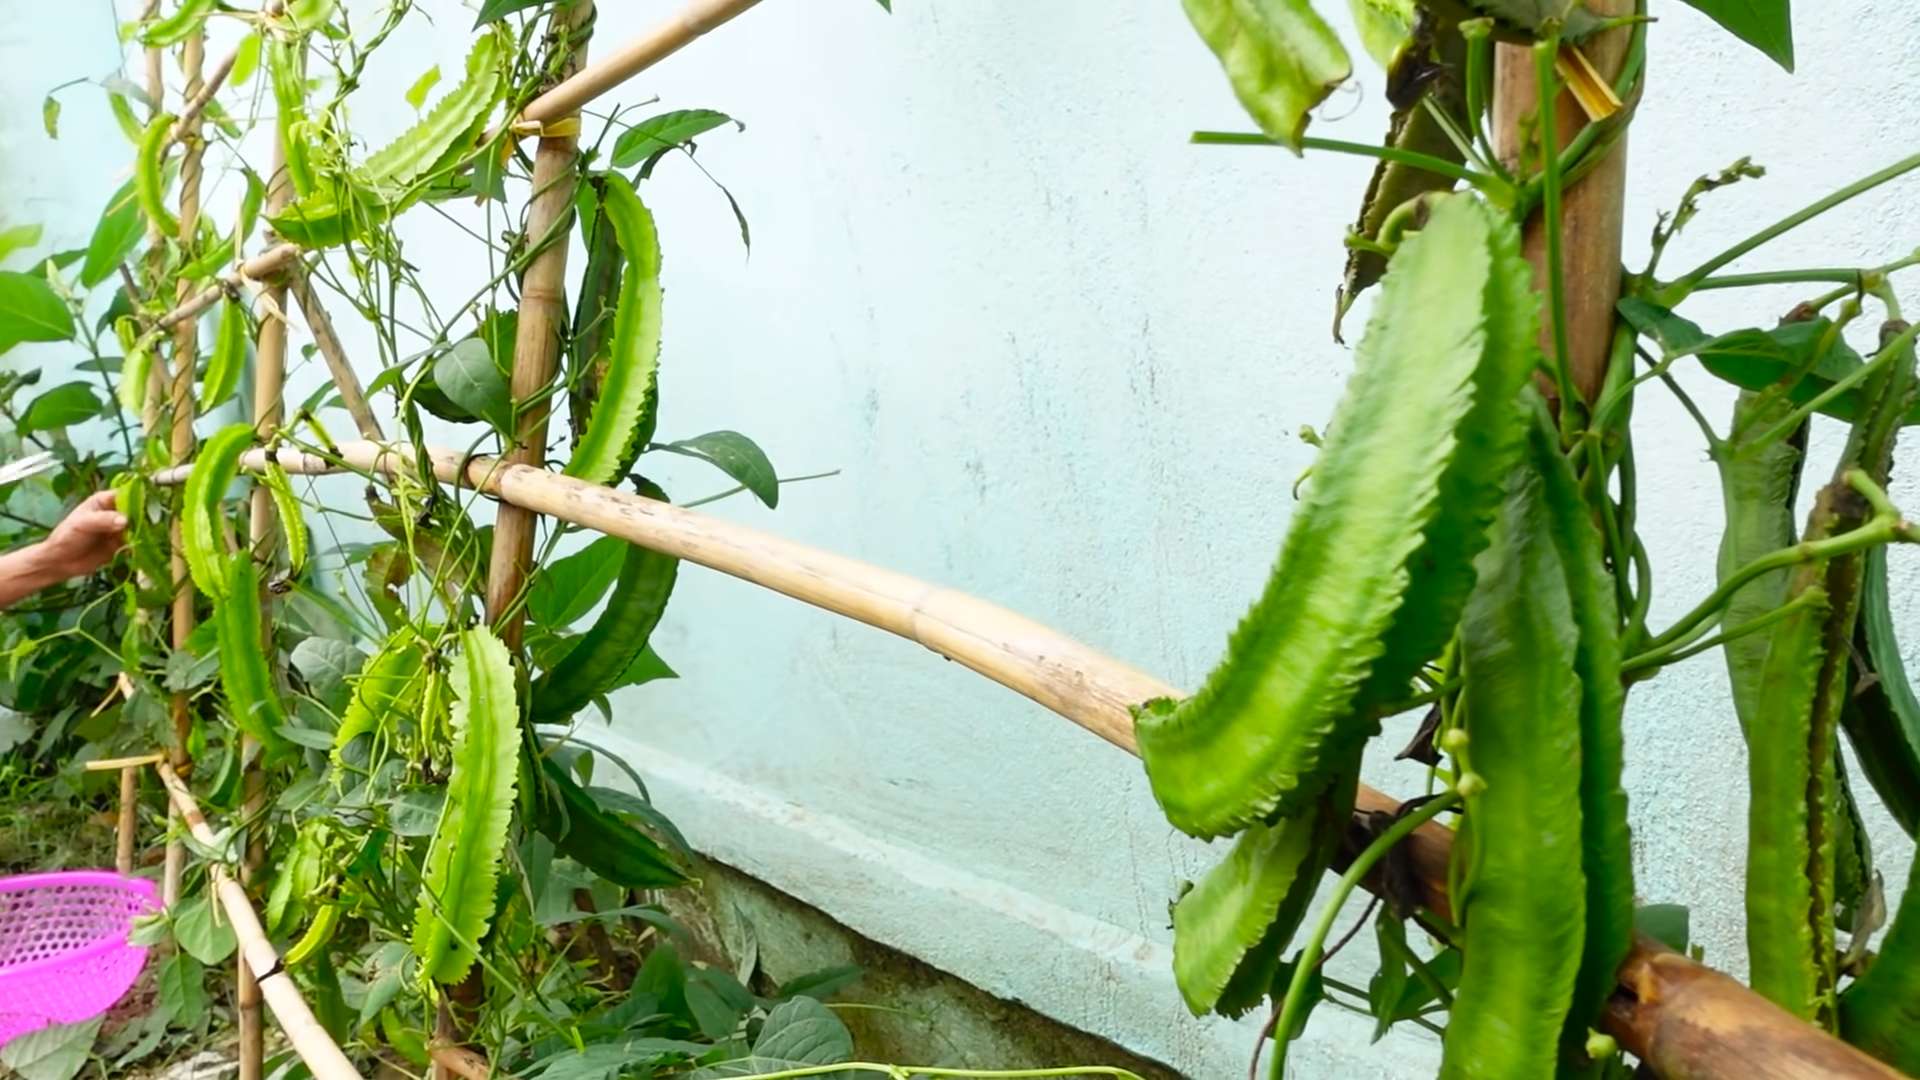
The best support structure for growing dragon beans is one that is tall, sturdy, and provides ample space for the vines to climb. A trellis made of wood, bamboo, or metal is a popular choice. You can also create a teepee structure using poles or branches tied together at the top. The key is to ensure the structure is strong enough to support the weight of the mature vines and the heavy pods. The DIY trick outlined in this article focuses on building a robust and customizable support system that can be adapted to your specific needs and resources. Remember to consider the height of your structure, as dragon beans can grow quite tall, often reaching 6-8 feet or more.
How often should I water my dragon beans?
Dragon beans need consistent moisture, especially during hot and dry weather. Water deeply and regularly, aiming to keep the soil consistently moist but not waterlogged. A good rule of thumb is to water every 2-3 days, or more frequently during periods of intense heat. Mulching around the base of the plants can help retain moisture and suppress weeds. Check the soil moisture regularly by sticking your finger into the soil about an inch deep. If the soil feels dry to the touch, it’s time to water. Avoid overhead watering, as this can increase the risk of fungal diseases. Instead, water at the base of the plants, using a soaker hose or drip irrigation system if possible.
What are some common pests and diseases that affect dragon beans, and how can I prevent them?
Dragon beans can be susceptible to various pests and diseases, including aphids, bean beetles, spider mites, and fungal infections like powdery mildew. To prevent these problems, practice good garden hygiene, such as removing weeds and debris that can harbor pests and diseases. Companion planting can also be helpful. Marigolds, for example, are known to repel many common garden pests. Regularly inspect your plants for signs of infestation or disease, and take action promptly if you notice any problems. Insecticidal soap or neem oil can be effective for controlling aphids, spider mites, and bean beetles. For fungal diseases, ensure good air circulation around the plants and avoid overhead watering. You can also use a fungicide if necessary, but always follow the instructions carefully.
When is the best time to harvest dragon beans?
Dragon beans are typically ready to harvest about 60-70 days after planting. The pods should be long, slender, and firm, but not too thick or tough. Harvest them when they are about 12-18 inches long, or when they reach your desired size. Use scissors or pruning shears to cut the pods from the vine, being careful not to damage the plant. Regular harvesting encourages continued production. The more you pick, the more the plant will produce. Overripe pods can become tough and stringy, so it’s best to harvest them while they are still young and tender.
Can I grow dragon beans in containers?
Yes, you can grow dragon beans in containers, but you’ll need to choose a large container that is at least 12 inches deep and wide. Make sure the container has drainage holes to prevent waterlogging. Use a high-quality potting mix that is well-draining and rich in nutrients. Provide a sturdy trellis or support structure for the vines to climb. Container-grown dragon beans may require more frequent watering and fertilization than those grown in the ground. Choose a sunny location that receives at least 6-8 hours of sunlight per day.
What kind of fertilizer should I use for dragon beans?
Dragon beans benefit from regular fertilization, especially during the growing season. Use a balanced fertilizer with an NPK ratio of 10-10-10 or 20-20-20. You can also use a fertilizer specifically formulated for beans and legumes. Apply the fertilizer according to the instructions on the package. Avoid over-fertilizing, as this can lead to excessive foliage growth and reduced pod production. You can also amend the soil with compost or other organic matter to improve its fertility and drainage.
How do I save seeds from my dragon beans for next year?
To save seeds from your dragon beans, allow some of the pods to mature fully on the vine. The pods will turn brown and dry, and the seeds inside will become hard and dry. Once the pods are completely dry, harvest them and shell the seeds. Spread the seeds out on a tray to dry completely for a few days. Store the dried seeds in an airtight container in a cool, dark, and dry place. Label the container with the date and variety of the seeds. Dragon bean seeds can remain viable for several years if stored properly.
What are some creative ways to use dragon beans in cooking?
Dragon beans are incredibly versatile and can be used in a variety of dishes. They can be stir-fried, steamed, grilled, or added to soups and stews. They are also delicious in salads and can be pickled or fermented. Try stir-frying them with garlic, ginger, and soy sauce for a quick and easy side dish. Add them to your favorite vegetable curry for a boost of flavor and nutrition. Grill them with a drizzle of olive oil and a sprinkle of salt and pepper for a simple and elegant appetizer. The possibilities are endless!


Leave a Comment