

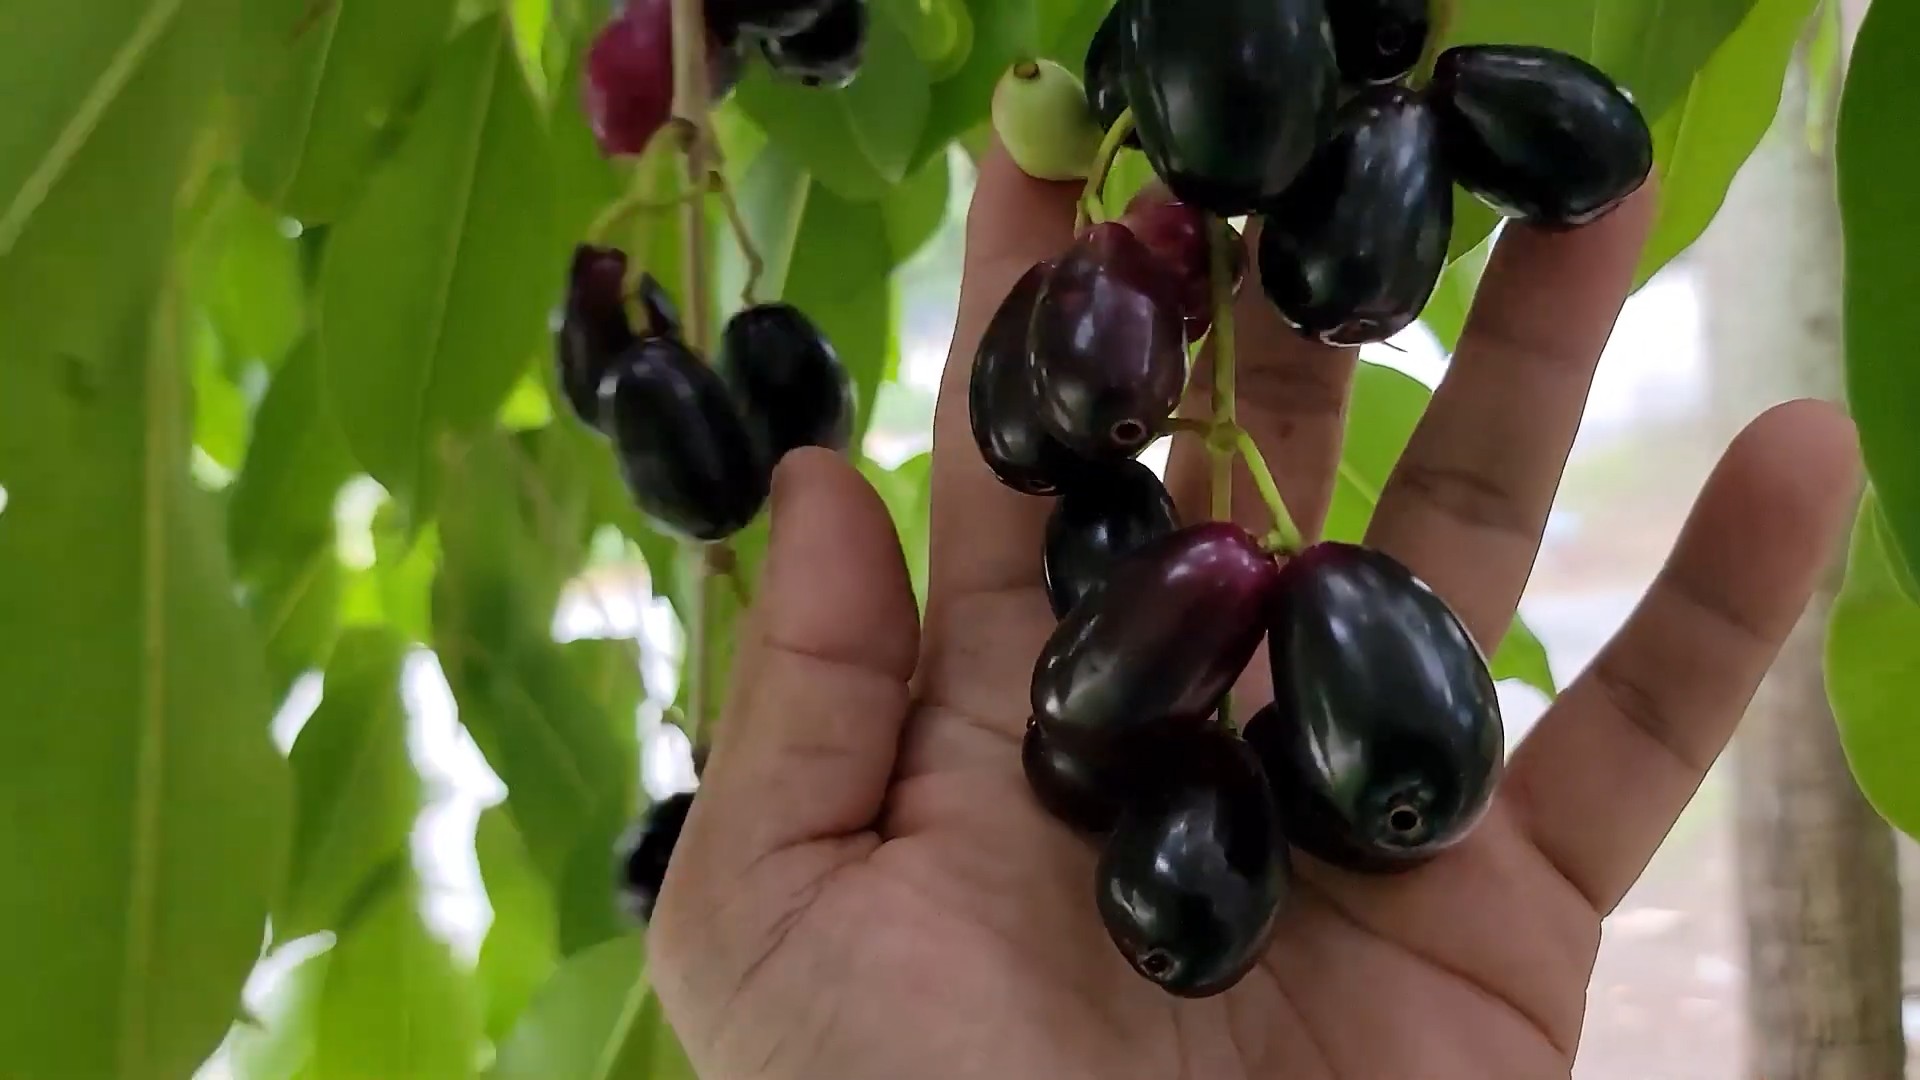
Growing Java Plum at Home can seem like a daunting task, but trust me, with a few simple tricks and a little DIY spirit, you can enjoy the sweet, tangy taste of homegrown Java plums right in your backyard! Have you ever imagined plucking a juicy, dark purple fruit straight from your own tree? It’s more achievable than you think, and this guide is here to show you how.
The Java Plum, also known as Jambolan or Jamun, has a rich history, deeply rooted in traditional medicine and culinary practices across Asia. For centuries, it’s been revered not only for its delicious fruit but also for its medicinal properties. Imagine carrying on that tradition, nurturing your own little piece of this heritage!
Why should you bother with this DIY project? Well, for starters, store-bought Java plums often lack the freshness and flavor of homegrown ones. Plus, growing Java Plum at Home allows you to control the growing environment, ensuring your fruit is free from harmful pesticides and chemicals. More importantly, it’s incredibly rewarding to watch a tiny sapling grow into a thriving tree, providing you with delicious fruit year after year. I’m excited to share these simple yet effective DIY tricks that will help you successfully cultivate your very own Java Plum tree. Let’s get started!
Growing Java Plum (Jamun) at Home: A Comprehensive DIY Guide
Hey there, fellow gardening enthusiasts! I’m thrilled to share my experience and guide you through the process of growing your very own Java Plum tree, also known as Jamun. It’s a rewarding experience, and nothing beats the taste of fresh, homegrown Jamun. Let’s dive in!
Choosing the Right Variety and Starting Material
Before we get our hands dirty, it’s crucial to select the right variety of Java Plum and the best starting material. This will significantly impact the success of your growing journey.
* Variety Selection: Look for improved varieties known for their larger fruit size, sweeter taste, and disease resistance. Local nurseries are your best bet for finding varieties that thrive in your specific climate. Ask them about the “Rajamundi” or “Seedless” varieties, as these are often preferred.
* Starting Material Options: You have two main options:
* Seedlings: These are young trees grown from seeds. While readily available, they might take longer to bear fruit (around 7-10 years) and the fruit quality might not be consistent with the parent tree.
* Grafted Plants: These are created by joining a desirable Java Plum variety (the scion) onto a strong rootstock. Grafted plants are more expensive but offer several advantages: they bear fruit sooner (usually within 3-5 years), the fruit quality is predictable, and they are often more disease-resistant. I highly recommend going for a grafted plant if you can find one.
Preparing the Planting Site
Java Plum trees need plenty of sunlight and well-drained soil to flourish. Proper site preparation is key to their long-term health and productivity.
* Sunlight: Choose a location that receives at least 6-8 hours of direct sunlight per day.
* Soil Drainage: Java Plum trees hate soggy roots. Ensure the soil drains well. If you have heavy clay soil, amend it with organic matter like compost, well-rotted manure, or peat moss to improve drainage.
* Soil pH: Java Plum trees prefer slightly acidic to neutral soil (pH 6.0-7.0). You can test your soil pH using a soil testing kit available at most garden centers. If the soil is too alkaline, you can lower the pH by adding sulfur or acidic organic matter.
* Space: Java Plum trees can grow quite large (up to 40-50 feet tall and wide), so give them plenty of space. A minimum spacing of 25-30 feet between trees is recommended.
Planting Your Java Plum Tree
Now comes the exciting part – planting your tree!
1. Dig the Hole: Dig a hole that is twice as wide as the root ball and just as deep. This allows the roots to spread easily.
2. Amend the Soil (Optional): If your soil is poor, mix some compost or well-rotted manure into the soil you removed from the hole. This will provide essential nutrients and improve soil structure.
3. Remove the Tree from the Container: Gently remove the tree from its container. If the roots are pot-bound (tightly circling the root ball), carefully loosen them with your fingers or a small trowel. This encourages the roots to grow outward into the surrounding soil.
4. Position the Tree: Place the tree in the hole, ensuring that the top of the root ball is level with the surrounding soil. For grafted plants, make sure the graft union (the point where the scion is joined to the rootstock) is a few inches above the soil line.
5. Backfill the Hole: Backfill the hole with the amended soil, gently tamping it down to remove air pockets.
6. Water Thoroughly: Water the newly planted tree thoroughly to settle the soil and provide moisture to the roots.
7. Mulch: Apply a layer of organic mulch (such as wood chips, straw, or shredded leaves) around the base of the tree, keeping it a few inches away from the trunk. Mulch helps retain moisture, suppress weeds, and regulate soil temperature.
8. Stake (Optional): If the tree is young and susceptible to wind damage, you can stake it for support. Use soft ties to attach the tree to the stake, ensuring that the ties are not too tight and do not damage the bark.
Caring for Your Java Plum Tree
Consistent care is essential for the healthy growth and fruit production of your Java Plum tree.
* Watering: Water regularly, especially during dry periods. Young trees need more frequent watering than established trees. Water deeply, allowing the water to soak into the soil. Avoid overwatering, which can lead to root rot. As a general rule, water when the top inch of soil feels dry to the touch.
* Fertilizing: Fertilize your Java Plum tree in the spring and early summer with a balanced fertilizer (e.g., 10-10-10). Follow the instructions on the fertilizer package for application rates. You can also use organic fertilizers like compost or well-rotted manure. Avoid fertilizing in the late fall or winter, as this can encourage new growth that is susceptible to frost damage.
* Pruning: Prune your Java Plum tree annually to maintain its shape, remove dead or diseased branches, and improve air circulation. The best time to prune is in late winter or early spring, before new growth begins. Remove any crossing or rubbing branches, as well as any suckers (shoots that grow from the base of the tree).
* Pest and Disease Control: Java Plum trees are generally resistant to pests and diseases, but they can occasionally be affected by aphids, scale, or fungal diseases. Inspect your tree regularly for signs of pests or diseases. If you find any, treat them promptly with appropriate insecticides or fungicides. Organic options like neem oil or insecticidal soap can be effective for controlling many pests. Good air circulation and proper watering practices can help prevent fungal diseases.
* Weed Control: Keep the area around the base of the tree free of weeds. Weeds compete with the tree for water and nutrients. You can control weeds by hand-pulling, hoeing, or applying herbicides. Mulch also helps suppress weed growth.
Harvesting Your Java Plums
The moment you’ve been waiting for! Harvesting your own delicious Java Plums.
* Timing: Java Plums typically ripen in the summer (June-August). The exact timing will depend on your climate and the variety of tree.
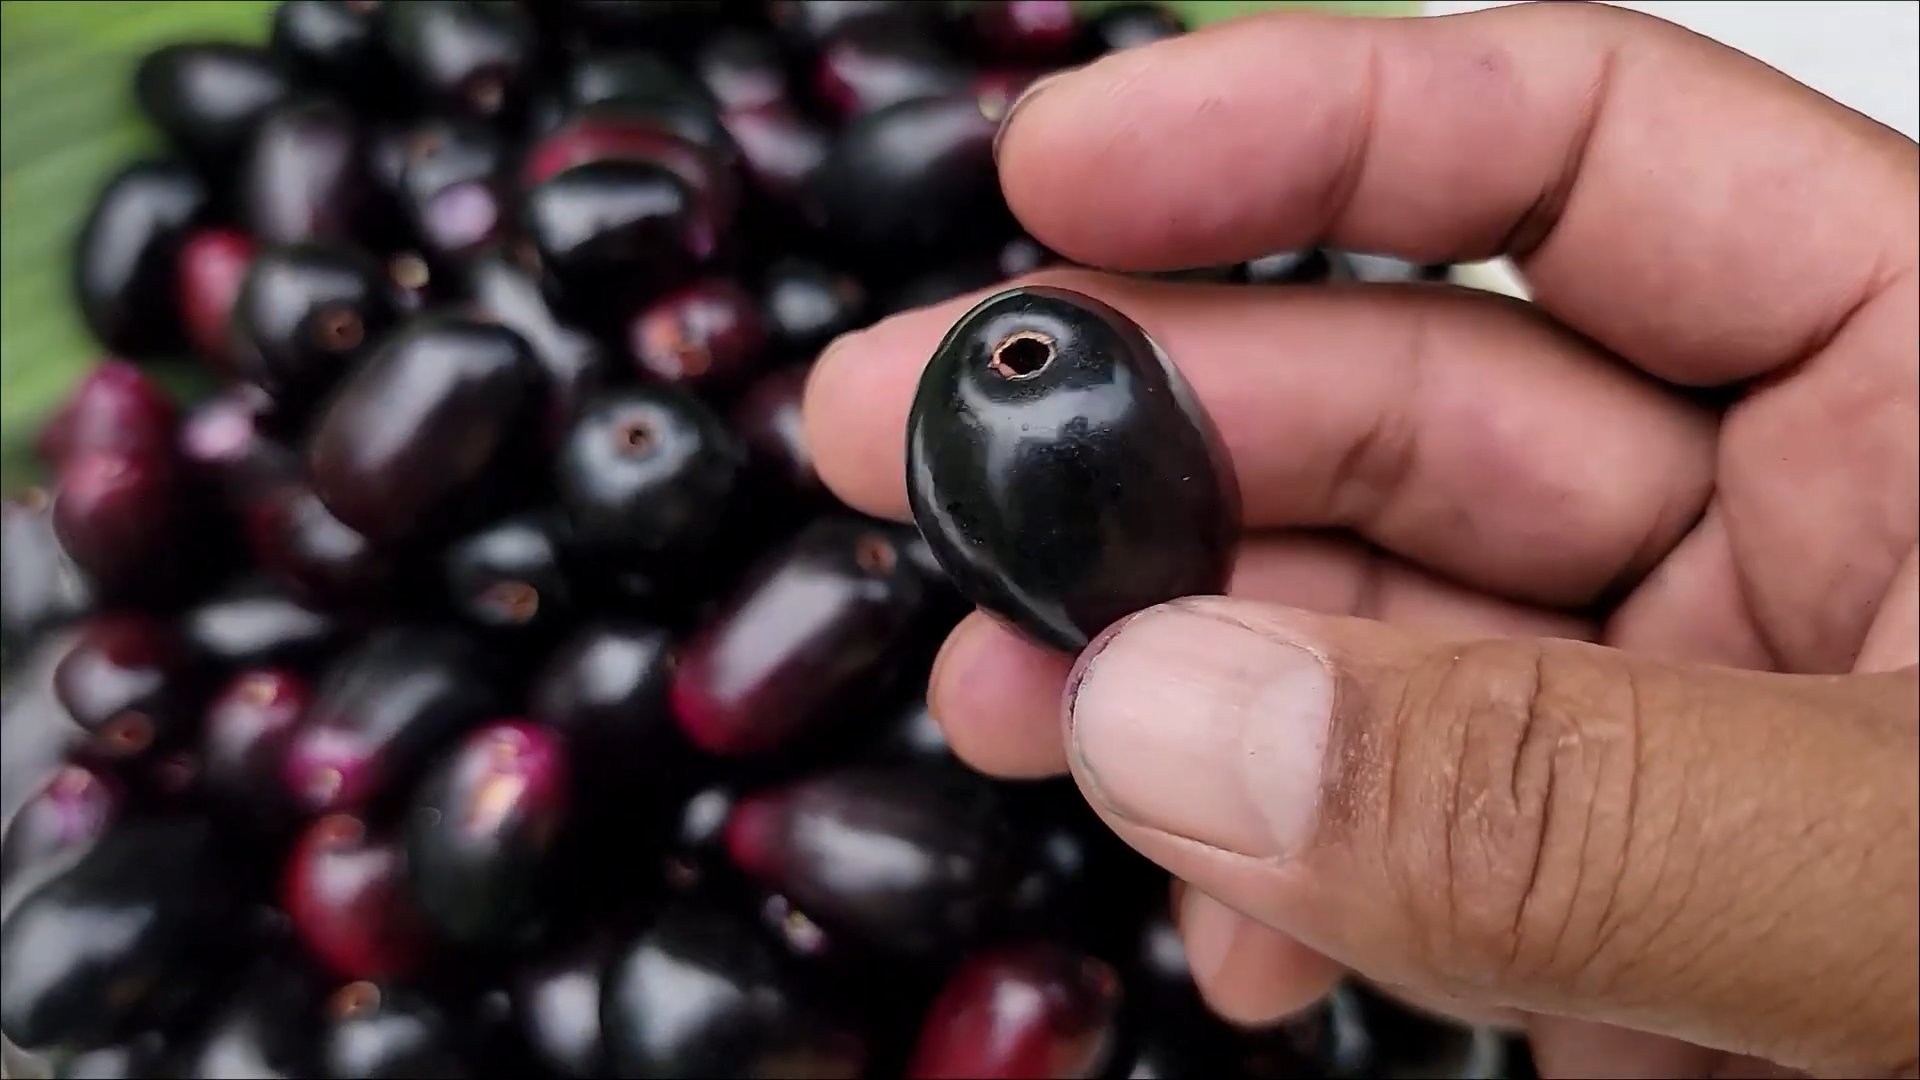
* Ripeness: The fruits are ripe when they turn a deep purple or black color and are slightly soft to the touch.
* Harvesting Technique: Gently pick the ripe fruits from the tree. You can also shake the branches to dislodge the ripe fruits. Be careful not to damage the tree or the remaining fruits.
* Storage: Java Plums are best eaten fresh, but they can also be stored in the refrigerator for a few days. You can also use them to make jams, jellies, juices, or wines.
Troubleshooting Common Problems
Even with the best care, you might encounter some challenges along the way. Here are some common problems and how to address them:
* Lack of Fruit: Several factors can contribute to a lack of fruit production, including:
* Young Age: Young trees may take several years to begin bearing fruit. Be patient!
* Insufficient Sunlight: Ensure the tree is receiving at least 6-8 hours of direct sunlight per day.
* Poor Pollination: Java Plum trees are generally self-pollinating, but cross-pollination can improve fruit set. Planting multiple trees can help.
* Nutrient Deficiency: Fertilize the tree with a balanced fertilizer in the spring and early summer.
* Improper Pruning: Avoid pruning too heavily, as this can remove flower buds.
* Leaf Yellowing: Yellowing leaves can indicate a nutrient deficiency, overwatering, or a pest infestation. Check the soil drainage, fertilize the tree, and inspect for pests.
* Pest Infestations: Treat pest infestations promptly with appropriate insecticides or organic control methods.
* Disease Problems: Prevent fungal diseases by ensuring good air circulation and avoiding overwatering. Treat any diseases with appropriate fungicides.
Propagating Java Plum Trees
If you want to expand your Java Plum orchard or share your favorite variety with friends, you can propagate new trees.
* Seed Propagation: While possible, seed propagation is not recommended for improved varieties, as the resulting trees may not be true to type. However, if you want to try it, collect ripe fruits, remove the pulp, and sow the seeds in a well-drained potting mix. Keep the soil moist and warm. Seedlings will take several years to bear fruit.
* Grafting: Grafting is the preferred method for propagating improved Java Plum varieties. This involves joining a scion (a cutting from a desirable variety) onto a strong rootstock. Grafting is a more advanced technique that requires some skill and experience. You can find
Conclusion
So, there you have it! Growing Java Plum at home, while it might seem daunting at first, is entirely achievable with a little patience, the right knowledge, and a dash of enthusiasm. We’ve walked through the essential steps, from selecting the perfect cutting or seedling to nurturing your young tree into a fruit-bearing marvel. The rewards, however, are well worth the effort. Imagine stepping into your backyard and plucking a handful of juicy, sweet-tart Java Plums, knowing you cultivated them yourself. That’s a satisfaction you simply can’t buy at the grocery store.
But why is this DIY trick a must-try? Beyond the sheer joy of homegrown fruit, growing your own Java Plum offers several compelling advantages. Firstly, you have complete control over the growing process. You can ensure your tree is nurtured organically, free from harmful pesticides and chemicals. This translates to healthier, more flavorful fruit for you and your family. Secondly, you’re contributing to a more sustainable environment. By growing your own food, you’re reducing your carbon footprint and supporting local biodiversity. And finally, let’s not forget the cost savings! Over time, you’ll be saving money on purchasing Java Plums from the store, especially considering their relatively high price and limited availability in some regions.
Now, let’s talk about variations and suggestions. While we’ve focused on the general approach, feel free to experiment and adapt the techniques to suit your specific climate and growing conditions. For example, if you live in a particularly hot and dry area, consider providing extra shade and watering during the peak summer months. You can also explore different pruning techniques to shape your tree and maximize fruit production. Some gardeners even graft different varieties of Java Plum onto a single tree to enjoy a wider range of flavors and textures. Another great idea is to use the Java Plum leaves for composting, adding valuable nutrients back into your garden soil.
Don’t be afraid to get creative and personalize your Java Plum growing journey. The most important thing is to start! Even if you encounter challenges along the way, remember that gardening is a learning process. Each mistake is an opportunity to grow (pun intended!) and improve your skills.
We wholeheartedly encourage you to try growing Java Plum at home. It’s a rewarding experience that will connect you with nature, provide you with delicious fruit, and enhance your overall well-being. Once you’ve embarked on this adventure, we’d love to hear about your experiences! Share your tips, successes, and even your challenges in the comments section below. Let’s build a community of Java Plum enthusiasts and learn from each other. Your insights could be invaluable to other aspiring gardeners. So, grab your gardening gloves, find a sunny spot in your backyard, and get ready to cultivate your own little piece of paradise. Happy growing!
Frequently Asked Questions (FAQ)
What is the best time of year to plant a Java Plum tree?
The ideal time to plant a Java Plum tree is during the late spring or early summer, after the last frost has passed. This allows the tree ample time to establish its roots before the onset of winter. However, in warmer climates with mild winters, you can plant Java Plum trees almost year-round, avoiding only the hottest and driest periods. When planting, make sure the soil is well-draining and rich in organic matter. Amending the soil with compost or well-rotted manure can significantly improve its fertility and drainage.
How long does it take for a Java Plum tree to bear fruit?
The time it takes for a Java Plum tree to bear fruit depends on several factors, including the variety of the tree, the growing conditions, and whether it was grown from seed or grafted. Generally, trees grown from seed can take anywhere from 5 to 8 years to produce fruit, while grafted trees may start bearing fruit in as little as 3 to 4 years. To encourage faster fruiting, ensure your tree receives adequate sunlight, water, and nutrients. Regular pruning can also help promote fruit production by improving air circulation and light penetration within the canopy.
What are the common pests and diseases that affect Java Plum trees?
Java Plum trees are generally quite hardy, but they can be susceptible to certain pests and diseases. Some common pests include aphids, scale insects, and fruit flies. These pests can damage the leaves, stems, and fruits of the tree. To control these pests, you can use organic insecticides such as neem oil or insecticidal soap. Regular monitoring of your tree can help you detect infestations early and prevent them from becoming severe. Common diseases that can affect Java Plum trees include fungal infections such as anthracnose and leaf spot. These diseases can cause discoloration, spotting, and premature leaf drop. To prevent fungal diseases, ensure good air circulation around the tree and avoid overwatering. You can also use copper-based fungicides to control fungal infections.
How much sunlight does a Java Plum tree need?
Java Plum trees thrive in full sunlight, requiring at least 6 to 8 hours of direct sunlight per day. Adequate sunlight is essential for photosynthesis, which is the process by which plants convert sunlight into energy. Without enough sunlight, your Java Plum tree may not grow properly, and it may produce fewer fruits. When planting your Java Plum tree, choose a location that receives plenty of sunlight throughout the day. If you live in a particularly hot climate, you may need to provide some afternoon shade to protect the tree from scorching.
What kind of soil is best for growing Java Plum trees?
Java Plum trees prefer well-draining soil that is rich in organic matter. The ideal soil pH is between 6.0 and 7.0. Before planting your Java Plum tree, it’s a good idea to test your soil to determine its pH and nutrient content. If your soil is heavy clay or sandy, you may need to amend it with compost, peat moss, or other organic materials to improve its drainage and fertility. You can also add slow-release fertilizer to the soil at planting time to provide your tree with a steady supply of nutrients.
How often should I water my Java Plum tree?
The watering needs of a Java Plum tree depend on several factors, including the climate, the soil type, and the age of the tree. Young trees need to be watered more frequently than established trees. In general, you should water your Java Plum tree deeply whenever the top inch of soil feels dry to the touch. During hot, dry weather, you may need to water your tree more frequently. Avoid overwatering, as this can lead to root rot. A good rule of thumb is to water deeply but infrequently, allowing the soil to dry out slightly between waterings.
Can I grow a Java Plum tree in a container?
Yes, you can grow a Java Plum tree in a container, but you’ll need to choose a large container that is at least 24 inches in diameter. The container should also have drainage holes to prevent waterlogging. Use a well-draining potting mix that is rich in organic matter. Container-grown Java Plum trees will need to be watered and fertilized more frequently than trees grown in the ground. You’ll also need to prune the roots of your container-grown tree every few years to prevent it from becoming root-bound.
How do I prune a Java Plum tree?
Pruning is an important part of caring for a Java Plum tree. Regular pruning helps to maintain the tree’s shape, improve air circulation, and promote fruit production. The best time to prune a Java Plum tree is during the dormant season, which is typically in late winter or early spring. Remove any dead, damaged, or diseased branches. Also, remove any branches that are crossing or rubbing against each other. Thin out the canopy to allow more sunlight to reach the interior of the tree. You can also prune the tips of the branches to encourage branching and bushier growth.
Are Java Plums safe to eat?
Yes, Java Plums are generally safe to eat when ripe. However, unripe Java Plums can be quite tart and astringent. Some people may also experience mild digestive upset after eating large quantities of Java Plums. If you have any concerns, it’s always best to consult with your doctor before eating Java Plums. The seed inside the plum is not edible and should be discarded.
How can I use Java Plums?
Java Plums can be eaten fresh, or they can be used to make jams, jellies, juices, and wines. They can also be used in desserts such as pies, tarts, and ice cream. Java Plums are a good source of vitamins, minerals, and antioxidants. They are also low in calories and fat. The fruit has a unique sweet and tart flavor that makes it a versatile ingredient in both sweet and savory dishes.
Leave a Comment