

Growing Lupins from Seed might seem daunting, but trust me, it’s incredibly rewarding! Imagine your garden bursting with vibrant, towering lupins, all thanks to your own green thumb. For centuries, these beauties have graced gardens, adding a touch of whimsical charm and attracting beneficial pollinators. Their history is intertwined with folklore and artistry, often depicted in paintings and celebrated for their striking presence.
But why bother with growing lupins from seed when you can buy established plants? Well, for starters, it’s significantly more budget-friendly! Plus, there’s a unique satisfaction in nurturing a plant from its very beginning. I’ve found that starting from seed gives you more control over the varieties you grow, allowing you to choose from a wider range of colors and sizes that might not be readily available at your local nursery.
This DIY guide is your key to unlocking a garden filled with these stunning blooms. I’ll walk you through every step, from seed selection to transplanting, ensuring you have all the knowledge you need for successful growing lupins from seed. Forget expensive garden centers – let’s create a lupin paradise together, one seed at a time!
Growing Lupines from Seed: A Comprehensive DIY Guide
Hey there, fellow gardening enthusiasts! I’m so excited to share my experience with growing lupines from seed. These beauties are not only stunning additions to any garden, but they’re also surprisingly easy to cultivate, even for beginner gardeners. I’ve had great success with them, and I’m confident you will too! Let’s dive in!
Understanding Lupines
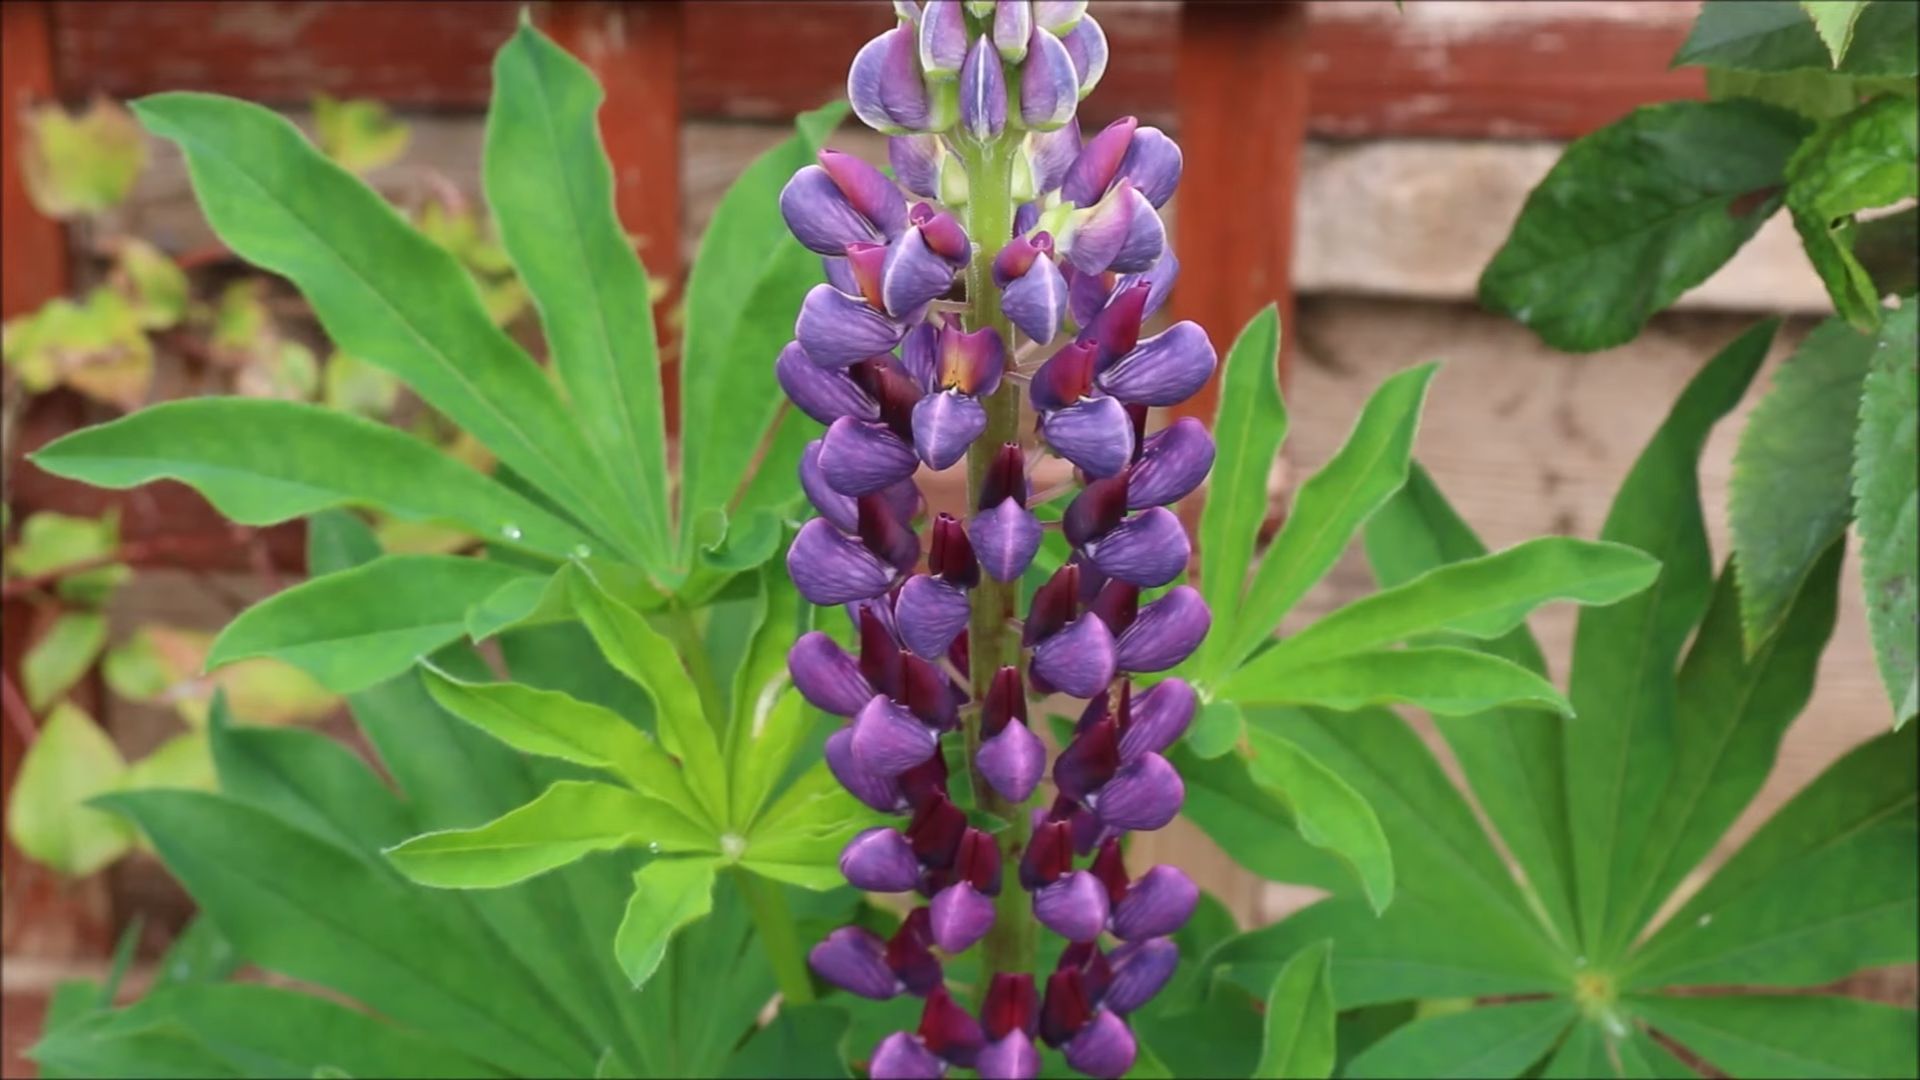
Before we get our hands dirty, let’s talk a little about lupines. They belong to the legume family and are known for their tall, vibrant flower spikes that come in a rainbow of colors – pink, purple, blue, yellow, white, and even bi-colored varieties. They’re also nitrogen fixers, meaning they can improve the soil quality in your garden.
Lupines thrive in well-drained soil and prefer full sun to partial shade. They’re generally hardy in zones 3-8, but it’s always a good idea to check the specific requirements for the variety you’re growing.
Materials You’ll Need
To get started, you’ll need the following:
* Lupine seeds (choose your favorite colors!)
* Small pots or seed trays
* Seed starting mix (or a well-draining potting mix)
* Watering can or spray bottle
* A warm, bright location (or a grow light)
* Optional: Sandpaper or a nail file for scarification
* Optional: Rooting hormone
Phase 1: Preparing the Seeds
Lupine seeds have a tough outer coating, which can sometimes make it difficult for them to germinate. To improve your chances of success, we’ll use a technique called scarification.
What is Scarification?
Scarification involves gently scratching or nicking the seed coat to allow water to penetrate more easily. There are a few ways to do this:
1. Sandpaper Method: Gently rub the seeds between two pieces of fine-grit sandpaper. Be careful not to grind them into dust! Just a few light rubs should do the trick.
2. Nail File Method: Use a nail file to gently nick the seed coat. Again, be very careful not to damage the inside of the seed.
3. Soaking Method: Soak the seeds in warm water for 24 hours. This can help soften the seed coat and improve germination. I often combine this with one of the other methods for best results.
Step-by-Step Scarification Instructions
1. Gather your materials: You’ll need your lupine seeds, sandpaper (or a nail file), and a small bowl of warm water (optional).
2. Scarify the seeds: If using sandpaper, place a few seeds between the sandpaper and gently rub them back and forth. If using a nail file, carefully nick the seed coat of each seed.
3. Soak the seeds (optional): Place the scarified seeds in a bowl of warm water and let them soak for 24 hours.
4. Drain the seeds: After soaking, drain the water and gently pat the seeds dry with a paper towel.
Phase 2: Sowing the Seeds
Now that our seeds are prepped, it’s time to sow them! I prefer to start lupines indoors a few weeks before the last expected frost. This gives them a head start and allows them to establish strong roots before being transplanted outdoors.
Step-by-Step Sowing Instructions
1. Prepare your pots or seed trays: Fill your pots or seed trays with seed starting mix. Make sure the mix is moist but not soggy.
2. Sow the seeds: Make a small hole (about 1/4 inch deep) in the soil of each pot or cell. Place one or two seeds in each hole.
3. Cover the seeds: Gently cover the seeds with soil and lightly pat it down.
4. Water the seeds: Water the seeds gently using a watering can or spray bottle. Avoid overwatering, as this can lead to rot.
5. Provide warmth and light: Place the pots or seed trays in a warm, bright location. If you don’t have a sunny windowsill, you can use a grow light. I’ve found that a consistent temperature of around 65-70°F (18-21°C) is ideal for germination.
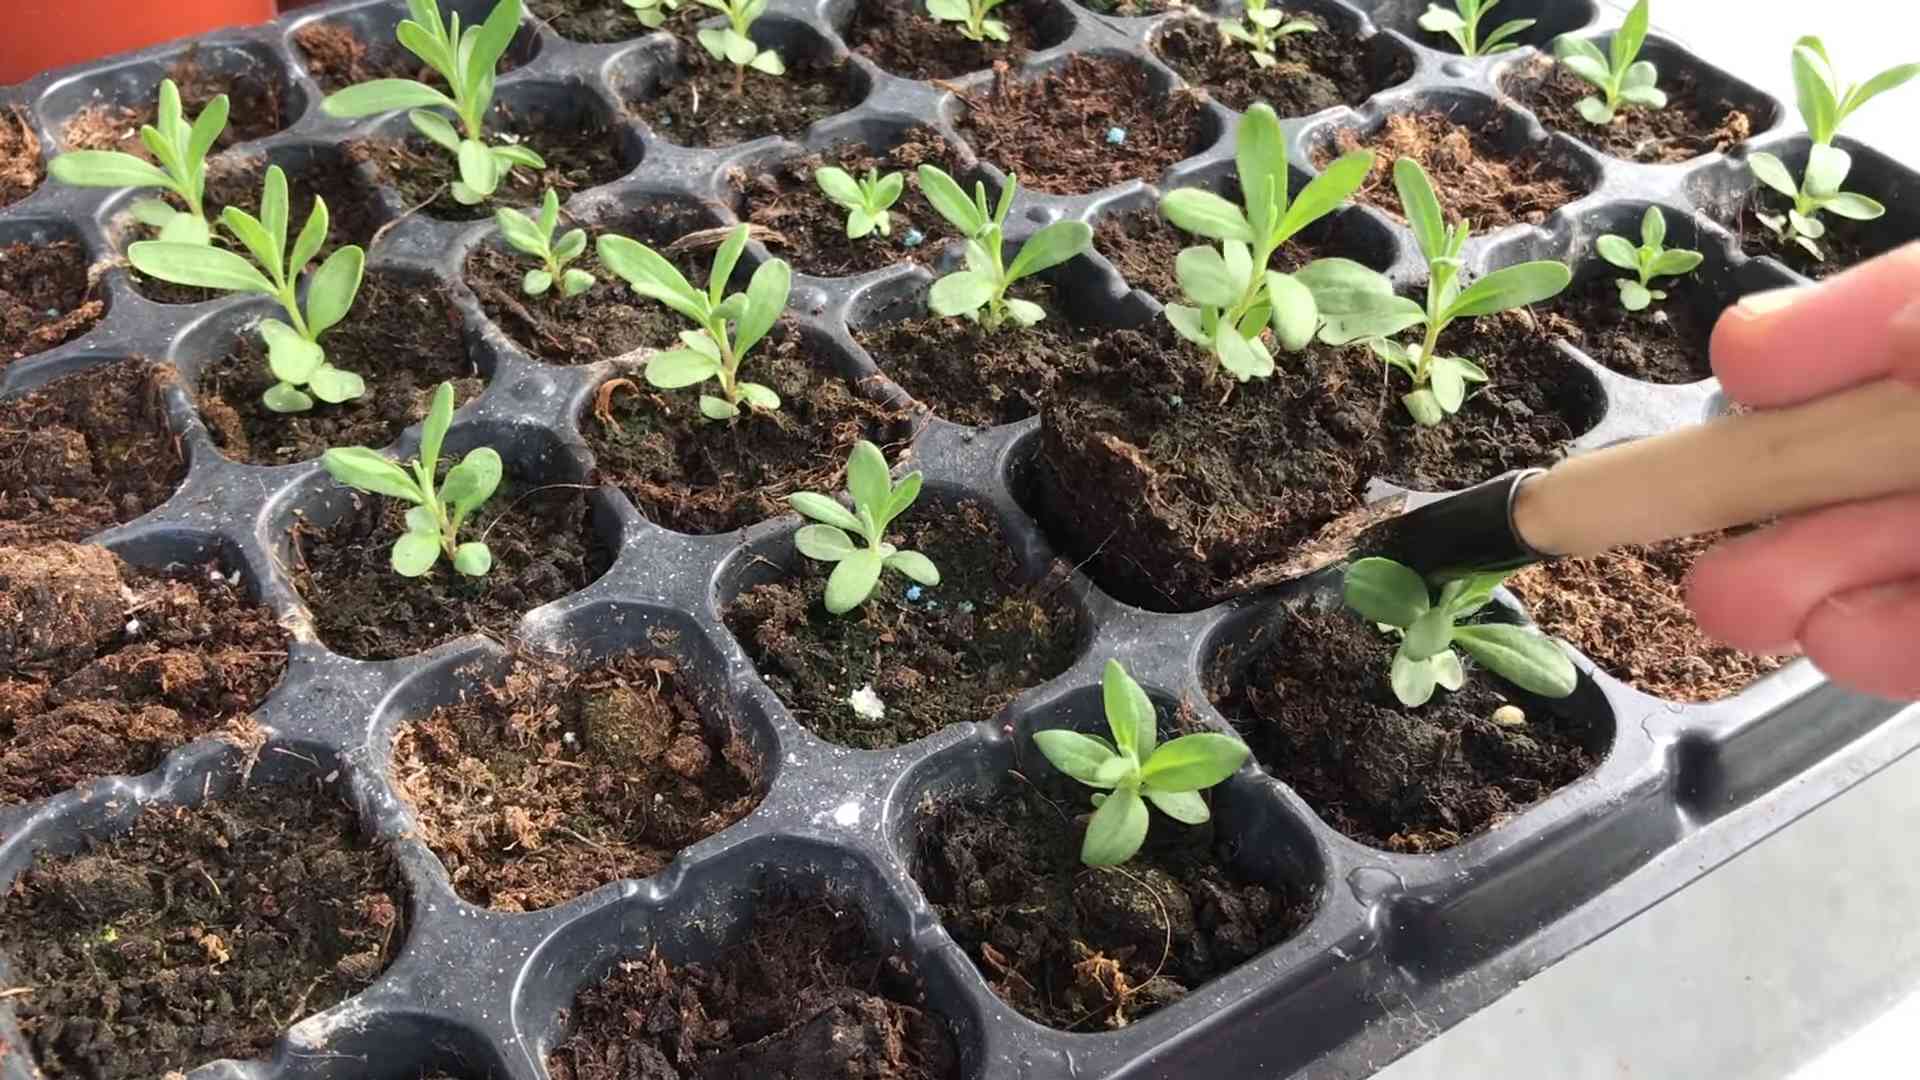
Phase 3: Caring for Seedlings
Once your lupine seeds have germinated (usually within 7-21 days), it’s important to provide them with proper care to ensure they grow into healthy, strong plants.
Step-by-Step Seedling Care Instructions
1. Watering: Keep the soil consistently moist, but avoid overwatering. Water when the top inch of soil feels dry to the touch.
2. Light: Provide plenty of light. If you’re using a grow light, keep it on for 12-16 hours per day.
3. Thinning: If you planted two seeds in each pot or cell and both have germinated, thin them out by snipping off the weaker seedling at the soil line. This will give the remaining seedling more room to grow.
4. Fertilizing: Once the seedlings have developed their first true leaves (the leaves that appear after the initial seed leaves), you can start fertilizing them with a diluted liquid fertilizer. I like to use a balanced fertilizer, such as a 10-10-10 formula, diluted to half strength.
5. Hardening off: Before transplanting your lupine seedlings outdoors, you’ll need to harden them off. This process gradually acclimates them to outdoor conditions, such as sunlight, wind, and temperature fluctuations. To harden off your seedlings, start by placing them outdoors in a sheltered location for a few hours each day. Gradually increase the amount of time they spend outdoors over the course of a week or two.
Phase 4: Transplanting Outdoors
Once your lupine seedlings have been hardened off and the danger of frost has passed, it’s time to transplant them into your garden.
Step-by-Step Transplanting Instructions
1. Choose a location: Select a location in your garden that receives full sun to partial shade and has well-drained soil.
2. Prepare the soil: Dig a hole that is slightly larger than the root ball of your lupine seedling. Amend the soil with compost or other organic matter to improve drainage and fertility.
3. Remove the seedling from the pot: Gently remove the lupine seedling from its pot, being careful not to damage the roots.
4. Plant the seedling: Place the seedling in the hole and backfill with soil. Gently pat the soil down around the base of the plant.
5. Water thoroughly: Water the newly transplanted lupine seedling thoroughly.
6. Mulch: Apply a layer of mulch around the base of the plant to help retain moisture and suppress weeds.
Phase 5: Ongoing Care
Once your lupines are established in your garden, they’re relatively low-maintenance. However, there are a few things you can do to keep them healthy and blooming beautifully.
Ongoing Care Tips
* Watering: Water your lupines regularly, especially during dry spells.
* Fertilizing: Fertilize your lupines in the spring with a balanced fertilizer.
* Deadheading: Deadhead spent flower spikes to encourage more blooms. Simply cut off the faded flower spikes at the base of the plant.
* Staking: Tall lupine varieties may need to be staked to prevent them from flopping over.
* Pest and disease control: Keep an eye out for pests and diseases, such as aphids, slugs, and powdery mildew. Treat any problems promptly with appropriate organic controls.
* Dividing: After a few years, your lupines may become crowded. You can divide them in the spring or fall to rejuvenate them.
Troubleshooting
Even with the best care, you may encounter some challenges when growing lupines from seed. Here are a few common problems and how to address them:
* Poor germination: If your lupine seeds aren’t germinating, make sure you’ve scarified them properly and that the soil is warm and moist.
* Leggy seedlings: If your seedlings are tall and spindly, they’re probably not getting enough light. Move them to a brighter location or use a grow light.
* Yellowing leaves: Yellowing leaves can be a sign of overwatering, nutrient deficiency, or pest infestation. Adjust your watering schedule, fertilize your plants, and inspect them for pests.
* Powdery mildew: Powdery mildew is a fungal disease that can affect lupines. To prevent powdery mildew, provide good air circulation and avoid overhead watering. If you see signs of powdery mildew, treat your plants with a fungicide.
Enjoying Your Lupines
Growing lupines from seed is a rewarding experience. With a little patience and care, you can enjoy these beautiful flowers in
Conclusion
So, there you have it! Growing lupins from seed isn’t just a cost-effective way to fill your garden with these stunning spires of color; it’s a deeply rewarding experience. From the initial excitement of seeing those first tiny sprouts emerge to the triumphant display of vibrant blooms, each stage is a testament to the magic of nature and your own green-thumbed abilities.
Why is this DIY trick a must-try? Because it puts you in control. You get to choose the exact varieties you want, ensuring a harmonious color palette and bloom time in your garden. You avoid the often-inflated prices of pre-grown lupin plants at nurseries, and you gain a deeper understanding of the plant’s life cycle, making you a more knowledgeable and confident gardener. Plus, there’s nothing quite like the satisfaction of knowing you nurtured these beauties from the very beginning.
Don’t be afraid to experiment! Consider variations like starting your seeds indoors earlier in the season for a head start, especially if you live in a colder climate. You could also try different scarification methods to see which works best for you – some gardeners swear by a gentle nick with a knife, while others prefer the sandpaper technique. And for a truly unique display, try mixing different lupin varieties in the same pot or garden bed to create a kaleidoscope of colors.
Remember, patience is key. Lupins can sometimes be a little slow to get going, but the wait is well worth it. With a little care and attention, you’ll be rewarded with a breathtaking display of these majestic flowers.
We wholeheartedly encourage you to give this DIY trick a try. Embrace the process, learn from any challenges, and most importantly, enjoy the journey. Once your lupins are in full bloom, be sure to share your experience with us! We’d love to see photos of your stunning lupin displays and hear any tips or tricks you’ve discovered along the way. Share your successes (and even your learning curves!) in the comments below. Let’s create a community of lupin lovers and inspire others to experience the joy of growing these magnificent flowers from seed. This is truly the best way to ensure you get the exact lupin varieties you desire and to save money while doing it. So, get planting and prepare to be amazed by the beauty you can create!
Frequently Asked Questions (FAQs)
Q: When is the best time to sow lupin seeds?
A: The ideal time to sow lupin seeds is either in early spring (March-April) or in late summer/early autumn (August-September). Spring sowing allows the plants to establish themselves before the heat of summer, while autumn sowing allows them to develop strong roots over winter for an earlier and more robust display the following year. Consider your local climate when deciding which time is best for you. In colder regions, spring sowing might be preferable to avoid the risk of frost damage to young seedlings.
Q: Do lupin seeds need scarification before sowing?
A: Yes, scarification is highly recommended for lupin seeds. Lupin seeds have a hard outer coating that can prevent water from penetrating and initiating germination. Scarification helps to weaken this coating, allowing moisture to reach the embryo and trigger the germination process. As mentioned earlier, you can scarify lupin seeds by gently nicking them with a knife, rubbing them with sandpaper, or soaking them in warm water for 24 hours.
Q: What type of soil is best for growing lupins?
A: Lupins prefer well-drained soil that is slightly acidic to neutral. They don’t thrive in heavy clay soils that retain too much moisture. If your soil is heavy, amend it with compost or other organic matter to improve drainage. Avoid soils that are overly rich in nitrogen, as this can encourage excessive foliage growth at the expense of flowering.
Q: How deep should I sow lupin seeds?
A: Sow lupin seeds about 1/2 inch (1.25 cm) deep in the soil. Cover them lightly with soil and gently water the area. Avoid burying the seeds too deep, as this can prevent them from germinating.
Q: How long does it take for lupin seeds to germinate?
A: Lupin seeds typically germinate within 14-21 days, depending on the temperature and moisture levels. Keep the soil consistently moist but not waterlogged during this period.
Q: What are the best growing conditions for lupins?
A: Lupins thrive in full sun to partial shade. They need at least six hours of sunlight per day to produce abundant blooms. In hotter climates, some afternoon shade can be beneficial to prevent the plants from scorching.
Q: How often should I water lupins?
A: Water lupins regularly, especially during dry periods. Keep the soil consistently moist but avoid overwatering, as this can lead to root rot. Water deeply and less frequently, rather than shallowly and more often.
Q: Do lupins need fertilizer?
A: Lupins are relatively low-maintenance plants and don’t require heavy fertilization. However, you can apply a balanced fertilizer in early spring to promote healthy growth and flowering. Avoid fertilizers that are high in nitrogen, as this can encourage excessive foliage growth.
Q: How do I prevent lupins from flopping over?
A: Lupins can sometimes become top-heavy and flop over, especially after heavy rain or wind. To prevent this, provide support by staking the plants or using plant supports. You can also pinch back the tips of the stems in early spring to encourage bushier growth and stronger stems.
Q: Are lupins susceptible to any pests or diseases?
A: Lupins can be susceptible to aphids, slugs, and snails. Inspect your plants regularly and take action to control these pests if necessary. They can also be affected by powdery mildew, a fungal disease that causes a white powdery coating on the leaves. To prevent powdery mildew, ensure good air circulation around the plants and avoid overhead watering.
Q: Can I save seeds from my lupins?
A: Yes, you can save seeds from your lupins to grow more plants the following year. Allow the seed pods to dry on the plant, then harvest them and remove the seeds. Store the seeds in a cool, dry place until you’re ready to sow them. Be aware that seeds saved from hybrid lupins may not produce plants that are true to type.
Q: Are lupins poisonous?
A: Yes, all parts of the lupin plant are poisonous if ingested. Keep them away from children and pets. Wear gloves when handling lupins, as the sap can cause skin irritation in some people.
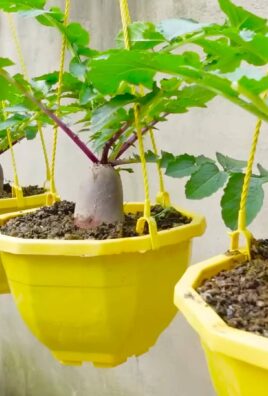
Q: Can I grow lupins in containers?
A: Yes, you can grow lupins in containers, but choose a large container that is at least 12 inches (30 cm) in diameter to accommodate their root system. Use a well-draining potting mix and water regularly. Container-grown lupins may need more frequent fertilization than those grown in the ground.
Q: How long do lupins live?
A: Lupins are typically short-lived perennials, meaning they live for only a few years. However, they often self-seed readily, so you can maintain a continuous display of lupins in your garden. Deadhead spent flowers to encourage more blooms and prevent the plants from self-seeding if you don’t want them to spread.


Leave a Comment