

Home cleaning and freshening tips are more than just about tidying up; they’re about creating a sanctuary, a space where you feel truly comfortable and at peace. Have you ever walked into a home and instantly felt a sense of calm and freshness? That’s the power of a well-maintained and fragrant living space! But let’s be honest, keeping our homes sparkling and smelling delightful can sometimes feel like a never-ending battle.
For centuries, cultures around the world have placed immense value on the cleanliness and aroma of their homes. From ancient rituals involving fragrant herbs to modern-day cleaning innovations, the desire for a fresh and inviting home is deeply ingrained in our human experience. Think about it – our homes are where we recharge, connect with loved ones, and create lasting memories. Shouldn’t they reflect the best version of ourselves?
That’s where these DIY home cleaning and freshening tips come in! I’m going to share some simple, effective, and often overlooked tricks that will transform your living space into a haven of cleanliness and delightful scents. We all deserve a home that feels good, and with these easy hacks, you can achieve that without breaking the bank or spending hours scrubbing. So, let’s dive in and discover how to make your home a place you truly love to be!

DIY Home Cleaning and Freshening Hacks: Breathe New Life into Your Space!
Okay, let’s face it, cleaning isn’t exactly anyone’s favorite pastime. But a clean and fresh-smelling home? That’s something we can all get behind! I’m going to share some of my favorite DIY cleaning and freshening hacks that are not only effective but also budget-friendly and use ingredients you probably already have in your pantry. Get ready to transform your home into a sparkling sanctuary!
Hack 1: Sparkling Clean Microwave with Lemon Power
That microwave… it’s a magnet for splatters and grime, isn’t it? Forget harsh chemicals; lemon is your new best friend.
* The Magic Ingredient: Lemon (fresh or juice)
* Tools You’ll Need: Microwave-safe bowl, water, sponge or cloth
Step-by-Step Instructions:
1. Prepare the Lemon Solution: Fill a microwave-safe bowl with about 1 cup of water. Cut a lemon in half and squeeze the juice into the water. Then, drop the lemon halves into the bowl as well. If you only have lemon juice on hand, add about 2 tablespoons to the water.
2. Microwave the Solution: Place the bowl in the microwave and heat on high for 3-5 minutes. You want the water to boil and create steam. This steam is what loosens all the stuck-on food particles.
3. Let it Sit (Important!): Leave the microwave door closed for another 5-10 minutes. This allows the steam to really work its magic. Don’t be tempted to open it too soon!
4. Wipe it Down: Carefully remove the bowl (it will be hot!). Use a sponge or cloth to wipe down the inside of the microwave. You’ll be amazed at how easily the grime comes off. For stubborn spots, you can use the lemon halves to scrub gently.
5. Final Touches: Wipe the turntable and the outside of the microwave. Enjoy your sparkling clean microwave!
Hack 2: Freshen Your Mattress with Baking Soda
Did you know your mattress can harbor dust mites, dead skin cells, and odors? Yuck! This simple baking soda trick will freshen it up in no time.
* The Deodorizing Powerhouse: Baking Soda
* Optional Boosters: Essential oils (lavender, eucalyptus, tea tree), vacuum cleaner with upholstery attachment
* Tools You’ll Need: Sifter or strainer
Step-by-Step Instructions:
1. Strip the Bed: Remove all bedding, including sheets, blankets, and mattress protectors. Wash them according to their care instructions.
2. Sprinkle Baking Soda: Generously sprinkle baking soda over the entire surface of your mattress. Use a sifter or strainer to ensure an even coating.
3. Optional: Add Essential Oils: If you want to add a pleasant scent, mix a few drops of your favorite essential oil (lavender is great for relaxation) with the baking soda before sprinkling.
4. Let it Sit (The Key Step): This is crucial! Let the baking soda sit on the mattress for at least 30 minutes, but ideally for several hours (or even overnight). The longer it sits, the more odors and moisture it will absorb.
5. Vacuum Thoroughly: Use a vacuum cleaner with an upholstery attachment to thoroughly vacuum the entire surface of the mattress. Make sure to get into all the nooks and crannies.
6. Flip and Repeat: Flip the mattress over and repeat steps 2-5 on the other side.
7. Air it Out: If possible, open a window to air out the mattress for a few hours after vacuuming.
8. Make the Bed: Once the mattress is completely dry, make the bed with fresh, clean linens.
Hack 3: DIY All-Purpose Cleaner with Vinegar
Vinegar is a cleaning superstar! This all-purpose cleaner is perfect for countertops, floors, and more.
* The Cleaning Base: White Vinegar
* The Scent Booster: Essential Oils (lemon, orange, tea tree)
* The Water Component: Water
* Tools You’ll Need: Spray bottle, measuring cup
Step-by-Step Instructions:
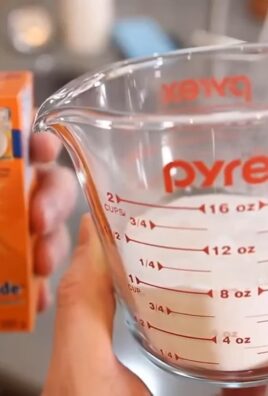
1. Mix the Solution: In a spray bottle, combine equal parts white vinegar and water. For example, 1 cup of vinegar and 1 cup of water.
2. Add Essential Oils (Optional): Add 10-20 drops of your favorite essential oil to the mixture. Lemon, orange, and tea tree are great choices for their cleaning and disinfecting properties.
3. Shake Well: Shake the spray bottle well to combine the ingredients.
4. Test in an Inconspicuous Area: Before using the cleaner on a large surface, test it in a small, inconspicuous area to make sure it doesn’t damage the material.
5. Spray and Wipe: Spray the cleaner onto the surface you want to clean and wipe it down with a clean cloth or sponge.
6. Rinse (If Necessary): For some surfaces, you may need to rinse with water after cleaning.
Important Note: Do not use vinegar-based cleaners on marble, granite, or other natural stone surfaces, as it can damage them.
Hack 4: Unclog Drains with Baking Soda and Vinegar (The Volcano Method!)
A clogged drain is a major annoyance. This baking soda and vinegar trick is a natural and effective way to clear those blockages.
* The Dynamic Duo: Baking Soda and White Vinegar
* The Hot Water Assistant: Boiling Water
* Tools You’ll Need: Measuring cup
Step-by-Step Instructions:
1. Pour Baking Soda: Pour about 1/2 cup of baking soda down the clogged drain.
2. Add Vinegar: Immediately follow with 1 cup of white vinegar.
3. The Fizzing Action: You’ll see and hear a fizzing reaction. This is the baking soda and vinegar working together to break down the clog.
4. Let it Sit: Let the mixture sit for at least 30 minutes, or even longer for stubborn clogs.
5. Flush with Boiling Water: After the waiting period, carefully pour a pot of boiling water down the drain.
6. Repeat if Necessary: If the drain is still clogged, repeat the process.
7. Prevention is Key: To prevent future clogs, avoid pouring grease down the drain and use a drain strainer to catch hair and other debris.
Hack 5: Freshening Carpets with Baking Soda and Essential Oils
Carpets can trap odors and allergens. This simple baking soda and essential oil treatment will leave your carpets smelling fresh and clean.
* The Odor Absorber: Baking Soda
* The Fragrance Booster: Essential Oils (lavender, eucalyptus, lemon)
* Tools You’ll Need: Vacuum cleaner, shaker or jar with a lid
Step-by-Step Instructions:
1. Mix Baking Soda and Essential Oils: In a shaker or jar, combine 1 cup of baking soda with 10-20 drops of your favorite essential oil. Lavender, eucalyptus, and lemon are all great choices.
2. Shake Well: Shake the mixture well to distribute the essential oils evenly throughout the baking soda.
3. Sprinkle on Carpet: Sprinkle the baking soda mixture evenly over the entire carpet.
4. Let it Sit: Let the baking soda sit on the carpet for at least 30 minutes, or even longer for heavily soiled carpets. Overnight is ideal.
5. Vacuum Thoroughly: Vacuum the carpet thoroughly to remove all the baking soda.
6. Enjoy the Fresh Scent: Enjoy your freshly scented and deodorized carpet!
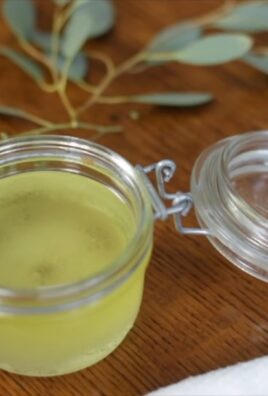
Hack 6: DIY Furniture Polish with Olive Oil and Lemon Juice
Give your wooden furniture a natural shine with this simple DIY polish.
* The Shine Enhancer: Olive Oil
* The Cleaning Agent: Lemon Juice
* Tools You’ll Need: Spray bottle or bowl, soft cloth
Step-by-Step Instructions:
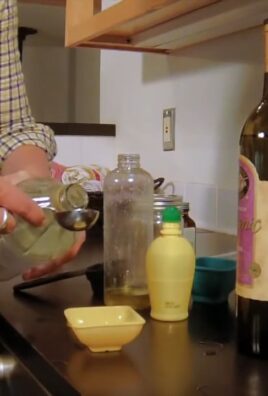
1. Mix the Polish: In a spray bottle or bowl, combine 1/4 cup of olive oil with 1 tablespoon of lemon juice.
2. Shake or Stir Well: Shake the spray bottle or stir the mixture well to combine the ingredients.
3. Apply to Furniture: Lightly spray or apply the polish to your wooden furniture.
4. Wipe with a Soft Cloth: Use a soft cloth to wipe the polish into the wood, following the grain.
5. Buff to a Shine: Use a clean, dry cloth to buff the furniture to a shine.
Important Note: Test the polish in a small, inconspicuous area before applying
Conclusion
So, there you have it! Transforming your home into a haven of freshness and cleanliness doesn’t require a fortune or a cupboard full of harsh chemicals. This DIY approach to home cleaning and freshening is not only budget-friendly and eco-conscious, but it also allows you to customize the scents and ingredients to perfectly suit your preferences and needs.
Why is this a must-try? Because it empowers you to take control of your living environment, creating a space that is both healthy and inviting. Imagine walking into your home and being greeted by the subtle, natural aroma of lavender and lemon, instead of the overpowering scent of artificial fragrances. Think about the peace of mind knowing that you’re cleaning with ingredients that are safe for your family, your pets, and the planet.
But the benefits extend beyond just the immediate results. By embracing this DIY philosophy, you’re fostering a more mindful and sustainable lifestyle. You’re reducing your reliance on single-use plastics, minimizing your exposure to potentially harmful chemicals, and connecting with the simple pleasure of creating something useful and beautiful with your own hands.
Don’t be afraid to experiment and personalize these recipes. For a more invigorating scent, try adding a few drops of peppermint or eucalyptus essential oil to your all-purpose cleaner. If you’re dealing with stubborn stains, a paste of baking soda and water can work wonders. And for a truly luxurious touch, infuse your homemade linen spray with rose petals or vanilla beans.
The possibilities are endless! The key is to start small, be patient, and have fun. Once you experience the satisfaction of creating your own effective and eco-friendly cleaning solutions, you’ll never want to go back to store-bought products again.
We wholeheartedly encourage you to give these DIY tricks a try. We are confident that you’ll be amazed by the results. And more importantly, we want to hear about your experience! Share your tips, variations, and success stories in the comments below. Let’s create a community of like-minded individuals who are passionate about creating clean, healthy, and happy homes. Your insights could inspire others to embark on their own DIY journey and discover the transformative power of natural home cleaning and freshening. Let us know what worked for you, what didn’t, and any creative twists you added along the way. Together, we can unlock the secrets to a truly clean and vibrant living space. So, roll up your sleeves, gather your ingredients, and get ready to experience the joy of DIY cleaning!
Frequently Asked Questions (FAQ)
Q: Are these DIY cleaning solutions as effective as store-bought cleaners?
A: In many cases, yes! The effectiveness of DIY cleaning solutions often surprises people. Ingredients like vinegar, baking soda, lemon juice, and essential oils possess powerful cleaning and disinfecting properties. Vinegar, for example, is a natural disinfectant that can kill many common household germs. Baking soda is a mild abrasive that can scrub away dirt and grime without scratching surfaces. Lemon juice is a natural degreaser and deodorizer. Essential oils not only add a pleasant scent but also offer antibacterial and antifungal benefits. While some heavy-duty cleaning tasks might require specialized products, these DIY solutions are excellent for everyday cleaning and maintenance. The key is to use the right combination of ingredients for the specific cleaning task at hand. For instance, a mixture of vinegar and water is great for cleaning windows and mirrors, while a paste of baking soda and water is effective for removing stubborn stains from countertops.
Q: Are essential oils safe to use around pets and children?
A: While essential oils offer numerous benefits, it’s crucial to exercise caution when using them around pets and children. Some essential oils can be toxic to animals, even in small amounts. Common culprits include tea tree oil, peppermint oil, and eucalyptus oil. Always research the safety of specific essential oils before using them in your home, especially if you have pets. When using essential oils around children, dilute them properly and avoid direct contact with their skin. It’s also a good idea to consult with a veterinarian or pediatrician if you have any concerns. As a general rule, it’s best to err on the side of caution and use essential oils sparingly in households with pets and young children. Consider using safer alternatives like lemon juice or vinegar for cleaning tasks in areas where pets and children frequently play.
Q: How long do these DIY cleaning solutions last?
A: The shelf life of DIY cleaning solutions varies depending on the ingredients used. Solutions containing water are more prone to bacterial growth and should be used within a week or two. Solutions made with vinegar or alcohol tend to last longer, typically up to a month. To maximize the shelf life of your DIY cleaners, store them in airtight containers in a cool, dark place. Label each container with the date it was made so you can keep track of its freshness. If you notice any changes in color, odor, or consistency, it’s best to discard the solution and make a fresh batch. It’s always better to make smaller batches more frequently to ensure that your cleaning solutions are at their peak effectiveness.
Q: Can I use these DIY cleaners on all surfaces?
A: Not all DIY cleaners are suitable for all surfaces. For example, vinegar can damage natural stone surfaces like marble and granite. Always test a small, inconspicuous area before applying any DIY cleaner to a larger surface. Avoid using abrasive cleaners like baking soda on delicate surfaces like polished wood or stainless steel. When in doubt, consult the manufacturer’s instructions for the specific surface you’re cleaning. For sensitive surfaces, consider using milder cleaning solutions like diluted dish soap or warm water. It’s also a good idea to use separate cleaning cloths for different areas of your home to prevent cross-contamination.
Q: What are some other natural ingredients I can use for home cleaning and freshening?
A: Beyond the common ingredients like vinegar, baking soda, lemon juice, and essential oils, there are many other natural ingredients that can be used for home cleaning and freshening. Borax is a natural mineral that can be used as a laundry booster and all-purpose cleaner. Castile soap is a gentle and versatile soap made from vegetable oils that can be used for a variety of cleaning tasks. Hydrogen peroxide is a natural disinfectant that can be used to whiten laundry and clean surfaces. Cornstarch can be used to absorb odors and clean carpets. And even coffee grounds can be used to deodorize refrigerators and garbage disposals. The possibilities are endless! By exploring different natural ingredients, you can create a customized cleaning routine that is both effective and eco-friendly.
Leave a Comment