

Plant Ginger Backyard: Imagine stepping into your backyard and harvesting fresh, zesty ginger, ready to spice up your favorite dishes or brew a comforting cup of tea. Sounds dreamy, right? Well, it’s more achievable than you think! For centuries, ginger has been prized not only for its culinary uses but also for its medicinal properties, playing a significant role in traditional medicine across Asia. From ancient remedies to modern kitchens, ginger’s versatility is undeniable.
But why should you bother growing your own? Let’s face it, store-bought ginger can sometimes be lackluster, lacking that vibrant flavor and freshness. Plus, knowing exactly where your food comes from is incredibly satisfying. That’s where this DIY guide comes in! I’m going to share some simple yet effective tricks and hacks to help you successfully plant ginger backyard, even if you’re a complete beginner.
Whether you have a sprawling garden or just a sunny patio, I’ll show you how to cultivate this amazing rhizome and enjoy a continuous supply of fresh ginger right at your fingertips. Get ready to unleash your inner gardener and discover the joy of growing your own ginger!
Growing Ginger in Your Backyard: A DIY Guide
Hey there, fellow gardening enthusiasts! Ever thought about growing your own ginger? It’s surprisingly easy and rewarding, and nothing beats the fresh, zesty flavor of homegrown ginger. I’m going to walk you through the whole process, from choosing the right ginger to harvesting your very own crop. Let’s get started!
Choosing Your Ginger Rhizome
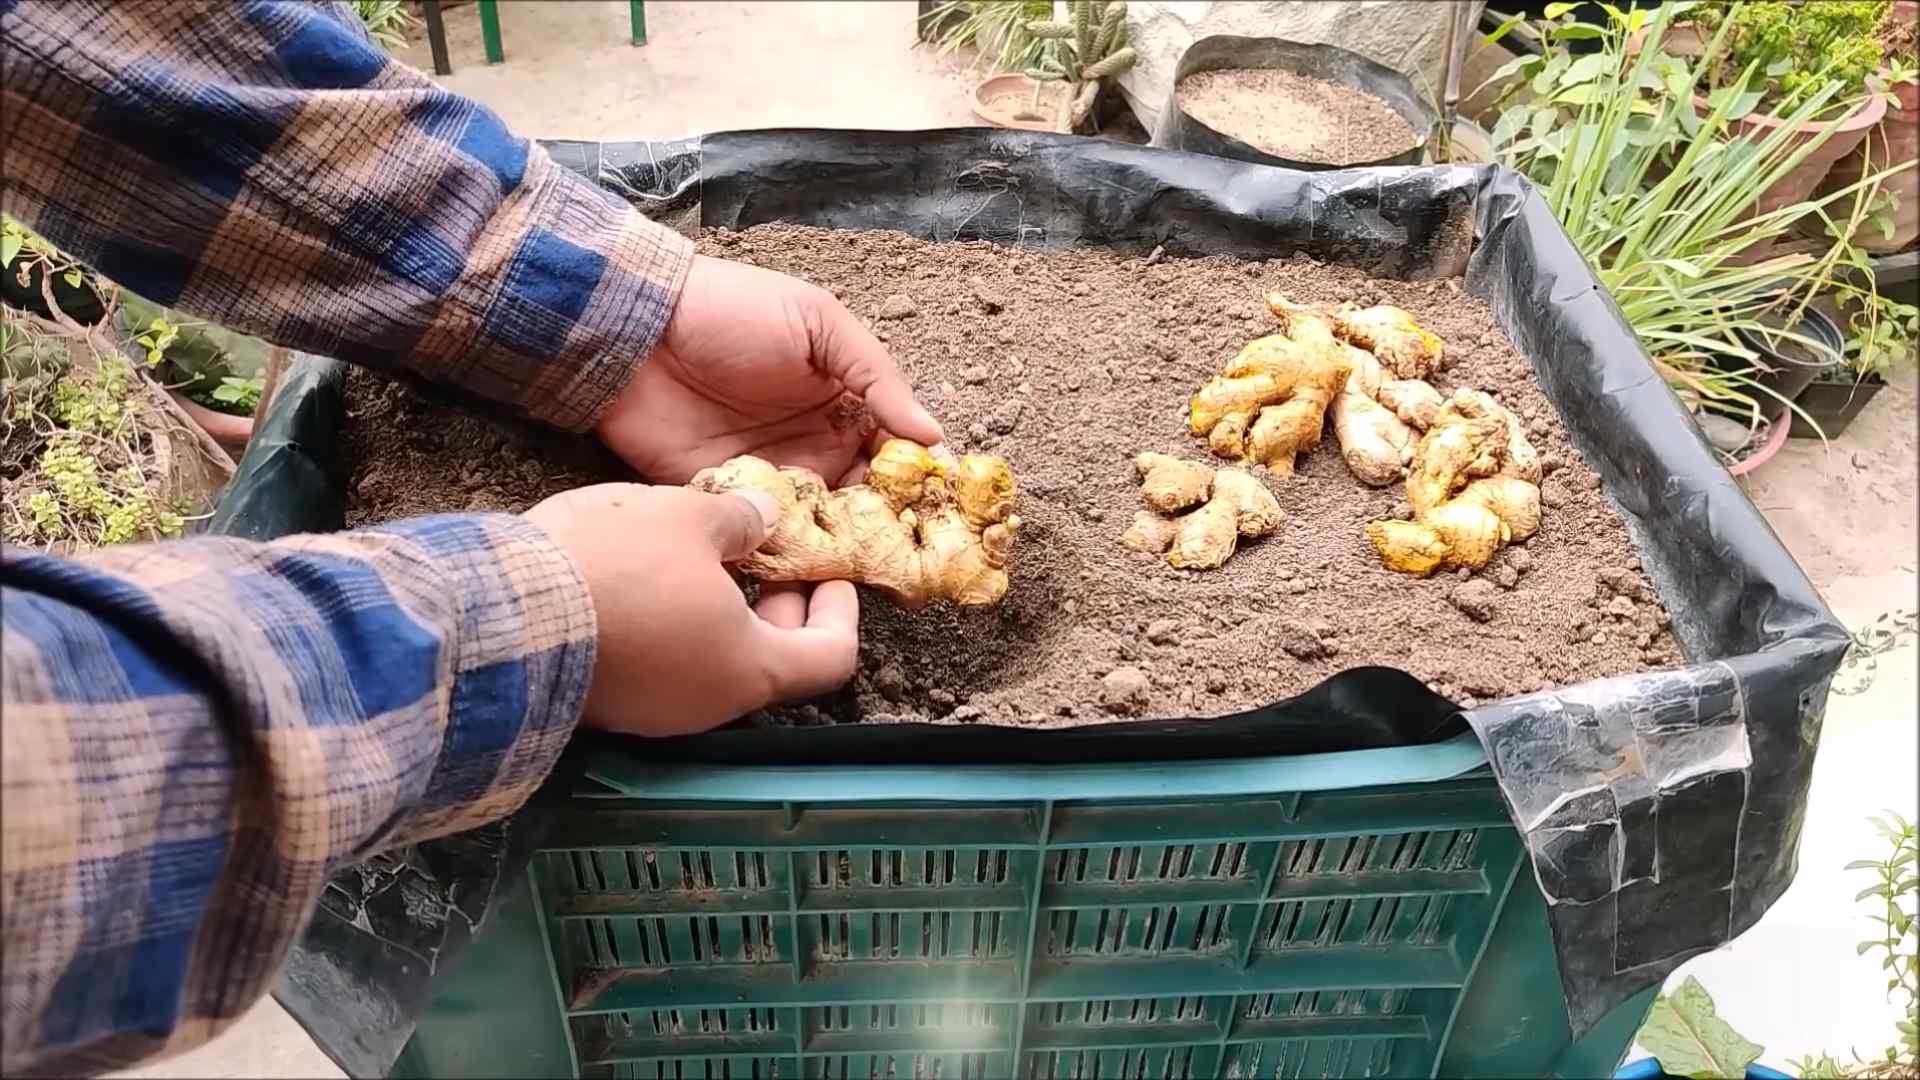
The first step is selecting a healthy ginger rhizome (that knobby root-like thing you buy at the grocery store). Not all ginger is created equal when it comes to propagation. Here’s what to look for:
* Look for plump rhizomes: Avoid anything shriveled or dried out. You want a rhizome that looks juicy and full of life.
* Check for “eyes”: These are small, green buds or nodes on the rhizome. They’re where the new shoots will emerge. The more eyes, the better!
* Organic is best: Opt for organic ginger if possible. Non-organic ginger may be treated with growth inhibitors to prevent sprouting, which will obviously hinder your efforts.
* Avoid damaged rhizomes: Steer clear of any rhizomes that are bruised, cut, or show signs of mold or rot.
Preparing the Ginger for Planting
Before you plant your ginger, it’s a good idea to wake it up and encourage those “eyes” to sprout. This will give you a head start.
1. Soaking the Rhizome: Soak the ginger rhizome in lukewarm water for 12-24 hours. This rehydrates the rhizome and stimulates growth. I usually use a bowl or container large enough to fully submerge the ginger.
2. Cutting (Optional): If your rhizome is large, you can cut it into smaller pieces, ensuring each piece has at least one or two “eyes.” This will give you multiple plants. Use a clean, sharp knife to prevent the spread of disease. Let the cut pieces air dry for a day or two to allow the cut surfaces to callous over. This helps prevent rot.
Planting Your Ginger
Now for the fun part – getting your ginger into the ground!
1. Choosing the Right Location: Ginger thrives in warm, humid conditions with partial shade. Direct sunlight can scorch the leaves. A spot that gets morning sun and afternoon shade is ideal. If you live in a cooler climate, you can grow ginger in a pot and bring it indoors during the winter.
2. Preparing the Soil: Ginger needs well-draining soil that’s rich in organic matter. Amend your soil with compost, aged manure, or peat moss to improve drainage and fertility. I like to use a mix of equal parts garden soil, compost, and perlite.
3. Planting Depth and Spacing: Dig a shallow trench about 2-4 inches deep. Place the ginger rhizome horizontally in the trench, with the “eyes” facing upwards. Space the rhizomes about 8-12 inches apart if you’re planting multiple pieces.
4. Covering the Rhizome: Gently cover the rhizome with soil and water thoroughly. Be careful not to overwater, as this can lead to rot.
5. Mulching: Apply a layer of mulch around the plants to help retain moisture, suppress weeds, and regulate soil temperature. I like to use straw or shredded leaves.
Caring for Your Ginger Plants
Ginger is relatively low-maintenance, but here are a few things to keep in mind:
1. Watering: Keep the soil consistently moist, but not waterlogged. Water deeply when the top inch of soil feels dry. During hot, dry weather, you may need to water more frequently.
2. Fertilizing: Ginger is a heavy feeder. Fertilize every 4-6 weeks with a balanced organic fertilizer. I like to use fish emulsion or compost tea.
3. Weeding: Keep the area around your ginger plants free of weeds. Weeds compete with the ginger for nutrients and water.
4. Pest and Disease Control: Ginger is generally pest and disease resistant. However, watch out for slugs and snails, which can damage the leaves. You can control them with organic slug bait or by handpicking them off the plants. Root rot can be a problem if the soil is poorly drained.
5. Providing Support: As the ginger plants grow taller, they may need some support to prevent them from falling over. You can use stakes or a trellis.
Harvesting Your Ginger
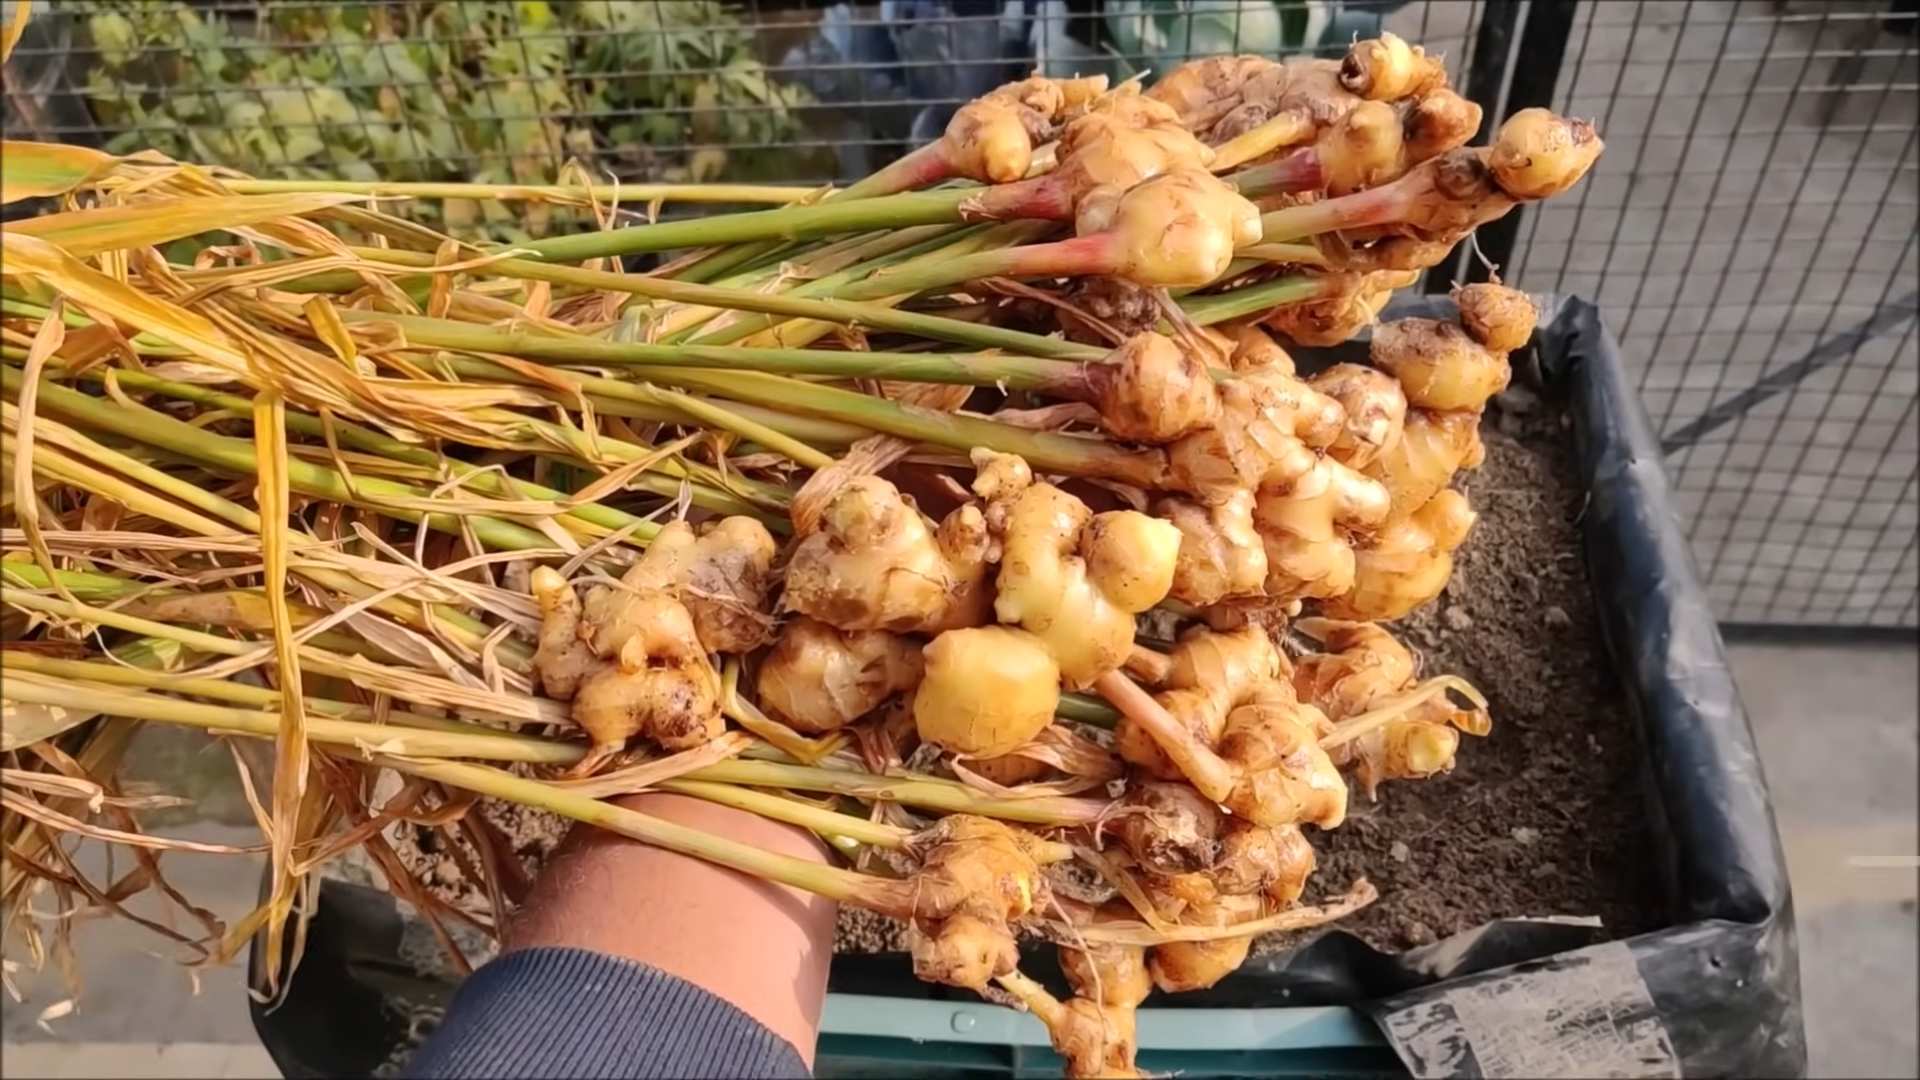
The best part! You can start harvesting ginger about 8-10 months after planting.
1. When to Harvest: You can harvest ginger at any time, but the flavor will be milder when the plant is young. For a more mature, spicier flavor, wait until the leaves start to turn yellow and die back.
2. How to Harvest: Gently dig around the plant and lift the rhizome out of the ground. You can harvest the entire plant or just a portion of the rhizome. If you only harvest a portion, be sure to leave some of the rhizome in the ground to continue growing.
3. Cleaning and Storing: Wash the harvested ginger rhizomes thoroughly to remove any dirt. You can store fresh ginger in the refrigerator for several weeks. Wrap it in a paper towel and place it in a plastic bag. You can also freeze ginger for longer storage.
Troubleshooting
Even with the best care, you might encounter a few challenges. Here are some common problems and how to address them:
* Yellowing Leaves: This could be a sign of overwatering, underwatering, nutrient deficiency, or pest infestation. Check the soil moisture, fertilize if necessary, and inspect the plants for pests.
* Slow Growth: This could be due to insufficient sunlight, poor soil, or cold temperatures. Make sure your ginger plants are getting enough light, amend the soil with compost, and provide protection from frost.
* Root Rot: This is caused by overwatering and poor drainage. Improve drainage by adding perlite or sand to the soil. Avoid overwatering.
* Pests: Slugs and snails are the most common pests of ginger. Control them with organic slug bait or by handpicking them off the plants.
Enjoying Your Homegrown Ginger
Now that you’ve harvested your own ginger, it’s time to enjoy the fruits (or rather, rhizomes) of your labor! Here are a few ideas:
* Fresh Ginger Tea: Slice a few pieces of fresh ginger and steep them in hot water for a soothing and flavorful tea.
* Cooking: Add fresh ginger to stir-fries, soups, curries, and other dishes.
* Baking: Use grated ginger in cookies, cakes, and breads.
* Pickled Ginger: Make your own pickled ginger to serve with sushi or other Asian dishes.
* Ginger Syrup: Create a ginger syrup for cocktails or to add to sparkling water.
Propagating More Ginger
Once you have a thriving ginger plant, you can easily propagate more plants by dividing the rhizomes. Simply dig up the plant, separate the rhizomes into smaller pieces, and replant them.
Ginger Varieties to Consider
While the ginger you find at the grocery store (often *Zingiber officinale*) is perfectly fine to grow, you might want to explore other varieties for different flavors and uses. Here are a few to consider:
* Galangal (Alpinia galanga): Also known as Thai ginger, galangal has a more citrusy and piney flavor than common ginger.
* Turmeric (Curcuma longa): While technically not ginger, turmeric is in the same family and has similar growing requirements. It’s prized for its vibrant color and medicinal properties.
* Myoga Ginger (Zingiber mioga): This variety is grown for its edible flower buds, which have a mild ginger flavor.
Ginger in Containers
If you don’t have a backyard, or if you live in a colder climate, you can still grow ginger in containers. Choose a large pot with good drainage and use a well-draining potting mix. Place the pot in a warm, sunny location and water regularly. You can bring the pot indoors during the winter to protect the plants from frost.
Final Thoughts
Growing ginger in your backyard is a rewarding experience that allows you to enjoy fresh, flavorful ginger whenever you want. With a little bit of care and attention, you can have a thriving ginger patch in no time. So, get out there and start planting! Happy gardening!
Conclusion
So, there you have it! Transforming your backyard into a ginger-growing haven is not only achievable but also incredibly rewarding. We’ve walked you through the simple steps to successfully plant ginger in your backyard, from selecting the perfect rhizome to nurturing it to a bountiful harvest. This isn’t just about saving money at the grocery store; it’s about connecting with nature, understanding where your food comes from, and enjoying the unparalleled flavor of freshly grown ginger.
Why is this DIY trick a must-try? Because the taste difference between store-bought and homegrown ginger is astounding. The ginger you cultivate in your own backyard will be more vibrant, more aromatic, and possess a zest that you simply can’t find elsewhere. Plus, you’ll have the satisfaction of knowing exactly what went into growing it – no hidden pesticides or questionable farming practices.
But the benefits extend beyond just flavor. Growing your own ginger is a fantastic way to add a touch of the exotic to your garden. The lush, green foliage of the ginger plant is visually appealing and can create a tropical ambiance in your outdoor space. It’s also a great conversation starter and a unique way to impress your friends and family.
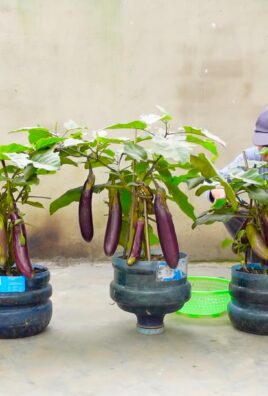
Looking for variations? Consider experimenting with different varieties of ginger. While common ginger is readily available, you might be able to find blue ginger or galangal at specialty nurseries. Each variety offers a slightly different flavor profile, allowing you to tailor your ginger harvest to your specific culinary preferences. You can also try growing ginger in containers if you have limited backyard space or live in a colder climate. Container gardening allows you to move your ginger plants indoors during the winter months, ensuring a continuous supply of fresh ginger year-round. Another fun variation is to companion plant your ginger with other herbs and vegetables that thrive in similar conditions, such as turmeric, peppers, or even bananas for a truly tropical feel.
Don’t be intimidated by the prospect of growing your own ginger. It’s a surprisingly easy and forgiving plant to cultivate. With a little bit of care and attention, you’ll be rewarded with a plentiful supply of fresh, flavorful ginger that will elevate your cooking and your garden.
We wholeheartedly encourage you to give this DIY trick a try. Imagine the possibilities: homemade ginger tea with ginger freshly plucked from your backyard, spicy stir-fries bursting with flavor, or even candied ginger for a sweet and spicy treat. The possibilities are endless!
Once you’ve embarked on your ginger-growing journey, we’d love to hear about your experience. Share your tips, tricks, and photos with us in the comments below. Let’s create a community of backyard ginger growers and inspire others to discover the joys of homegrown goodness. What challenges did you face? What successes did you celebrate? Your insights will be invaluable to other aspiring ginger farmers. So, get your hands dirty, plant some ginger, and let the growing begin!
Frequently Asked Questions
What is the best time of year to plant ginger in my backyard?
The ideal time to plant ginger is in the early spring, after the last frost has passed. Ginger thrives in warm temperatures and needs a long growing season to mature. If you live in a colder climate, you can start your ginger indoors in pots about 6-8 weeks before the last expected frost. This will give your ginger plants a head start and ensure a good harvest.
What kind of soil is best for growing ginger?
Ginger prefers well-draining, fertile soil that is rich in organic matter. A slightly acidic soil pH of around 6.0 to 6.5 is ideal. Before planting, amend your soil with compost, well-rotted manure, or other organic materials to improve drainage and fertility. Avoid heavy clay soils, as they can become waterlogged and lead to root rot. If you have clay soil, consider growing your ginger in raised beds or containers.
How much sunlight does ginger need?
Ginger needs partial shade to thrive. While it needs sunlight to grow, direct sunlight can scorch the leaves. A location that receives morning sun and afternoon shade is ideal. If you’re growing ginger in a container, you can easily move it to a shadier spot during the hottest part of the day.
How often should I water my ginger plants?
Ginger needs consistent moisture, but it’s important to avoid overwatering. Water deeply when the top inch of soil feels dry to the touch. During hot, dry weather, you may need to water more frequently. Be sure to provide good drainage to prevent root rot. Mulching around your ginger plants can help retain moisture and suppress weeds.
How long does it take for ginger to grow?
It typically takes about 8-10 months for ginger to mature and be ready for harvest. You can start harvesting small pieces of ginger after about 4 months, but the flavor will be milder. For a more intense flavor, wait until the plant has matured fully. The leaves will start to turn yellow and die back when the ginger is ready to harvest.
How do I harvest ginger?
To harvest ginger, gently dig up the entire plant, being careful not to damage the rhizomes. Use a garden fork or spade to loosen the soil around the plant, then lift it out of the ground. Wash off any excess soil and separate the rhizomes. You can replant some of the rhizomes to grow more ginger, or store them in a cool, dry place for later use.
Can I grow ginger in a container?
Yes, ginger grows very well in containers. Choose a pot that is at least 12 inches deep and wide to allow the rhizomes plenty of room to spread. Use a well-draining potting mix and follow the same watering and fertilizing guidelines as you would for ginger grown in the ground. Container-grown ginger can be easily moved indoors during the winter months in colder climates.
What are some common pests and diseases that affect ginger?
Ginger is relatively pest and disease-resistant, but it can be susceptible to certain problems, such as root rot, nematodes, and aphids. Root rot is caused by overwatering and poor drainage. To prevent root rot, ensure your soil is well-draining and avoid overwatering. Nematodes are microscopic worms that can damage the roots of ginger plants. To control nematodes, use a soil amendment that contains beneficial nematodes or practice crop rotation. Aphids are small insects that can suck the sap from ginger leaves. To control aphids, spray your plants with insecticidal soap or neem oil.
How do I store ginger after harvesting?
Fresh ginger can be stored in the refrigerator for several weeks. Wrap the ginger in a paper towel and place it in a plastic bag to prevent it from drying out. You can also freeze ginger for longer storage. Peel the ginger and chop it into small pieces, then freeze it in a single layer on a baking sheet. Once frozen, transfer the ginger to a freezer bag or container. Frozen ginger can be used directly in cooking without thawing.
Can I grow ginger from store-bought ginger?
Yes, you can often grow ginger from store-bought ginger, but it’s important to choose rhizomes that are plump, firm, and have visible “eyes” or buds. Soak the ginger in water overnight before planting to encourage sprouting. However, be aware that some commercially sold ginger may be treated to prevent sprouting, so success is not always guaranteed. Organic ginger is more likely to sprout.

Leave a Comment