

Planting eggplants this season might seem daunting, but trust me, with a few simple tricks and a dash of DIY spirit, you can be harvesting these glossy, gorgeous fruits in no time! I remember my grandmother, a true gardening guru, always said, “An eggplant well-tended is a feast extended!” And she was right. Eggplants have been cultivated for centuries, with roots tracing back to ancient Asia, where they were prized not only for their culinary uses but also for their ornamental beauty.
But why bother with the effort of growing your own? Well, beyond the sheer joy of nurturing something from seed to table, homegrown eggplants offer a flavor and freshness you simply can’t find in the supermarket. Plus, you have complete control over what goes into your garden, ensuring a healthy and organic harvest. This DIY guide is packed with easy-to-follow tips and tricks to help you succeed, even if you’re a complete beginner. From choosing the right variety to warding off pests naturally, I’ll walk you through every step of planting eggplants this season, ensuring a bountiful and delicious crop. Get ready to roll up your sleeves and transform your garden into an eggplant paradise!
“`html
Planting Eggplants This Season: A DIY Guide for a Bountiful Harvest
Okay, eggplant lovers, let’s get our hands dirty! I’m going to walk you through everything you need to know to successfully plant eggplants and enjoy a delicious harvest. From seed starting to pest control, we’ll cover it all. Get ready to become an eggplant pro!
Choosing Your Eggplant Varieties
Before we even think about planting, let’s talk about variety. Eggplants come in all shapes, sizes, and colors! Choosing the right one for your garden and taste is crucial. Here are a few popular options:
- Black Beauty: This is a classic, producing large, dark purple, oval-shaped fruits. It’s a reliable choice and great for beginners.
- Japanese Eggplant (Ichiban): These are long, slender, and have a delicate flavor. They’re perfect for stir-fries and grilling.
- Italian Eggplant (Graffiti): These are smaller, rounder, and have beautiful purple and white stripes. They’re visually appealing and have a mild taste.
- Thai Eggplant: These are small, round, and green or white. They’re often used in Thai curries and have a slightly bitter flavor.
- White Eggplant (Casper): As the name suggests, these are white and have a very mild, almost sweet flavor.
Consider your climate, available space, and culinary preferences when making your choice. I personally love growing both Black Beauty and Japanese eggplants for their versatility.
Starting Eggplant Seeds Indoors (Recommended)
Eggplants need a long growing season, so starting them indoors is usually the best way to go, especially if you live in a cooler climate. I typically start my seeds about 8-10 weeks before the last expected frost.
Materials You’ll Need:
- Eggplant seeds
- Seed starting trays or small pots
- Seed starting mix (a light, well-draining mix is essential)
- Heat mat (optional, but highly recommended)
- Grow lights (essential if you don’t have a very sunny window)
- Spray bottle
Step-by-Step Instructions:
- Prepare your seed starting trays: Fill your trays or pots with seed starting mix. Gently tap them to settle the soil.
- Sow the seeds: Make a small indentation (about ¼ inch deep) in the soil. Place one or two seeds in each indentation. Cover lightly with soil.
- Water gently: Use a spray bottle to moisten the soil. Avoid overwatering, as this can lead to damping off (a fungal disease that kills seedlings).
- Provide warmth: Place the trays on a heat mat. Eggplant seeds germinate best in warm temperatures (around 80-85°F).
- Provide light: Place the trays under grow lights or in a very sunny window. Seedlings need at least 14-16 hours of light per day.
- Keep the soil moist: Check the soil daily and water as needed to keep it consistently moist, but not soggy.
- Thin the seedlings: Once the seedlings have their first true leaves (the second set of leaves), thin them to one seedling per cell or pot. Snip off the weaker seedling at the soil line.
- Harden off the seedlings: About a week before you plan to transplant the seedlings outdoors, start hardening them off. This means gradually exposing them to outdoor conditions. Start by placing them outside for an hour or two each day, gradually increasing the time each day. Protect them from strong winds and direct sunlight at first.
Preparing Your Garden Bed
Eggplants need a sunny spot with well-drained soil. I always amend my soil with plenty of compost before planting.
Things to Consider:
- Sunlight: Eggplants need at least 6-8 hours of direct sunlight per day.
- Soil: Eggplants prefer well-drained soil that is rich in organic matter. Amend your soil with compost or well-rotted manure before planting.
- Soil pH: Eggplants prefer a slightly acidic soil pH of 6.0-6.8.
- Spacing: Eggplants need plenty of space to grow. Space them 24-36 inches apart in rows that are 3-4 feet apart.
Step-by-Step Instructions:
- Choose a sunny location: Select a spot in your garden that receives at least 6-8 hours of direct sunlight per day.
- Prepare the soil: Remove any weeds, rocks, or debris from the area.
- Amend the soil: Dig in plenty of compost or well-rotted manure to improve the soil’s drainage and fertility. I usually add about 2-3 inches of compost.
- Test the soil pH: Use a soil testing kit to check the pH of your soil. If it’s too alkaline, you can amend it with sulfur. If it’s too acidic, you can amend it with lime.
- Create planting holes: Dig holes that are slightly larger than the root balls of your seedlings. Space the holes 24-36 inches apart.
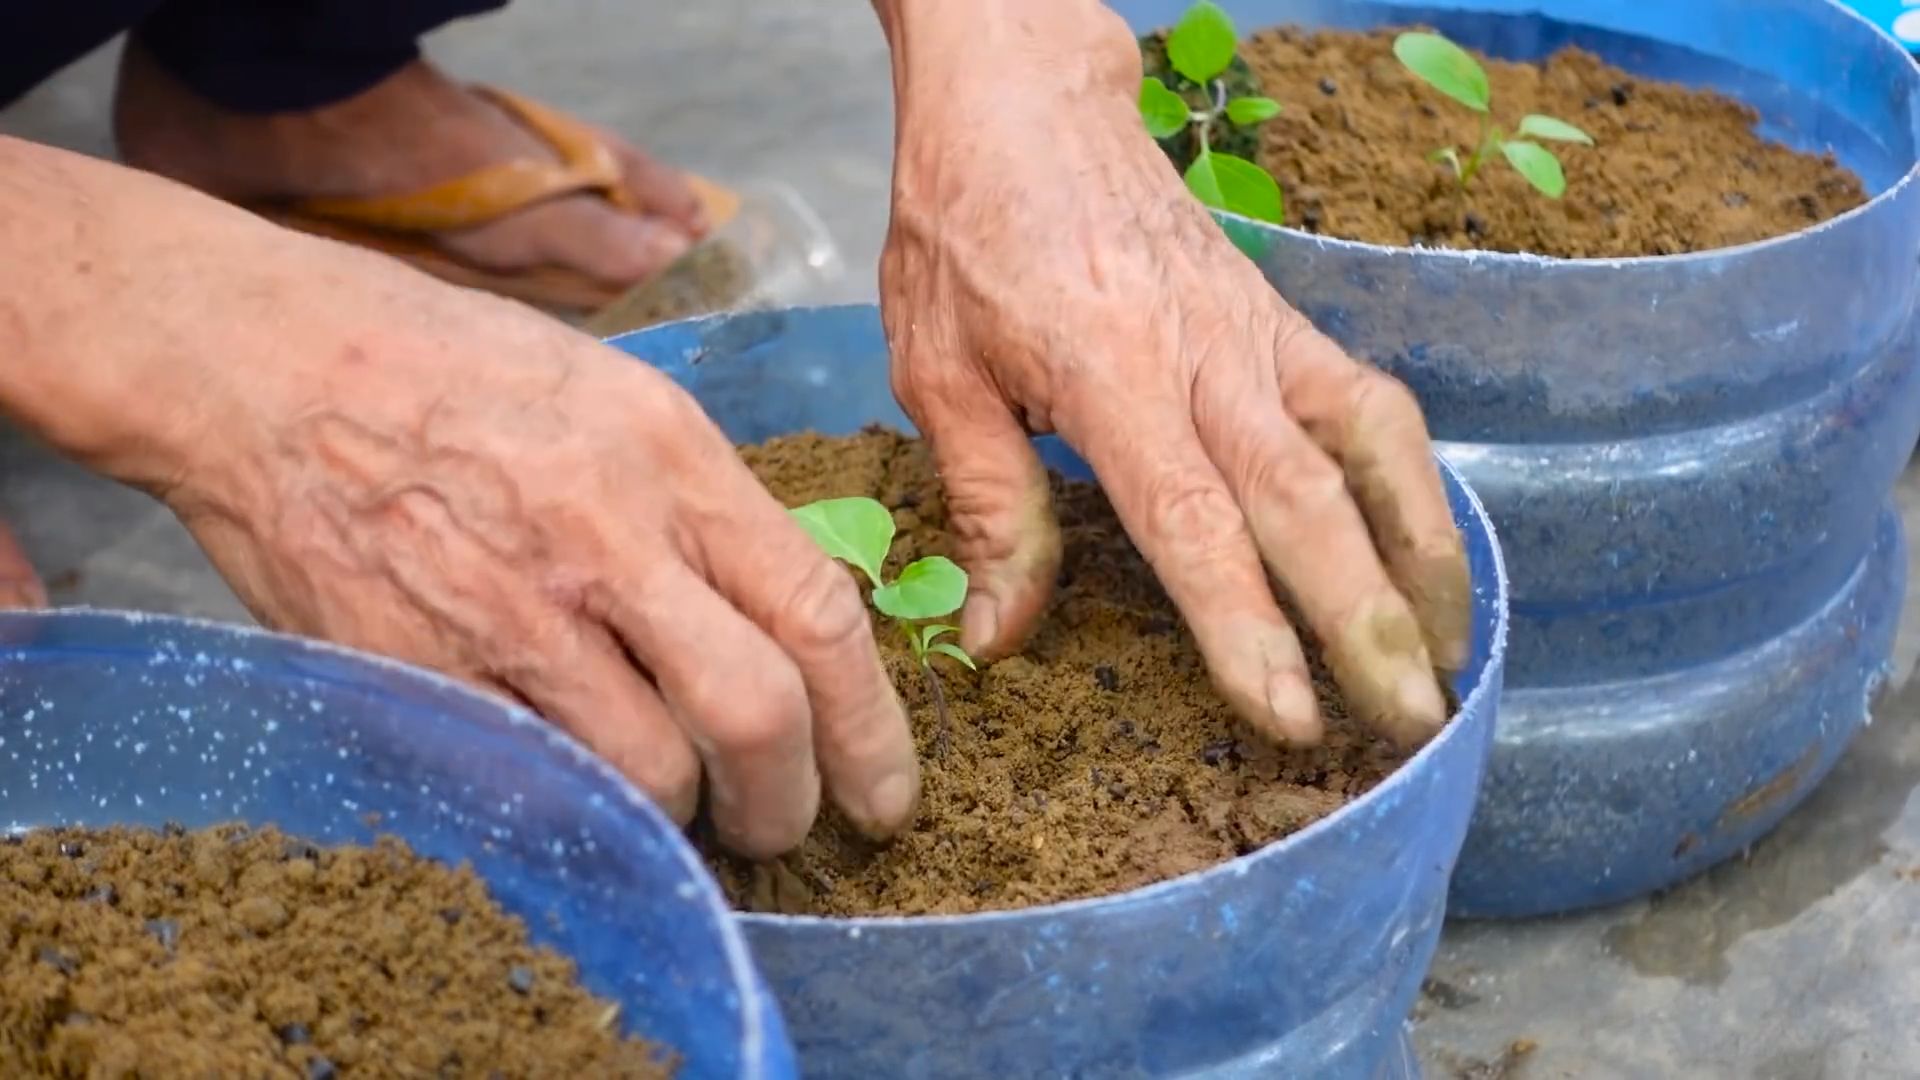
Transplanting Your Eggplant Seedlings
Now for the exciting part – getting those little guys into the ground! Make sure all danger of frost has passed before transplanting.
Step-by-Step Instructions:
- Water the seedlings: Water the seedlings thoroughly before transplanting. This will help them to adjust to their new environment.
- Remove the seedlings from their containers: Gently squeeze the sides of the container to loosen the root ball. Carefully remove the seedling from the container, being careful not to damage the roots.
- Place the seedlings in the planting holes: Place the seedling in the planting hole, making sure that the top of the root ball is level with the surrounding soil.
- Fill in the holes: Fill in the holes with soil, gently firming it around the base of the plant.
- Water thoroughly: Water the newly transplanted seedlings thoroughly.
- Mulch around the plants: Apply a layer of mulch around the plants to help retain moisture, suppress weeds, and regulate soil temperature. I like to use straw or wood chips.
- Stake the plants (optional): Eggplants can get quite tall and heavy, so staking them can help to prevent them from falling over. Use stakes that are at least 3 feet tall and tie the plants to the stakes with soft twine.
Caring for Your Eggplants
Once your eggplants are in the ground, it’s important to provide them with proper care to ensure a bountiful harvest.
Watering:
Eggplants need consistent watering, especially during hot, dry weather. Water deeply and regularly, aiming for about 1 inch of water per week. Avoid overhead watering, as this can lead to fungal diseases. I prefer to water at the base of the plants.
Fertilizing:
Eggplants are heavy feeders, so they need regular fertilization. Fertilize them every 2-3 weeks with a balanced fertilizer. You can also side-dress them with compost or well-rotted manure.
Pruning:
Pruning eggplants can help to improve air circulation and encourage fruit production. Remove any suckers (small shoots that grow from the base of the plant) and any yellowing or diseased leaves.
Pest and Disease Control:
Eggplants are susceptible to a variety of pests and diseases, including flea beetles, aphids, spider mites, and blossom-end rot.
- Flea beetles: These small, jumping beetles can damage the leaves of eggplant seedlings. Cover the seedlings with row covers to protect them. You can also use insecticidal soap or neem oil to control flea beetles.
- Aphids: These small, sap-sucking insects can weaken plants and spread diseases. Spray aphids with a strong stream of water or use insecticidal soap or neem oil.
- Spider mites: These tiny mites can cause the leaves of eggplants to turn yellow and stippled. Spray spider mites with insecticidal soap or neem oil.
- Blossom-end rot: This is a physiological disorder that causes the bottom of the eggplant to rot. It’s usually caused by calcium deficiency or inconsistent watering. To prevent blossom-end rot, make sure your soil is well-drained and that you water your eggplants consistently. You can also add calcium to the soil by adding crushed eggshells or bone meal.
I always try to use organic pest control methods whenever possible. Neem oil is my go-to for many common pests.
Harvesting Your Eggplants
The moment we’ve all
Conclusion
So, there you have it! Planting eggplants this season doesn’t have to be a daunting task. By implementing this simple yet effective DIY trick, you’re setting yourself up for a bountiful harvest of delicious, glossy eggplants. We’ve shown you how to give your eggplant seedlings the best possible start, boosting their growth and resilience against common garden pests and diseases.
Why is this a must-try? Because it’s more than just a gardening hack; it’s an investment in your garden’s future. This method promotes stronger root development, leading to healthier, more productive plants. You’ll spend less time battling problems and more time enjoying the fruits (or rather, vegetables!) of your labor. Plus, it’s incredibly cost-effective, utilizing materials you likely already have on hand.
But don’t stop there! Feel free to experiment with variations. Try adding a pinch of Epsom salts to the planting hole for an extra magnesium boost, which can encourage flowering and fruit production. You could also incorporate a slow-release fertilizer specifically formulated for tomatoes and peppers, as eggplants share similar nutrient needs. Consider companion planting with basil or marigolds to deter pests naturally. Another variation is to use different types of organic matter in the planting hole, such as well-rotted compost or aged manure, to further enrich the soil.
The key is to adapt the technique to your specific garden conditions and preferences. Observe your plants closely and adjust your approach as needed. Remember, gardening is a journey of learning and discovery.
We’re confident that this DIY trick will make a significant difference in your eggplant-growing success. But we want to hear from you! Give it a try this season and share your experiences in the comments below. Did you notice a difference in your plants’ growth? Did you encounter any challenges? What variations did you try? Your feedback will not only help other gardeners but also contribute to our collective knowledge of successful eggplant cultivation.
Don’t delay, start planting eggplants this season with confidence! We can’t wait to see your amazing eggplant harvests! Share your photos and stories with us – let’s build a community of thriving eggplant growers!
Frequently Asked Questions (FAQ)
What exactly is the DIY trick you’re referring to?
The DIY trick involves amending the planting hole with nutrient-rich organic matter and creating a slightly raised mound for improved drainage. Specifically, we recommend digging a hole that is wider and deeper than the eggplant seedling’s root ball. Then, mix compost, well-rotted manure, or other organic matter into the excavated soil. Create a small mound in the center of the hole and plant the seedling on top of the mound. This ensures good drainage and provides the roots with easy access to nutrients.
Why is good drainage so important for eggplants?
Eggplants are susceptible to root rot if their roots sit in waterlogged soil. The raised mound created by this DIY trick helps to improve drainage, preventing the roots from becoming waterlogged and reducing the risk of root rot. Well-drained soil also allows for better aeration, which is essential for healthy root growth.
What kind of organic matter should I use?
Compost is an excellent choice, as it provides a balanced mix of nutrients and improves soil structure. Well-rotted manure is another great option, but be sure it’s fully composted to avoid burning the roots. Other options include leaf mold, worm castings, and aged mushroom compost. Avoid using fresh manure, as it can be too strong and damage the plants.
How much organic matter should I add to the planting hole?
A good rule of thumb is to mix about one-third organic matter with two-thirds of the excavated soil. You want to create a rich, well-draining mixture that will support the eggplant’s growth. Don’t overdo it, as too much organic matter can sometimes lead to nutrient imbalances.
Can I use fertilizer instead of organic matter?
While fertilizer can provide nutrients, it doesn’t improve soil structure like organic matter does. We recommend using organic matter as the primary soil amendment and supplementing with fertilizer if needed. If you choose to use fertilizer, opt for a slow-release formula specifically designed for tomatoes and peppers, as they have similar nutrient requirements to eggplants. Follow the instructions on the fertilizer package carefully to avoid over-fertilizing.
When is the best time to plant eggplants?
Eggplants are warm-season crops and should be planted after the last frost when the soil has warmed up to at least 60°F (15°C). In most regions, this is typically in late spring or early summer. You can start eggplant seedlings indoors 6-8 weeks before the last frost to get a head start on the growing season.
How far apart should I plant eggplants?
Space eggplants 24-36 inches apart in rows that are 3-4 feet apart. This allows for adequate air circulation and sunlight penetration, which is essential for healthy growth and fruit production.
What are some common problems that affect eggplants?
Common problems include flea beetles, aphids, blossom-end rot, and fungal diseases. Regularly inspect your plants for signs of pests or diseases and take action promptly. Companion planting with basil or marigolds can help deter pests naturally. Ensure proper watering and fertilization to prevent blossom-end rot. Use organic fungicides if necessary to control fungal diseases.
How often should I water eggplants?
Water eggplants deeply and regularly, especially during hot, dry weather. Aim to keep the soil consistently moist but not waterlogged. Mulching around the plants can help to retain moisture and suppress weeds.
How do I know when eggplants are ripe?
Eggplants are typically ready to harvest when they are glossy, firm, and have reached their mature size and color. The skin should be smooth and unblemished. Gently press the skin with your thumb; if it leaves a slight indentation, the eggplant is ripe. Use a sharp knife or pruning shears to cut the eggplant from the plant, leaving a short stem attached.
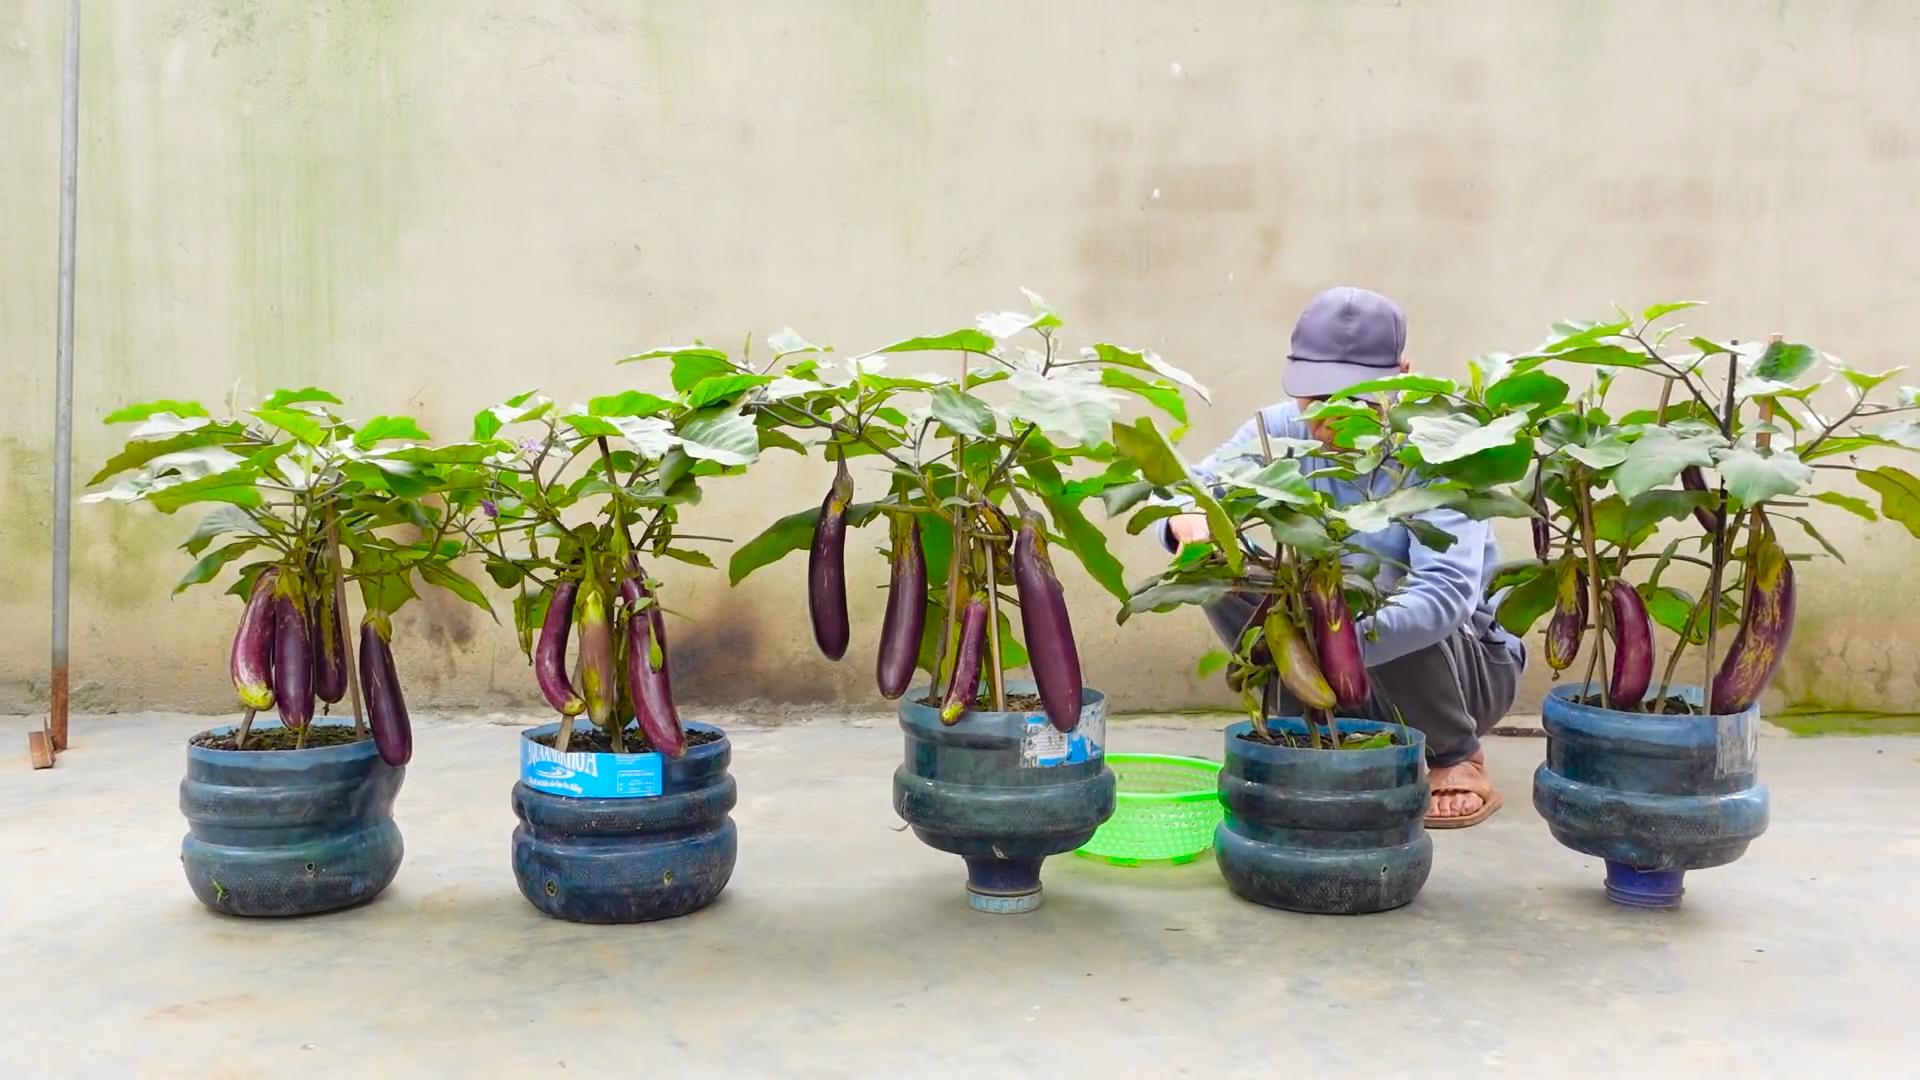
Can I grow eggplants in containers?
Yes, eggplants can be successfully grown in containers. Choose a large container that is at least 12 inches in diameter and depth. Use a high-quality potting mix and provide regular watering and fertilization. Container-grown eggplants may need to be watered more frequently than those grown in the ground.
What if I don’t have access to compost or manure?
If you don’t have access to compost or manure, you can use other organic soil amendments such as peat moss, coconut coir, or leaf mold. You can also purchase commercially available organic soil conditioners. The goal is to improve the soil structure and provide nutrients to the plants.
Will this DIY trick work for all types of eggplants?
Yes, this DIY trick is beneficial for all types of eggplants, regardless of their size, shape, or color. It helps to create a healthy growing environment that promotes strong root development and overall plant health.
How can I encourage more fruit production?
Regularly fertilize your eggplants with a balanced fertilizer or a fertilizer specifically formulated for tomatoes and peppers. Prune away any suckers that grow from the base of the plant to encourage more energy to be directed towards fruit production. Ensure that the plants receive at least 6-8 hours of sunlight per day. Hand-pollinate the flowers if necessary, especially in areas with low bee activity.
What if my eggplant leaves are turning yellow?
Yellowing leaves can be a sign of several problems, including nutrient deficiencies, overwatering, or pest infestations. Check the soil moisture level and adjust your watering accordingly. Fertilize the plants with a balanced fertilizer to address any nutrient deficiencies. Inspect the leaves for signs of pests and take appropriate action. If the problem persists, consult with your local garden center or extension office for further assistance.


Leave a Comment