

Simple bathroom cleaning tricks – who doesn’t need a few of those up their sleeve? Let’s be honest, the bathroom is probably the last place we *want* to spend our time cleaning, but it’s definitely a place that needs regular attention. I get it; the thought of scrubbing away soap scum and battling mildew isn’t exactly thrilling. But what if I told you that keeping your bathroom sparkling clean could be easier and faster than you think?
For centuries, people have been devising clever ways to maintain hygiene and cleanliness in their homes. From ancient Roman bathhouses to the modern-day obsession with spotless surfaces, the desire for a clean bathroom is deeply ingrained in our culture. But unlike our ancestors, we have access to a wealth of knowledge and innovative products that can make the task much less daunting.
That’s where these simple bathroom cleaning tricks come in! I’m going to share some of my favorite DIY hacks that will not only save you time and money but also help you achieve a bathroom that’s not just clean, but truly inviting. Imagine stepping into a fresh, sparkling bathroom every morning – wouldn’t that be a great way to start your day? So, ditch the harsh chemicals and endless scrubbing; let’s dive into some easy and effective ways to transform your bathroom into a pristine oasis. You’ll thank me later!

DIY Bathroom Cleaning Hacks: Sparkling Clean with Minimal Effort!
Okay, let’s face it, cleaning the bathroom is nobody’s favorite chore. But, with a few clever hacks, you can transform this dreaded task into a manageable and even (dare I say?) satisfying experience. I’m going to share some of my go-to DIY bathroom cleaning tricks that will leave your bathroom sparkling without breaking the bank or spending hours scrubbing.
Tackling Soap Scum and Grime
Soap scum is the bane of every bathroom cleaner’s existence. It’s stubborn, unsightly, and seems to multiply overnight. But don’t worry, I’ve got a few tricks up my sleeve to combat this bathroom beast.
* The Power of Vinegar: Vinegar is my secret weapon against soap scum. Its acidity breaks down the mineral deposits and grime, making it easy to wipe away.
* Baking Soda Scrub: For tougher stains, baking soda acts as a gentle abrasive that won’t scratch your surfaces.
* Lemon Freshness: Lemons not only smell amazing but also contain citric acid, which helps dissolve soap scum and leave a fresh, clean scent.
Step-by-Step: Vinegar Shower Head Soak
This is a game-changer for restoring water pressure and removing mineral buildup from your shower head.
1. Gather Your Supplies: You’ll need a plastic bag (a Ziploc bag works great), white vinegar, a rubber band or twist tie, and an old toothbrush.
2. Fill the Bag: Pour enough white vinegar into the plastic bag to fully submerge the shower head.
3. Secure the Bag: Carefully position the bag over the shower head, ensuring the shower head is completely immersed in the vinegar. Use the rubber band or twist tie to secure the bag tightly around the shower arm.
4. Soak Overnight: Let the shower head soak in the vinegar overnight (or for at least a few hours). This allows the vinegar to dissolve the mineral deposits.
5. Remove and Rinse: Remove the bag and discard the vinegar. Turn on the shower and let the water run for a few minutes to flush out any remaining vinegar and loosened debris.
6. Scrub Away Stubborn Residue: If you still see some stubborn residue, use the old toothbrush to gently scrub it away.
7. Enjoy Your Improved Shower: You should notice a significant improvement in your shower’s water pressure and overall performance.
Step-by-Step: Baking Soda Paste for Tile and Grout
This method is perfect for cleaning tile surfaces and brightening dingy grout lines.
1. Gather Your Supplies: You’ll need baking soda, water, a small bowl, an old toothbrush or grout brush, and a sponge or cloth.
2. Make a Paste: In the small bowl, mix baking soda with enough water to form a thick paste. The consistency should be similar to toothpaste.
3. Apply the Paste: Apply the baking soda paste to the tile and grout lines you want to clean. You can use your fingers or a small spatula to spread it evenly.
4. Let it Sit: Allow the paste to sit for at least 15-20 minutes. This gives the baking soda time to work its magic and loosen the grime. For heavily soiled areas, you can let it sit for longer.
5. Scrub with a Brush: Use the old toothbrush or grout brush to scrub the tile and grout lines. Apply gentle pressure and focus on areas with stubborn stains.
6. Rinse Thoroughly: Rinse the tile and grout with clean water. Use a sponge or cloth to wipe away any remaining baking soda residue.
7. Dry and Admire: Dry the tile and grout with a clean towel. You’ll be amazed at how much brighter and cleaner they look!
Step-by-Step: Lemon Power for Shower Doors
This is a natural and effective way to remove water spots and soap scum from glass shower doors.
1. Gather Your Supplies: You’ll need a lemon (cut in half), a sponge or cloth, and a spray bottle filled with water.
2. Rub with Lemon: Take one half of the lemon and rub it directly onto the shower door, focusing on areas with water spots and soap scum. The citric acid in the lemon will help dissolve the buildup.
3. Let it Sit: Allow the lemon juice to sit on the shower door for about 5-10 minutes.
4. Rinse Thoroughly: Rinse the shower door with clean water. You can use the spray bottle to help remove any remaining lemon juice.
5. Wipe Dry: Wipe the shower door dry with a clean sponge or cloth. This will prevent water spots from forming again.
6. Enjoy the Shine: Admire your sparkling clean shower door! The lemon will also leave a fresh, citrusy scent in your bathroom.
Cleaning the Toilet Like a Pro
The toilet is another area that requires regular cleaning. Here’s how I keep mine fresh and sanitary.
* Toilet Bowl Cleaner Bombs: These homemade fizzers are a fun and effective way to clean and deodorize your toilet bowl.
* Vinegar and Baking Soda Flush: A simple combination that creates a powerful cleaning action.
* Cleaning the Exterior: Don’t forget to wipe down the exterior of the toilet, including the seat, lid, and base.
Step-by-Step: DIY Toilet Bowl Cleaner Bombs
These are so easy to make and keep on hand for quick toilet cleaning.
1. Gather Your Supplies: You’ll need 1 ½ cups baking soda, ½ cup citric acid (available online or at some health food stores), ½ cup cornstarch, a few tablespoons of water, 15-20 drops of essential oil (lemon, tea tree, or eucalyptus are great choices), a spray bottle filled with water, and a silicone mold (ice cube trays or muffin tins work well).
2. Combine Dry Ingredients: In a large bowl, combine the baking soda, citric acid, and cornstarch. Whisk them together until they are well mixed.
3. Add Essential Oil: Add the essential oil to the dry ingredients. This will give your toilet bowl cleaner bombs a pleasant scent and add extra cleaning power.
4. Slowly Add Water: Slowly add water to the dry ingredients, one tablespoon at a time, while mixing constantly. Be careful not to add too much water at once, as this will cause the mixture to fizz prematurely. You want the mixture to be slightly damp and clumpy, like wet sand.
5. Pack into Molds: Press the mixture firmly into the silicone molds. Make sure to pack it tightly so that the bombs hold their shape.
6. Let Them Dry: Let the toilet bowl cleaner bombs dry completely in the molds. This may take several hours or even overnight.
7. Remove from Molds: Once the bombs are completely dry, carefully remove them from the molds.
8. Store in an Airtight Container: Store the toilet bowl cleaner bombs in an airtight container in a cool, dry place.
9. To Use: Simply drop one bomb into the toilet bowl and let it fizz. After the fizzing stops, scrub the bowl with a toilet brush and flush.
Step-by-Step: Vinegar and Baking Soda Toilet Bowl Clean
This is a quick and easy way to freshen up your toilet bowl.
1. Pour in Baking Soda: Pour about one cup of baking soda into the toilet bowl.
2. Add Vinegar: Slowly pour about two cups of white vinegar into the toilet bowl. The mixture will fizz and bubble.
3. Let it Fizz: Let the mixture fizz for about 30 minutes. This allows the baking soda and vinegar to loosen any stains and grime.
4. Scrub and Flush: After 30 minutes, scrub the toilet bowl with a toilet brush and flush.
Mirror, Mirror on the Wall: Cleaning Mirrors and Fixtures
Streaky mirrors and dull fixtures can make your bathroom look less than its best. Here’s how to achieve a sparkling shine.
* Vinegar and Water Solution: A simple and effective way to clean mirrors and glass surfaces.
* Microfiber Cloth Magic: Using a microfiber cloth is key to streak-free cleaning.
* Polishing Fixtures: Bring back the shine to your faucets and shower heads.
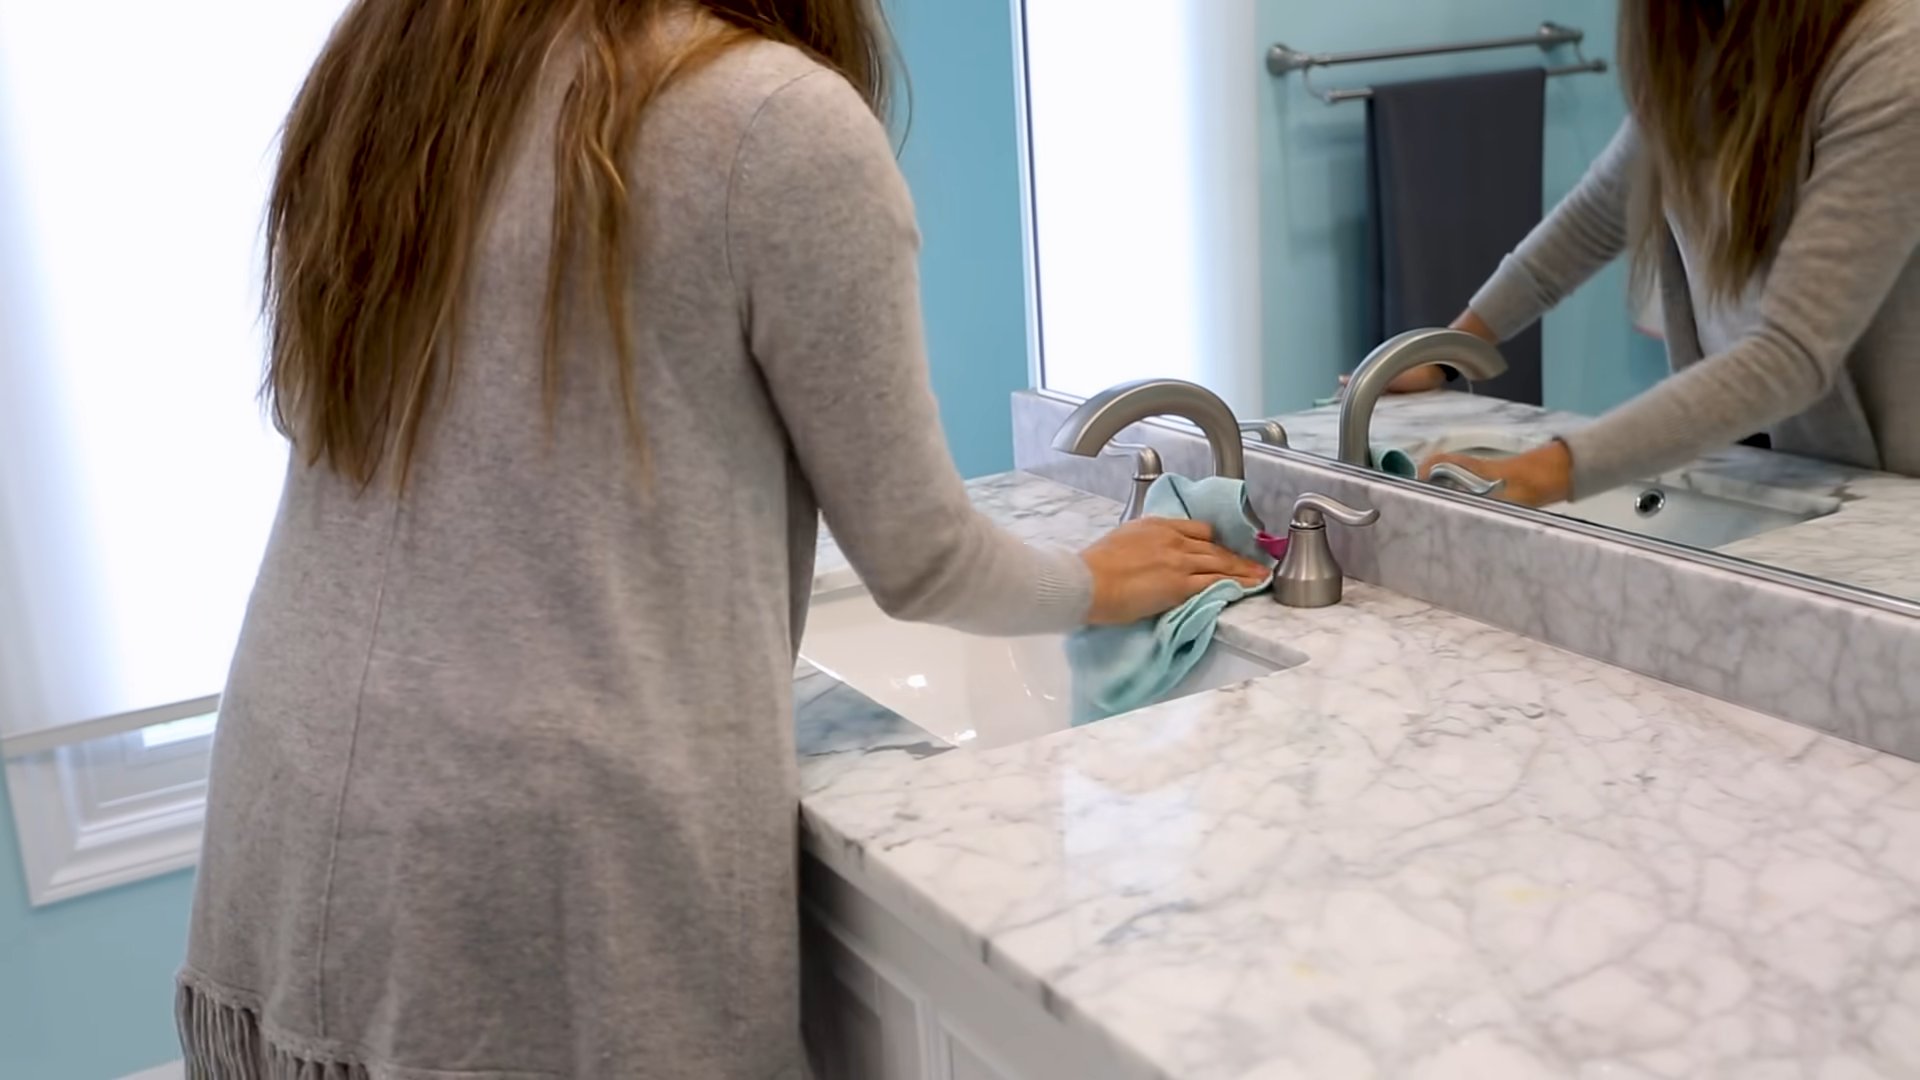
Step-by-Step: Vinegar and Water Mirror Cleaning
This is my go-to method for streak-free mirrors.
1. Gather Your Supplies: You’ll need a spray bottle, white vinegar, water, and a microfiber cloth.
2. Mix the Solution: In the spray bottle, mix equal parts white vinegar and water.
3. Spray the Mirror: Lightly spray the mirror with the vinegar and water solution.
4. Wipe with Microfiber Cloth: Immediately wipe the mirror with a clean, dry microfiber cloth. Use a circular motion to remove any
Conclusion
So, there you have it! These simple bathroom cleaning tricks are more than just quick fixes; they’re a pathway to a consistently sparkling and hygienic bathroom, without the harsh chemicals and exorbitant costs of commercial cleaners. We’ve explored how everyday items you likely already have in your pantry can be transformed into powerful cleaning agents, tackling everything from stubborn soap scum to grimy grout.
Why is this DIY approach a must-try? Because it’s effective, economical, and eco-friendly. You’re reducing your reliance on potentially harmful chemicals that can irritate your skin and damage the environment. You’re saving money by repurposing common household ingredients. And you’re gaining a sense of satisfaction from creating your own cleaning solutions that are tailored to your specific needs.
But the beauty of these bathroom cleaning tricks lies in their adaptability. Feel free to experiment with variations to find what works best for your bathroom surfaces and personal preferences. For instance, if you find the vinegar scent too strong, infuse it with citrus peels for a more pleasant aroma. Lemon peels, orange peels, or even grapefruit peels can add a refreshing fragrance to your homemade cleaner. Simply steep the peels in the vinegar for a week or two before using it.
Another variation involves adding a few drops of your favorite essential oil to your cleaning solutions. Tea tree oil is known for its antibacterial properties, while lavender oil can provide a calming and relaxing scent. Just be sure to use essential oils sparingly, as they can be quite potent.
For tougher stains, consider creating a paste of baking soda and water. Apply the paste to the affected area, let it sit for a few minutes, and then scrub gently with a brush or sponge. This method is particularly effective for removing stubborn water stains and mineral deposits.
Don’t be afraid to get creative and customize these bathroom cleaning tricks to suit your individual needs. The key is to experiment and find what works best for you.
We’re confident that once you try these simple bathroom cleaning tricks, you’ll be amazed by the results. You’ll have a cleaner, fresher, and more inviting bathroom, without the hassle and expense of traditional cleaning methods.
So, ditch the harsh chemicals and embrace the power of DIY cleaning. Give these bathroom cleaning tricks a try and see the difference for yourself. We encourage you to share your experiences with us! Let us know which tricks worked best for you, what variations you tried, and any other tips or insights you have to offer. Your feedback will help us refine these methods and make them even more effective for everyone. Share your before and after photos on social media and tag us! We can’t wait to see your sparkling bathrooms!
Now, let’s address some frequently asked questions to ensure you have all the information you need to embark on your DIY bathroom cleaning journey.
Frequently Asked Questions
Are these DIY bathroom cleaning tricks safe for all bathroom surfaces?
Generally, yes, these tricks are safe for most common bathroom surfaces like tile, porcelain, glass, and stainless steel. However, it’s always a good idea to test any cleaning solution in an inconspicuous area first, especially on more delicate surfaces like natural stone (marble, granite) or painted surfaces. Vinegar, in particular, can etch or dull some natural stone surfaces, so use it with caution or avoid it altogether on these materials. For natural stone, a mild soap and water solution is usually the best option. Always check the manufacturer’s recommendations for cleaning specific surfaces.
How often should I use these DIY bathroom cleaning tricks?
The frequency of cleaning depends on how often your bathroom is used and how quickly it gets dirty. For general cleaning, once a week is usually sufficient. However, you may need to clean more frequently if you have a large family or if your bathroom is prone to moisture and mildew. For specific tasks, like removing soap scum or water stains, you can use these tricks as needed. Regular maintenance will prevent buildup and make cleaning easier in the long run.
Can I mix different DIY cleaning ingredients together?
It’s generally not recommended to mix different DIY cleaning ingredients together, especially bleach and vinegar. Mixing these two substances can create toxic chlorine gas, which is harmful to your health. Other combinations, like vinegar and baking soda, can create a fizzing reaction that is not dangerous but may not be as effective as using the ingredients separately. It’s best to use each ingredient individually and avoid mixing them unless you are absolutely sure that it is safe to do so.
What is the best way to clean grout using these DIY methods?
Grout can be a breeding ground for dirt and mildew, so it’s important to clean it regularly. A paste of baking soda and water is an excellent option for cleaning grout. Apply the paste to the grout lines, let it sit for a few minutes, and then scrub with a stiff-bristled brush (an old toothbrush works well). For tougher stains, you can add a few drops of hydrogen peroxide to the paste. Alternatively, you can spray the grout with vinegar, let it sit for a few minutes, and then scrub with a brush. Rinse thoroughly with water after cleaning.
How can I prevent mildew from growing in my bathroom?
Mildew thrives in damp and humid environments, so it’s important to keep your bathroom well-ventilated. Open a window or turn on the exhaust fan after showering or bathing to help remove excess moisture. Wipe down wet surfaces, such as shower walls and doors, with a towel after each use. You can also spray a solution of vinegar and water on these surfaces to help prevent mildew growth. Regularly clean your shower curtain or door to remove any mildew that may have already formed.
Are these DIY bathroom cleaning tricks safe for children and pets?
While these DIY cleaning solutions are generally safer than commercial cleaners, it’s still important to keep them out of reach of children and pets. Store them in labeled containers in a secure location. When cleaning, make sure the area is well-ventilated and that children and pets are not present. If you are using essential oils, be aware that some oils can be toxic to pets. Always research the safety of essential oils before using them around animals.
What are some other uses for vinegar in bathroom cleaning?
Vinegar is a versatile cleaning agent with many uses in the bathroom. You can use it to clean showerheads by soaking them in a vinegar solution overnight. This will help remove mineral deposits and restore water flow. You can also use vinegar to clean toilet bowls by pouring a cup of vinegar into the bowl and letting it sit for a few hours before flushing. Vinegar can also be used to remove hard water stains from faucets and shower doors.
Can I use these DIY bathroom cleaning tricks on my toilet?
Yes, these tricks can be used to clean your toilet. Baking soda and vinegar are both effective for cleaning and deodorizing toilets. You can pour a cup of baking soda into the toilet bowl, followed by a cup of vinegar. Let the mixture fizz for a few minutes, then scrub with a toilet brush and flush. For tougher stains, you can let the mixture sit overnight before scrubbing.
What is the best way to clean a showerhead with vinegar?
To clean a showerhead with vinegar, you can either remove the showerhead and soak it in a bowl of vinegar overnight, or you can fill a plastic bag with vinegar and secure it around the showerhead with a rubber band. Make sure the showerhead is fully submerged in the vinegar. Let it soak for several hours or overnight. Remove the bag or showerhead and rinse thoroughly with water. Use a toothbrush to scrub away any remaining mineral deposits.
How do I make a DIY bathroom cleaner with essential oils?
To make a DIY bathroom cleaner with essential oils, start with a base of water and vinegar. In a spray bottle, combine equal parts water and vinegar. Add a few drops of your favorite essential oil, such as tea tree oil, lavender oil, or eucalyptus oil. Shake well to combine. Spray the cleaner on bathroom surfaces and wipe clean with a cloth. Be sure to test the cleaner in an inconspicuous area first to ensure it doesn’t damage the surface. Remember to use essential oils sparingly, as they can be quite potent.
Leave a Comment