

Simple daily cleaning routine: it’s the secret weapon against a perpetually messy home, and I’m here to tell you why you absolutely *need* one! Let’s face it, life gets hectic. Between work, family, and trying to squeeze in some semblance of a social life, the last thing most of us want to do is spend hours scrubbing and tidying. But what if I told you that just a few minutes each day could dramatically transform your living space and your overall well-being?
Think of it this way: for centuries, cultures around the world have valued cleanliness not just for hygiene, but for its connection to mental clarity and peace. From the ancient Roman bathhouses to the minimalist aesthetics of Japanese homes, a clean environment has always been associated with a clear mind. It’s not just about appearances; it’s about creating a sanctuary where you can relax and recharge.
This DIY article isn’t about achieving perfection; it’s about creating a sustainable system that works for *you*. We’ll break down the essential tasks into manageable chunks, offering tips and tricks to make your simple daily cleaning routine efficient and even enjoyable (yes, really!). I’ll share my favorite hacks for tackling common problem areas, from the kitchen sink to the bathroom mirror, so you can reclaim your time and your sanity. Get ready to say goodbye to weekend cleaning marathons and hello to a consistently tidy and inviting home!

DIY Your Way to a Sparkling Home: A Simple Daily Cleaning Routine
Okay, let’s be honest, nobody *loves* cleaning. But a little bit each day can make a huge difference in keeping your home feeling fresh and inviting. I’m going to share my simple daily cleaning routine that helps me stay on top of things without feeling overwhelmed. This isn’t about perfection; it’s about maintaining a comfortable and relatively clean living space.
The Philosophy Behind My Daily Routine
Before we dive into the nitty-gritty, let’s talk about the mindset. This routine is designed to be:
* Quick: Each task should only take a few minutes.
* Manageable: It’s broken down into small, easily achievable steps.
* Consistent: The key is to do it *every* day, or at least most days. Don’t beat yourself up if you miss a day, just jump back in the next day.
* Adaptable: Feel free to adjust this routine to fit your specific needs and lifestyle.
The Daily Cleaning Checklist
Here’s a quick overview of what we’ll be tackling each day:
* Make the bed.
* Wipe down kitchen counters and sink.
* Sweep or vacuum high-traffic areas.
* Do a quick tidy-up (put things back where they belong).
* One load of laundry (wash, dry, fold, and put away).
* Empty trash cans as needed.
Step-by-Step Instructions: Conquering the Daily Clean
Now, let’s break down each task into easy-to-follow steps.
1. Make the Bed: The Foundation of a Tidy Room
This is arguably the easiest and most impactful task on the list. Seriously, a made bed instantly makes a room look cleaner.
1. Pull up the sheets: Straighten out your bottom sheet and pull up the top sheet.
2. Fluff the pillows: Give your pillows a good fluff to restore their shape.
3. Arrange the pillows: Place your pillows neatly at the head of the bed. I like to layer mine for a more polished look.
4. Pull up the comforter or duvet: Smooth out your comforter or duvet and arrange it neatly over the bed.
5. Add any decorative touches: If you have any decorative pillows or throws, arrange them on the bed.
2. Wipe Down Kitchen Counters and Sink: Banishing Kitchen Clutter
The kitchen is often the heart of the home, but it can also be a magnet for messes. A quick wipe-down after each meal can prevent grime from building up.
1. Clear the counters: Remove any items from the counters, such as appliances, dishes, or food items.
2. Spray with cleaner: Spray your counters and sink with your favorite all-purpose cleaner. I personally love using a DIY solution of vinegar and water with a few drops of essential oil (lemon or tea tree are great choices).
3. Wipe down the surfaces: Use a clean cloth or sponge to wipe down all the surfaces, paying attention to any spills or sticky spots.
4. Rinse the sink: Rinse the sink thoroughly with water to remove any cleaner residue.
5. Dry the surfaces: Use a clean, dry cloth to dry the counters and sink. This will prevent water spots and keep them looking shiny.
6. Put everything back: Return any items you removed from the counters to their original places.
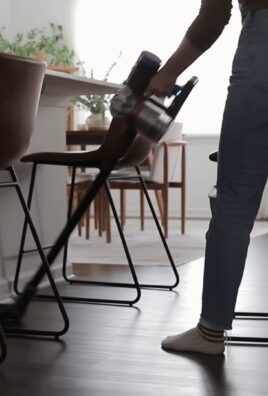
3. Sweep or Vacuum High-Traffic Areas: Keeping Floors Clean
Dirt and dust tend to accumulate in high-traffic areas, such as hallways, entryways, and kitchens. A quick sweep or vacuum can keep these areas looking clean and fresh.
1. Grab your broom or vacuum: Choose the appropriate cleaning tool for your floor type. A broom is great for hard floors, while a vacuum is better for carpets and rugs.
2. Sweep or vacuum the area: Sweep or vacuum the high-traffic areas, paying attention to corners and edges.
3. Empty the dustpan or vacuum canister: Empty the dustpan or vacuum canister when it’s full.
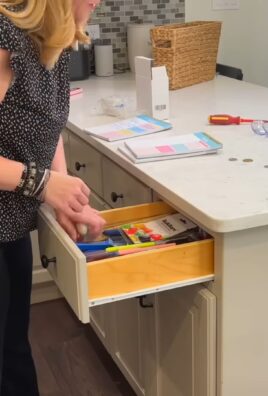
4. Quick Tidy-Up: Putting Things Back Where They Belong
This is all about preventing clutter from accumulating. A quick tidy-up each day can make a huge difference in the overall appearance of your home.
1. Walk through each room: Take a quick walk through each room in your home.
2. Put things back: Put away any items that are out of place, such as books, toys, clothes, or dishes.
3. Straighten up: Straighten up any items that are askew, such as pillows, blankets, or curtains.
5. One Load of Laundry: Staying on Top of the Laundry Pile
Laundry can quickly become overwhelming if you let it pile up. Doing one load each day can help you stay on top of things.
1. Gather dirty laundry: Collect all the dirty laundry from around your home.
2. Sort the laundry: Sort the laundry into whites, darks, and colors.
3. Load the washing machine: Load the washing machine with the sorted laundry.
4. Add detergent: Add the appropriate amount of detergent to the washing machine.
5. Start the washing machine: Start the washing machine on the appropriate cycle.
6. Transfer to the dryer: Once the washing machine is finished, transfer the laundry to the dryer.
7. Dry the laundry: Dry the laundry on the appropriate setting.
8. Fold the laundry: Once the laundry is dry, fold it neatly.
9. Put away the laundry: Put away the folded laundry in its designated place.
6. Empty Trash Cans as Needed: Preventing Odors and Overflow
Emptying trash cans regularly prevents odors and keeps your home looking clean.
1. Check trash cans: Check all the trash cans in your home to see if they need to be emptied.
2. Remove the trash bag: Remove the trash bag from the trash can.
3. Tie the trash bag: Tie the trash bag securely.
4. Dispose of the trash bag: Dispose of the trash bag in your outdoor trash can.
5. Replace the trash bag: Replace the trash bag in the trash can with a new one.
Breaking it Down Further: Room-Specific Tips
While the above checklist covers the basics, here are some room-specific tips to help you tailor your daily cleaning routine:
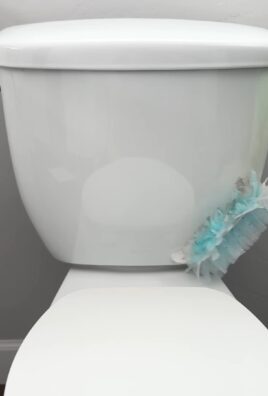
Bathroom
* Wipe down the sink and countertop: After brushing your teeth or washing your hands, give the sink and countertop a quick wipe.
* Squeegee the shower: After showering, use a squeegee to remove water from the shower walls and door. This will help prevent mildew and water spots.
* Clean the toilet seat: Give the toilet seat a quick wipe with a disinfectant wipe.
Living Room
* Fluff the pillows and blankets: Fluff the pillows and blankets on the sofa and chairs.
* Straighten up magazines and books: Straighten up any magazines or books that are lying around.
* Wipe down coffee table: Wipe down the coffee table to remove any dust or spills.
Bedroom
* Make the bed (as mentioned above): This is a must!
* Put away clothes: Put away any clothes that are lying around.
* Clear off nightstand: Clear off your nightstand and put away any items that are out of place.
Making it a Habit: Tips for Success
Consistency is key to making this daily cleaning routine work. Here are a few tips to help you make it a habit:
* Schedule it: Set aside a specific time each day for your cleaning routine. Even 15-20 minutes can make a difference.
* Make it enjoyable: Put on some music, a podcast, or an audiobook while you clean.
* Reward yourself: Treat yourself to something special after you complete your cleaning routine.
* Don’t strive for perfection: Remember, this is about maintaining a clean and comfortable living space, not achieving perfection.
* Enlist help: If you live with others, delegate tasks or work together to complete the routine.
Adapting the Routine to Your Needs
This routine is a starting point. Feel free to adjust it to fit your specific needs and lifestyle. For example:
* If you have pets: You may need to sweep or vacuum more frequently to remove pet hair.
* If you have kids: You may need to spend more time tidying up toys and other items.
* If you work from home: You may want to add a task to clean your workspace.
Beyond the Daily: Weekly and Monthly Tasks
This daily routine is designed to maintain a clean
Conclusion
So, there you have it! Transforming your daily cleaning routine with this simple DIY trick is more than just a shortcut; it’s a game-changer for maintaining a consistently clean and inviting home. We’ve shown you how to leverage readily available ingredients and a few minutes of your time to create a powerful cleaning solution that tackles everyday messes with ease. Forget spending a fortune on expensive, store-bought cleaners filled with harsh chemicals. This method is not only cost-effective and environmentally friendly but also allows you to customize the scent and strength to perfectly suit your preferences and needs.
Why is this DIY trick a must-try? Because it simplifies your life. It eliminates the need for multiple cleaning products cluttering your cabinets. It empowers you to create a healthier living environment for yourself and your family. And, perhaps most importantly, it transforms a dreaded chore into a manageable, even enjoyable, part of your daily routine. Imagine the satisfaction of knowing you’re actively contributing to a cleaner, fresher home with minimal effort.
But the beauty of this DIY approach lies in its adaptability. Feel free to experiment with different essential oils to create your signature scent. Lavender, lemon, tea tree, and eucalyptus are all excellent choices, each offering unique aromatherapy benefits alongside their cleaning properties. For tougher stains or areas requiring extra disinfecting power, consider adding a splash of white vinegar or hydrogen peroxide to your mixture. Remember to always test any new cleaning solution on an inconspicuous area first to ensure it doesn’t damage the surface.
Don’t be afraid to adjust the ratios of ingredients to find the perfect balance for your specific cleaning needs. If you have hard water, you might need to increase the amount of vinegar to prevent streaks. If you prefer a stronger scent, add a few extra drops of your favorite essential oil. The key is to experiment and personalize the recipe until it works best for you.
We are confident that once you incorporate this DIY cleaning trick into your daily routine, you’ll wonder how you ever lived without it. It’s a simple, effective, and sustainable way to keep your home sparkling clean and smelling fresh. So, ditch the harsh chemicals, embrace the power of natural ingredients, and experience the joy of a truly clean home.
Now, we want to hear from you! Give this DIY cleaning trick a try and share your experience with us. What variations did you try? What scents did you use? Did you find it effective for tackling specific messes? Your feedback is invaluable and will help us refine and improve this recipe for everyone. Share your tips, tricks, and success stories in the comments below. Let’s build a community of DIY cleaning enthusiasts and inspire each other to create healthier, happier homes. Let’s make this **simple daily cleaning routine** a habit for everyone!
Frequently Asked Questions (FAQ)
What exactly is the “DIY trick” this conclusion refers to?
This conclusion refers to a homemade cleaning solution designed to simplify your daily cleaning routine. While the specific recipe isn’t detailed here (as this is just the conclusion), it generally involves combining readily available ingredients like water, vinegar, baking soda, and essential oils to create a versatile cleaner suitable for various surfaces. The main article would provide the exact recipe and instructions.
What surfaces can I use this DIY cleaner on?
Generally, this type of DIY cleaner is safe for most non-porous surfaces like countertops (granite, quartz, laminate), sinks, toilets, showers, and floors (tile, linoleum, sealed hardwood). However, it’s crucial to avoid using vinegar-based cleaners on natural stone surfaces like marble or granite, as the acidity can etch and damage them. Always test the cleaner on an inconspicuous area first to ensure it doesn’t cause any discoloration or damage. For wood surfaces, ensure they are properly sealed and avoid excessive moisture.
Can I use different essential oils? What are the best options?
Absolutely! Experimenting with different essential oils is highly encouraged. The best options depend on your personal preferences and desired benefits. Lavender is known for its calming and relaxing properties, while lemon is a powerful degreaser and disinfectant. Tea tree oil has antibacterial and antifungal properties, making it ideal for cleaning bathrooms and kitchens. Eucalyptus oil is a natural decongestant and can help freshen the air. Other popular choices include peppermint, orange, and grapefruit. When choosing essential oils, opt for high-quality, pure oils for the best results.
How long will the DIY cleaning solution last?
The shelf life of your DIY cleaning solution depends on the ingredients used. Generally, a solution made with water, vinegar, and essential oils will last for several weeks to a few months when stored in a cool, dark place. However, if you add ingredients like fresh lemon juice or herbs, the shelf life will be shorter, typically a week or two. It’s best to make smaller batches of the cleaner to ensure it stays fresh and effective. Always check for any signs of spoilage, such as discoloration or a foul odor, before using the solution.
Is this DIY cleaner safe for pets and children?
While this DIY cleaner is generally safer than commercial cleaners with harsh chemicals, it’s still important to exercise caution when using it around pets and children. Essential oils can be toxic to pets if ingested or applied directly to their skin. Keep the cleaner out of reach of children and pets, and avoid spraying it directly on them. If you have pets that are particularly sensitive to smells, consider using unscented versions of the cleaner or opting for pet-safe essential oils like lavender or chamomile in very diluted concentrations. Always consult with your veterinarian if you have any concerns about using essential oils around your pets.
Can I use this cleaner to disinfect surfaces?
While this DIY cleaner can help remove dirt and grime, it may not be as effective as commercial disinfectants in killing all germs and bacteria. To increase its disinfecting power, consider adding a splash of white vinegar or hydrogen peroxide to the mixture. However, never mix vinegar and hydrogen peroxide together, as this can create harmful fumes. For surfaces that require thorough disinfection, such as cutting boards or toilets, it’s best to use a dedicated disinfectant cleaner.
What if I don’t have essential oils? Can I still make this cleaner?
Yes, you can still make the cleaner without essential oils. The essential oils primarily add fragrance and some additional cleaning properties, but the vinegar and baking soda will still provide effective cleaning power. You can substitute the essential oils with a few drops of lemon juice or simply leave them out altogether. The cleaner will still be effective at removing dirt and grime.
My DIY cleaner is leaving streaks on my surfaces. What am I doing wrong?
Streaking can be caused by several factors, including hard water, excessive cleaner residue, or improper wiping technique. If you have hard water, try increasing the amount of vinegar in the solution. Make sure to wipe the surface thoroughly with a clean, dry cloth after cleaning to remove any excess residue. You can also try using distilled water to make the cleaner, as it is free of minerals that can cause streaking.
Can I use this cleaner in a spray bottle?
Yes, this cleaner is perfect for use in a spray bottle. Make sure to use a clean spray bottle and label it clearly to avoid confusion. Shake the bottle well before each use to ensure the ingredients are properly mixed. Store the spray bottle in a cool, dark place to prolong the shelf life of the cleaner.
How often should I use this DIY cleaner as part of my simple daily cleaning routine?
The frequency of use depends on your individual needs and lifestyle. For high-traffic areas like kitchens and bathrooms, daily cleaning is recommended to prevent the buildup of dirt and grime. For other areas of the house, you can use the cleaner as needed, typically a few times a week. The key is to incorporate it into your routine and make it a habit. A **simple daily cleaning routine** using this DIY cleaner can significantly reduce the amount of time and effort required for deep cleaning later on.
Leave a Comment