

Spring Clean Living Dining Rooms: Ah, spring! The season of renewal, fresh starts, and… a whole lot of cleaning! Are you staring at your living and dining rooms, feeling overwhelmed by the winter’s accumulated dust and clutter? Don’t worry, I’ve been there! It’s time to roll up our sleeves and transform these spaces into bright, inviting havens.
For centuries, spring cleaning has been more than just a chore; it’s a ritual deeply rooted in various cultures. From the Persian tradition of “Khaneh Tekani” (shaking the house) to the Christian practice of cleaning before Easter, the act of decluttering and refreshing our homes in spring symbolizes a fresh start and a welcoming of new beginnings. It’s about more than just tidiness; it’s about clearing out the old to make way for the new, both physically and mentally.
Let’s face it, our living and dining rooms are often the heart of our homes. They’re where we relax, entertain, and create lasting memories. But when these spaces are cluttered and dusty, they can feel more stressful than serene. That’s why mastering some simple DIY tricks and hacks for spring clean living dining rooms is essential. I’m going to share some of my favorite, easy-to-implement strategies to help you declutter, deep clean, and refresh your living and dining areas, making them spaces you’ll truly love spending time in. Get ready to say goodbye to winter grime and hello to a sparkling, revitalized home!

Spring Clean Your Living and Dining Rooms: A DIY Deep Dive
Okay, friends, spring is in the air, and that means it’s time to banish the winter blues and give our living and dining rooms some serious TLC! I’m talking a deep clean that goes beyond the usual dusting and vacuuming. Get ready to roll up your sleeves because we’re about to tackle everything from hidden dust bunnies to grimy windows. Let’s get started!
Prepping for the Cleaning Frenzy
Before we dive headfirst into the cleaning chaos, a little preparation goes a long way. Trust me, you’ll thank me later.
* **Gather Your Supplies:** Nothing’s worse than getting halfway through a task and realizing you’re missing a crucial tool. Here’s my go-to list:
* Microfiber cloths (lots of them!)
* All-purpose cleaner
* Glass cleaner
* Wood cleaner (if you have wood furniture)
* Upholstery cleaner (or a DIY solution – more on that later!)
* Vacuum cleaner with attachments
* Baking soda
* White vinegar
* Dish soap
* Rubber gloves
* Bucket
* Sponges
* Old toothbrush (for those hard-to-reach spots)
* Ladder or step stool (for high places)
* Trash bags
* Laundry basket
* **Declutter First:** Before you even think about cleaning, take some time to declutter. This will make the actual cleaning process much easier and more efficient. Go through your living and dining rooms and get rid of anything you don’t need, use, or love. Donate, sell, or toss – whatever works for you!
* **Open the Windows:** Fresh air is your best friend during a deep clean. Open those windows and let the sunshine in! It’ll help air out the rooms and make the cleaning process more enjoyable.
* **Protect Your Floors:** If you have delicate floors, consider laying down some old towels or drop cloths to protect them from spills and scratches.
Tackling the Living Room
The living room is often the heart of the home, so it deserves some extra attention.
Dusting Like a Pro
Dusting isn’t just about wiping surfaces; it’s about getting into all those nooks and crannies where dust loves to hide.
1. **Start High:** Always start dusting from the top down. This way, any dust that falls will land on the floor, which you’ll vacuum later.
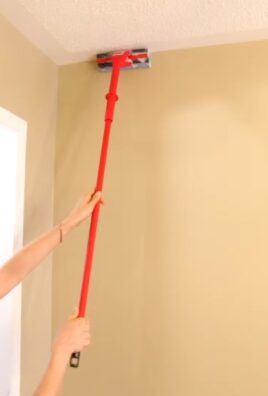
2. **Ceiling Fans and Light Fixtures:** Use a duster with an extension pole to reach ceiling fans and light fixtures. Be careful not to knock anything down! For light fixtures, make sure they’re turned off and cool before you start cleaning.
3. **Shelves and Bookshelves:** Remove everything from your shelves and bookshelves and dust each item individually. Use a microfiber cloth to wipe down the shelves themselves. Don’t forget to dust the backs of books!
4. **Electronics:** Use a dry microfiber cloth to dust your TV screen, speakers, and other electronics. Avoid using liquid cleaners on electronics, as they can damage them.
5. **Picture Frames and Mirrors:** Use glass cleaner to clean picture frames and mirrors. Spray the cleaner onto a microfiber cloth, not directly onto the surface, to avoid streaks.
6. **Baseboards and Trim:** Use a damp cloth to wipe down baseboards and trim. You can add a little bit of all-purpose cleaner to the water if they’re particularly dirty.
Conquering the Upholstery
Upholstery can be a breeding ground for dust, dirt, and allergens. Here’s how to give your furniture a refresh.
1. **Vacuum Thoroughly:** Use the upholstery attachment on your vacuum cleaner to vacuum your sofas, chairs, and ottomans. Pay special attention to crevices and seams where dirt tends to accumulate.
2. **Spot Clean Stains:** If you have any stains, spot clean them with an upholstery cleaner or a DIY solution. For a simple DIY solution, mix equal parts white vinegar and water in a spray bottle. Test the solution on an inconspicuous area first to make sure it doesn’t damage the fabric. Spray the solution onto the stain, let it sit for a few minutes, and then blot it with a clean cloth.
3. **Deep Clean (If Necessary):** If your upholstery is particularly dirty, you may need to deep clean it. You can rent an upholstery cleaning machine or hire a professional cleaner. If you choose to deep clean it yourself, follow the instructions on the machine carefully.
4. **Deodorize:** Sprinkle baking soda over your upholstery and let it sit for at least 30 minutes (or even overnight). Then, vacuum it up. This will help to deodorize your furniture and remove any lingering odors.
Window Wonders
Clean windows can make a huge difference in the brightness and overall feel of a room.
1. **Dust First:** Use a brush or vacuum cleaner attachment to remove any loose dust or dirt from the window frames and sills.
2. **Wash the Windows:** Mix equal parts white vinegar and water in a spray bottle. Spray the solution onto the windows and wipe them down with a clean microfiber cloth. For stubborn streaks, try using a squeegee.
3. **Clean the Screens:** Remove the window screens and wash them with soapy water. Rinse them thoroughly and let them dry completely before putting them back in.
4. **Don’t Forget the Curtains/Blinds:** Wash or dry clean your curtains or blinds according to the manufacturer’s instructions. If you have blinds, you can dust them with a microfiber cloth or use a blind cleaner tool.
Floor Focus
Whether you have hardwood, carpet, or tile, your floors need some love.
1. **Vacuum or Sweep:** Vacuum or sweep your floors to remove any loose dirt and debris.
2. **Mop (Hardwood or Tile):** Mop your hardwood or tile floors with a cleaner specifically designed for those surfaces. Follow the instructions on the cleaner carefully. Avoid using too much water, as it can damage hardwood floors.
3. **Steam Clean (Carpet):** Steam clean your carpets to remove deep-down dirt and stains. You can rent a steam cleaner or hire a professional cleaner. If you choose to steam clean it yourself, follow the instructions on the machine carefully.
4. **Spot Clean (Carpet):** If you have any stains on your carpet, spot clean them with a carpet cleaner. Test the cleaner on an inconspicuous area first to make sure it doesn’t damage the carpet.
Dining Room Delights
Now, let’s move on to the dining room and give it a spring refresh.
Table Transformation
The dining table is the centerpiece of the room, so let’s make it shine.
1. **Clear the Table:** Remove everything from the table, including placemats, centerpieces, and any other decorative items.
2. **Dust and Clean:** Dust the table with a microfiber cloth. If you have a wood table, use a wood cleaner to polish it. If you have a glass table, use glass cleaner to clean it.
3. **Clean Placemats and Table Runners:** Wash or dry clean your placemats and table runners according to the manufacturer’s instructions.
4. **Polish Silverware (If Applicable):** If you have silverware, polish it to remove any tarnish.
Chair Charm
Dining chairs can get pretty grimy, especially if you have kids.
1. **Vacuum:** Vacuum your dining chairs to remove any loose dirt and debris.
2. **Spot Clean:** Spot clean any stains with an upholstery cleaner or a DIY solution (like the vinegar and water mix).
3. **Deep Clean (If Necessary):** If your chairs are particularly dirty, you may need to deep clean them. You can rent an upholstery cleaning machine or hire a professional cleaner.
4. **Wipe Down Legs:** Wipe down the legs of your chairs with a damp cloth.
Cabinet Care
Dining room cabinets are often used to store dishes, glassware, and other items.
1. **Empty the Cabinets:** Remove everything from the cabinets.
2. **Dust and Clean:** Dust the inside of the cabinets with a microfiber cloth. If the cabinets are particularly dirty, you can use a damp cloth with a little bit of all-purpose cleaner.
3. **Organize:** Take this opportunity to organize your dishes, glassware, and other items. Get rid of anything you don’t need or use.
4. **Clean Glassware and Dishes:** Wash your glassware and dishes with soap and water. Dry them thoroughly before putting them back in the cabinets.
Finishing Touches
It’s the little things that make a big difference.
1. **Air Freshener:** Spray some air freshener to freshen up the rooms.
2. **Arrange Flowers:** Put a vase of fresh flowers on the dining table or in the living room to add a touch of spring.
3. **Light a Candle:** Light a scented candle to create a relaxing and inviting atmosphere.
4. **Enjoy Your

Conclusion
So, there you have it! Transforming your living and dining rooms into havens of freshness and light doesn’t require a massive budget or a team of professional cleaners. This spring cleaning DIY trick, focusing on natural and effective methods, is a game-changer for anyone looking to revitalize their home environment. It’s not just about removing dust and grime; it’s about creating a space that feels genuinely renewed, brighter, and more inviting.
Why is this a must-try? Because it’s simple, cost-effective, and uses ingredients you likely already have in your pantry. Forget harsh chemicals and overpowering fragrances. This approach prioritizes natural cleaning agents like vinegar, baking soda, and essential oils, ensuring a safe and healthy environment for you, your family, and even your pets. The satisfaction of knowing you’ve achieved a sparkling clean space using eco-friendly methods is truly rewarding.
Beyond the basic steps, there’s plenty of room for customization. For instance, if you’re dealing with stubborn stains on your upholstery, consider creating a paste of baking soda and water, applying it to the stain, letting it sit for a few minutes, and then gently scrubbing it away. For a more potent cleaning solution for your floors, add a few drops of tea tree oil to your vinegar and water mixture – its antibacterial properties will leave your floors not only clean but also sanitized. If you have wooden furniture, consider using a mixture of olive oil and lemon juice to polish and protect it, leaving a beautiful shine.
Don’t underestimate the power of decluttering! Before you even begin cleaning, take some time to go through your living and dining rooms and remove anything you no longer need or use. This will make the cleaning process much easier and more efficient. Consider donating unwanted items to charity or selling them online. A clutter-free space is a key ingredient in creating a truly refreshing and inviting atmosphere.
We encourage you to embrace this spring cleaning DIY trick and experience the difference it can make in your living and dining rooms. The process is not only therapeutic but also incredibly rewarding. Imagine stepping into a space that is not only visually appealing but also smells fresh and clean, all thanks to your own efforts.
But don’t just take our word for it! We’re eager to hear about your experiences. Try this DIY trick, adapt it to your specific needs, and share your results with us. What variations did you try? What challenges did you encounter? What tips do you have for others? Your feedback is invaluable and will help us refine and improve this guide for future readers. Share your before-and-after photos, your favorite cleaning hacks, and your overall impressions in the comments section below. Let’s create a community of spring cleaning enthusiasts who are passionate about creating beautiful and healthy homes. So, grab your cleaning supplies, put on some music, and get ready to transform your living and dining rooms into spaces you’ll love spending time in. Happy cleaning!
FAQ
What exactly is this “spring cleaning DIY trick” all about?
This DIY trick is a comprehensive approach to spring cleaning your living and dining rooms using primarily natural and readily available ingredients. It focuses on effective cleaning methods that are safe for your family, pets, and the environment. Instead of relying on harsh chemicals, we utilize the power of ingredients like vinegar, baking soda, lemon juice, and essential oils to achieve a sparkling clean and refreshed space. The trick encompasses everything from decluttering and dusting to cleaning floors, furniture, and windows, all while minimizing your environmental impact. It’s about creating a healthier and more inviting home environment through conscious cleaning practices.
Is vinegar really safe to use on all surfaces?
While vinegar is a fantastic natural cleaner, it’s not suitable for all surfaces. Avoid using it on marble, granite, or other natural stone countertops, as its acidity can etch and damage them. It’s also best to avoid using vinegar on waxed wood floors, as it can dull the finish. Always test vinegar in an inconspicuous area before applying it to a larger surface to ensure it doesn’t cause any discoloration or damage. For delicate surfaces, consider using a milder cleaning solution like diluted dish soap and water.
What essential oils are best for spring cleaning?
Several essential oils possess powerful cleaning and disinfecting properties, making them ideal for spring cleaning. Lemon essential oil is a popular choice for its uplifting scent and degreasing abilities. Tea tree oil is a potent antibacterial and antifungal agent, perfect for sanitizing surfaces. Lavender essential oil adds a calming and relaxing aroma while also possessing antiseptic properties. Eucalyptus essential oil is known for its decongestant properties and can help freshen the air. When using essential oils, always dilute them properly with water or a carrier oil to avoid skin irritation or damage to surfaces. A few drops in a spray bottle of water or vinegar solution are usually sufficient.
How often should I be spring cleaning my living and dining rooms?
While the term “spring cleaning” implies an annual event, the frequency of deep cleaning your living and dining rooms depends on your lifestyle and the amount of traffic they receive. For most households, a thorough spring cleaning once or twice a year is sufficient. However, regular maintenance cleaning, such as dusting, vacuuming, and wiping down surfaces, should be done weekly or bi-weekly to prevent dirt and grime from building up. If you have pets or young children, you may need to clean more frequently to maintain a healthy and hygienic environment.
What if I don’t have all the ingredients listed? Can I still do this?
Absolutely! The beauty of this DIY trick is its flexibility. While we recommend certain ingredients for optimal results, you can easily substitute them based on what you have on hand. For example, if you don’t have vinegar, you can use lemon juice as a substitute. If you don’t have essential oils, you can simply omit them or use other natural fragrances like citrus peels or herbs. The key is to focus on the core principles of natural cleaning and adapt the methods to your specific needs and resources. Don’t let a lack of specific ingredients deter you from giving your living and dining rooms a much-needed refresh.
How can I get my kids involved in spring cleaning?
Involving your kids in spring cleaning can be a fun and educational experience. Assign them age-appropriate tasks, such as dusting low surfaces, sorting toys, or wiping down baseboards. Make it a game by turning on some music and setting a timer. Offer rewards for completing tasks, such as extra playtime or a small treat. Explain the importance of cleaning and maintaining a healthy home environment. By involving your kids, you’re not only lightening your workload but also teaching them valuable life skills and fostering a sense of responsibility.
What’s the best way to deal with pet hair during spring cleaning?
Pet hair can be a major challenge during spring cleaning, especially if you have furry friends. Invest in a good quality vacuum cleaner with a HEPA filter to effectively remove pet hair from carpets, rugs, and upholstery. Use a lint roller or rubber glove to pick up pet hair from furniture and clothing. Consider using a pet hair remover spray or fabric softener sheets to loosen pet hair from fabrics before vacuuming. Regularly groom your pets to minimize shedding and prevent pet hair from accumulating in your home.
How do I prevent dust from accumulating so quickly after spring cleaning?
Preventing dust buildup is an ongoing effort, but there are several things you can do to minimize it. Regularly dust your furniture, shelves, and other surfaces with a microfiber cloth. Use an air purifier to remove dust and allergens from the air. Change your air filters regularly to prevent dust from circulating through your HVAC system. Consider using dust mite covers on your mattresses and pillows. Vacuum your carpets and rugs regularly to remove dust and debris. By implementing these strategies, you can keep your living and dining rooms cleaner for longer and reduce the frequency of deep cleaning.
What if I have allergies? Are these natural cleaning methods still safe for me?
Yes, in most cases, these natural cleaning methods are safer for people with allergies than traditional cleaning products that contain harsh chemicals and fragrances. However, it’s essential to be mindful of potential allergens in natural ingredients as well. For example, some people are allergic to citrus fruits or certain essential oils. If you have known allergies, test the cleaning solutions in a small, inconspicuous area before applying them to larger surfaces. You can also consult with your doctor or allergist to determine which ingredients are safe for you to use. When in doubt, opt for simple cleaning solutions like diluted dish soap and water, which are generally well-tolerated.

Leave a Comment