

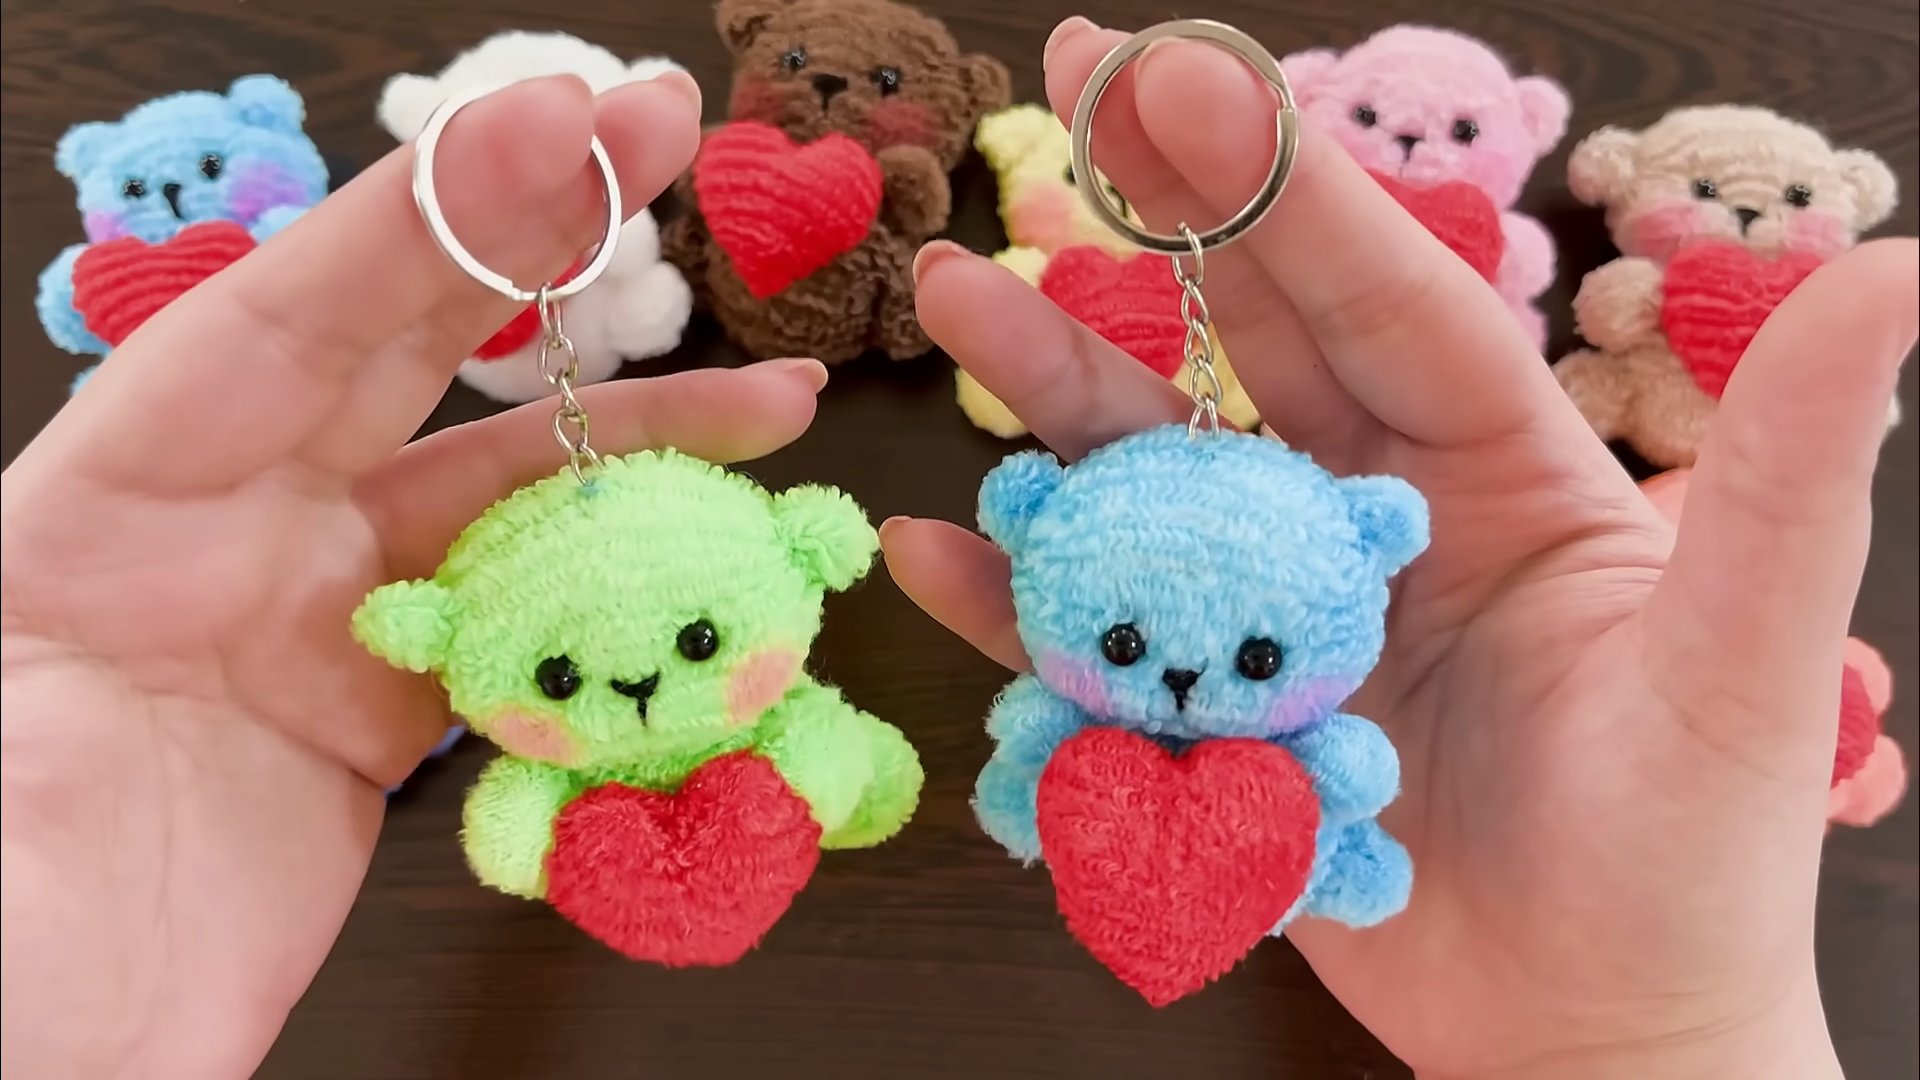
Teddy Bear Keychain DIY: Who doesn’t love a cute and cuddly teddy bear? But what if you could carry that adorable charm with you everywhere you go? I’m so excited to share a fun and easy project that lets you do just that – creating your very own teddy bear keychain!
Keychains have been around for ages, evolving from simple ways to keep keys organized to personalized accessories that reflect our style and interests. Think about it, from ancient Roman finger rings used to secure keys to the elaborate fobs of the Victorian era, keychains have always been more than just functional. Now, we’re taking that tradition and adding a touch of handmade sweetness with our teddy bear keychain DIY.
In today’s fast-paced world, adding a personal touch to everyday items can bring a little joy and a sense of calm. This teddy bear keychain DIY is the perfect way to de-stress, get creative, and end up with a unique accessory that’s sure to spark conversations. Plus, it’s a fantastic way to use up those scraps of fabric and yarn you’ve been hoarding! I know I’m always looking for ways to use up my craft supplies. So, grab your supplies, and let’s get crafting! I promise, you’ll love the result.
DIY Adorable Teddy Bear Keychain: A Step-by-Step Guide
Hey there, fellow crafters! Ever wanted a super cute, personalized keychain that screams “you”? Well, look no further! Today, I’m going to walk you through creating your very own adorable teddy bear keychain. It’s a fun and easy project, perfect for beginners and seasoned DIYers alike. Plus, it makes a fantastic gift!
What You’ll Need: The Supply List
Before we dive in, let’s gather our supplies. Having everything ready beforehand will make the process smooth and enjoyable.
* **Mini Teddy Bear:** This is the star of the show! You can find these at craft stores, online retailers, or even repurpose an old, small teddy bear. Aim for one that’s around 3-4 inches tall.
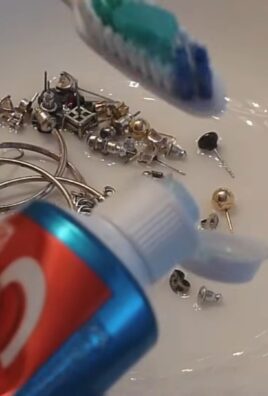
* **Keychain Ring:** Choose a sturdy keychain ring that can handle daily wear and tear.
* **Jump Rings:** These small metal rings connect the teddy bear to the keychain ring. You’ll need at least two, but having a few extras is always a good idea.
* **Eye Pin:** This is a small pin with a loop at one end. We’ll use it to create a secure attachment point on the teddy bear’s head.
* **Pliers (Needle-Nose Pliers and Round-Nose Pliers):** These are essential for opening and closing jump rings and manipulating the eye pin.
* **Strong Glue (E6000 or Similar):** A strong adhesive is crucial for securing the eye pin in place.
* **Scissors:** For trimming any stray threads or fabric.
* **Optional Embellishments:** This is where you can get creative! Consider adding beads, charms, ribbons, felt shapes, or anything else that tickles your fancy.
* **Drill (Optional):** If your teddy bear is particularly dense, you might need a small drill to create a pilot hole for the eye pin.
* **Safety Glasses (Optional):** If you’re using a drill, safety glasses are a must!
Preparing Your Teddy Bear: Creating a Secure Attachment Point
This is a crucial step to ensure your teddy bear doesn’t go rogue and detach from your keys!
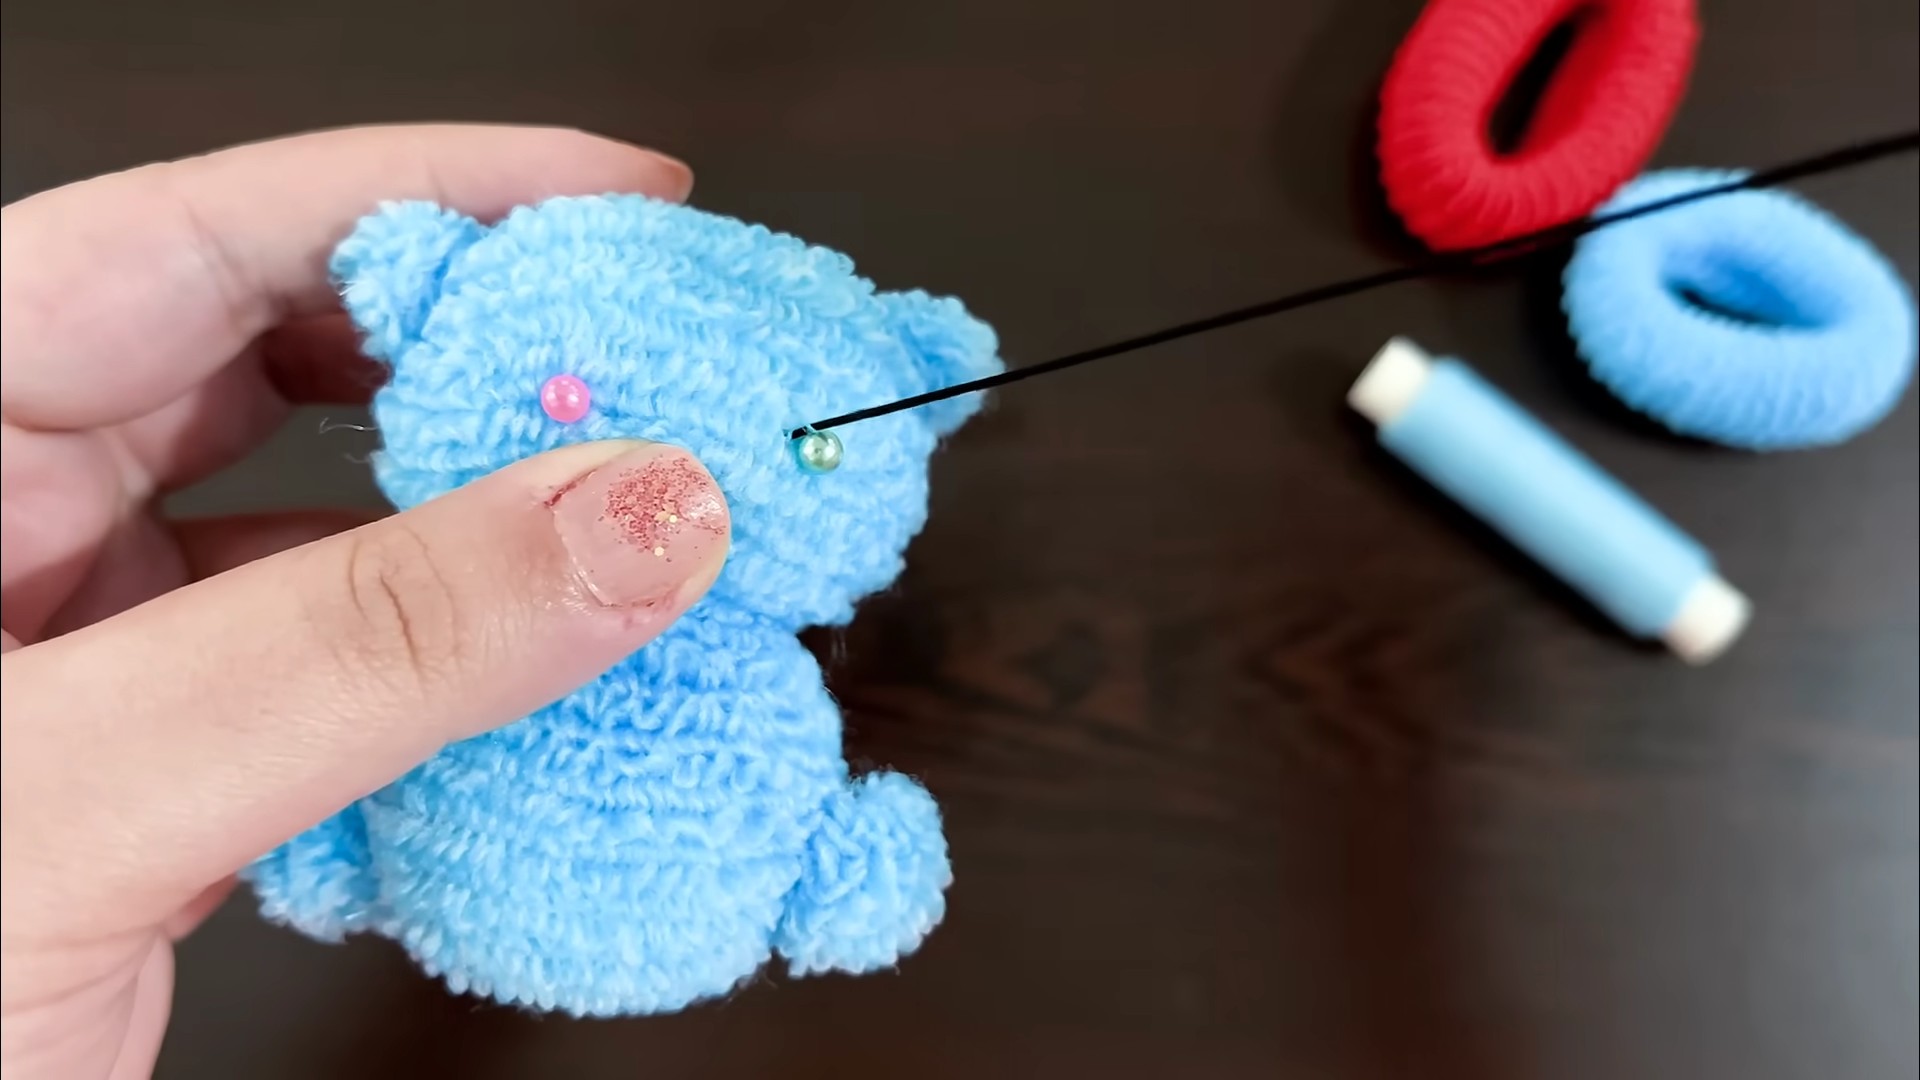
1. **Choose the Placement:** Decide where you want the keychain to attach to the teddy bear. The top of the head is usually the most balanced and aesthetically pleasing spot.
2. **Mark the Spot:** Use a pen or marker to mark the exact point where you want to insert the eye pin.
3. **Create a Pilot Hole (Optional):** If your teddy bear is made of dense material, carefully use a small drill bit to create a pilot hole at the marked spot. This will make it easier to insert the eye pin and prevent the fabric from tearing. Remember to wear safety glasses if you’re using a drill!
4. **Insert the Eye Pin:** Apply a small amount of strong glue (like E6000) to the end of the eye pin. Carefully insert the pin into the marked spot (or the pilot hole, if you created one).
5. **Secure the Eye Pin:** Gently push the eye pin into the teddy bear until the loop is flush with the surface. Wipe away any excess glue with a damp cloth.
6. **Let it Dry Completely:** This is the most important part! Allow the glue to dry completely according to the manufacturer’s instructions. This usually takes at least 24 hours. Resist the urge to touch or move the teddy bear during this time.
Connecting the Teddy Bear to the Keychain: Assembling Your Masterpiece
Now that our teddy bear has a secure attachment point, it’s time to connect it to the keychain ring.
1. **Open a Jump Ring:** Using your needle-nose pliers, gently open a jump ring. Don’t pull the ends apart; instead, twist them open sideways. This will help maintain the ring’s shape.
2. **Attach the Jump Ring to the Eye Pin:** Slide the open jump ring through the loop of the eye pin on the teddy bear’s head.
3. **Attach the Jump Ring to the Keychain Ring:** Slide the other end of the open jump ring onto the keychain ring.
4. **Close the Jump Ring:** Using your needle-nose pliers, carefully close the jump ring by twisting the ends back together. Make sure the ring is securely closed to prevent it from opening accidentally.
5. **Add a Second Jump Ring (Optional):** For extra security, you can add a second jump ring between the first jump ring and the keychain ring. This will distribute the weight and reduce the stress on a single point. Repeat steps 1-4 to add the second jump ring.
Embellishing Your Keychain: Adding Your Personal Touch
This is where you can really let your creativity shine! There are endless possibilities for embellishing your teddy bear keychain.
1. **Beads and Charms:** String beads or charms onto jump rings and attach them to the keychain ring. You can use a variety of colors, shapes, and sizes to create a unique design.
2. **Ribbons and Bows:** Tie a small ribbon or bow around the teddy bear’s neck or ear. Choose a ribbon that complements the teddy bear’s color or adds a pop of contrast.
3. **Felt Shapes:** Cut out felt shapes (hearts, stars, flowers, etc.) and glue them onto the teddy bear’s body. You can also use fabric paint to add details to the felt shapes.
4. **Personalized Tags:** Create a small tag with your name, initials, or a special message and attach it to the keychain ring.
5. **Miniature Accessories:** Add miniature accessories like tiny hats, glasses, or backpacks to your teddy bear. You can find these at craft stores or online retailers.
Tips and Tricks for a Perfect Teddy Bear Keychain
* Choose a High-Quality Teddy Bear: The better the quality of the teddy bear, the longer your keychain will last. Look for a teddy bear that is well-stitched and made of durable materials.
* Use Strong Glue: Don’t skimp on the glue! A strong adhesive is essential for securing the eye pin and preventing it from coming loose.
* Let the Glue Dry Completely: Patience is key! Allow the glue to dry completely before attaching the teddy bear to the keychain ring.
* Reinforce the Attachment Point: For extra security, you can add a small piece of felt or fabric to the back of the teddy bear’s head, covering the base of the eye pin. This will provide additional support and prevent the pin from pulling through the fabric.
* Protect Your Keychain: To protect your keychain from dirt and wear, you can apply a sealant or varnish. This will also help to prevent the embellishments from falling off.
* Consider the Weight: Be mindful of the weight of your embellishments. Adding too many heavy beads or charms can put stress on the keychain ring and cause it to break.
* Get Creative with Colors and Textures: Don’t be afraid to experiment with different colors, textures, and materials. The more creative you are, the more unique your keychain will be.
* Personalize It: Add elements that reflect your personality and interests. This will make your keychain even more special.
* Check Regularly: Periodically check the jump rings and eye pin to ensure they are still secure. If you notice any signs of wear or damage, replace them immediately.
* Have Fun!: Most importantly, have fun with the process! This is a chance to express your creativity and create something truly unique.
Troubleshooting Common Issues
* **The Eye Pin Keeps Coming Loose:** Make sure you’re using a strong glue and allowing it to dry completely. You can also try roughening up the surface of the teddy bear’s head with sandpaper before applying the glue.
* **The Jump Rings Keep Opening:** Use high-quality jump rings that are made of sturdy metal. Make sure you’re closing the jump rings properly by twisting the ends back together.
* **The Embellishments Keep Falling Off:** Use a strong adhesive to attach the embellishments. You can also try sewing them on for extra security.
* **The Keychain Ring Breaks:** Use a sturdy keychain ring that is designed to withstand daily wear and tear.
Alternative Ideas and Variations
* **Use Different Animals:** Instead of a teddy bear, you can use other small stuffed animals like bunnies, kittens, or puppies.
* **Create a Theme:** Design your keychain around a specific theme, such as holidays, sports, or hobbies.
* **Add a Tassel:** Attach a tassel to the keychain ring for a touch of elegance.
* **Make a Matching Set:** Create a matching set of keychains for you and your friends or family.
* **Use Different Materials:** Experiment with different materials like leather, wood, or metal to create a unique keychain.
I hope you enjoyed this tutorial and are inspired to create your own adorable teddy bear keychain! Remember to have fun and let your creativity shine. Happy crafting!
Conclusion
So, there you have it! Crafting your own adorable teddy bear keychain is not just a fun afternoon project; it’s a gateway to personalized style and heartfelt gifting. Forget mass-produced trinkets – this DIY trick allows you to create a unique accessory that reflects your personality or perfectly suits the recipient. The satisfaction of knowing you made something with your own two hands is truly unparalleled.
Why is this a must-try? Because it’s incredibly versatile! You can use scraps of fabric you already have, giving them a new lease on life. It’s a fantastic way to reduce waste and be eco-conscious while indulging in your creative side. Plus, the customization options are endless. Think about using different fabrics – corduroy for a rustic feel, velvet for a touch of luxury, or even upcycled denim for a trendy, edgy look.
Beyond fabric, consider embellishments. Add tiny buttons for eyes, embroider a cute little nose, or even attach miniature charms that reflect the recipient’s hobbies or interests. For a truly personalized touch, you could even embroider initials or a special date onto the teddy bear’s belly. Imagine the joy of receiving a keychain that’s not only adorable but also carries a deeply personal message.
Variations abound! Don’t limit yourself to the traditional teddy bear shape. Experiment with different animal silhouettes – a playful puppy, a cuddly kitten, or even a whimsical unicorn. You can also adjust the size of the keychain to suit your needs. A smaller version would be perfect for attaching to a zipper pull, while a larger one could be used as a bag charm.
Another exciting variation is to incorporate essential oils. Stuff the teddy bear with cotton balls infused with your favorite calming scent, like lavender or chamomile. This turns your keychain into a portable aromatherapy diffuser, providing a subtle and soothing fragrance throughout the day.
This teddy bear keychain DIY project is also a fantastic activity to do with children. It’s a great way to encourage their creativity, develop their fine motor skills, and spend quality time together. Just be sure to supervise them closely, especially when using sharp objects like scissors or needles.
We wholeheartedly encourage you to give this DIY trick a try. It’s a simple, affordable, and incredibly rewarding project that will bring a smile to your face every time you see your adorable creation. Don’t be afraid to experiment with different materials, colors, and embellishments to create a keychain that’s truly unique to you.
Once you’ve crafted your masterpiece, we’d love to see it! Share your creations with us on social media using [Your Hashtag Here]. We can’t wait to see the amazing teddy bear keychains you come up with! Let’s spread the joy of handmade goodness and inspire others to unleash their inner crafter. Happy crafting!
Frequently Asked Questions (FAQ)
What kind of fabric is best for making a teddy bear keychain?
The best fabric for a teddy bear keychain depends on the look and feel you’re going for. Felt is a popular choice because it’s inexpensive, easy to work with, and comes in a wide variety of colors. Fleece is another great option, as it’s soft, cuddly, and doesn’t fray easily. For a more luxurious feel, consider using velvet or corduroy. Cotton fabric is also a good choice, especially if you want to add embroidery or other embellishments. Ultimately, the best fabric is one that you enjoy working with and that suits the overall aesthetic you’re aiming for. Consider the scale of the keychain as well; very thick fabrics might be difficult to work with on a small scale.
What kind of stuffing should I use for my teddy bear keychain?
Polyester fiberfill is the most common and readily available stuffing option for teddy bear keychains. It’s lightweight, hypoallergenic, and washable. Cotton balls are another option, especially if you want to add essential oils for aromatherapy purposes. Just be sure to use enough cotton balls to create a firm and well-shaped teddy bear. You can also use fabric scraps as stuffing, but be sure to cut them into small pieces to avoid lumps. Avoid using materials like beans or rice, as they can attract moisture and mold.
How do I attach the keychain to the teddy bear?
There are several ways to attach the keychain to the teddy bear. The easiest method is to sew a small loop of ribbon or fabric to the top of the teddy bear’s head. Then, simply attach a keychain ring to the loop. Another option is to use a metal eyelet or grommet. Punch a hole in the top of the teddy bear’s head and insert the eyelet, securing it with pliers. Then, attach the keychain ring to the eyelet. For a more secure attachment, you can sew the keychain ring directly to the teddy bear’s head, reinforcing the stitches multiple times. Make sure the attachment point is strong enough to withstand everyday wear and tear.
Can I wash my teddy bear keychain?
Whether or not you can wash your teddy bear keychain depends on the materials you used to make it. If you used washable fabrics and stuffing, you can hand-wash it gently with mild soap and water. Avoid using harsh detergents or bleach. Rinse thoroughly and allow it to air dry completely. If you used delicate fabrics or embellishments, it’s best to spot-clean the keychain with a damp cloth. Avoid putting the keychain in the washing machine or dryer, as this could damage it.
How can I personalize my teddy bear keychain?
There are endless ways to personalize your teddy bear keychain! You can use different fabrics, colors, and embellishments to create a unique design. Consider adding tiny buttons for eyes, embroidering a cute little nose, or attaching miniature charms that reflect the recipient’s hobbies or interests. You can also embroider initials or a special date onto the teddy bear’s belly. Another fun idea is to dress up your teddy bear with miniature clothing, such as a tiny hat or scarf. Get creative and let your imagination run wild!
What if I don’t know how to sew? Can I still make this?
Absolutely! While sewing is the most common method for assembling a teddy bear keychain, you can also use fabric glue. Choose a strong, permanent fabric glue and carefully apply it to the edges of the fabric pieces. Press the pieces together firmly and allow the glue to dry completely according to the manufacturer’s instructions. This method may not be as durable as sewing, but it’s a great option for beginners or those who don’t have access to a sewing machine. You can also find pre-cut felt shapes at craft stores that require minimal assembly, often just gluing or snapping together.
How long does it take to make a teddy bear keychain?
The time it takes to make a teddy bear keychain depends on your skill level and the complexity of the design. A simple felt teddy bear keychain can be completed in as little as 30 minutes, while a more elaborate design with intricate details may take several hours. Don’t rush the process – take your time and enjoy the creative journey. The more you practice, the faster and more efficient you’ll become.
What safety precautions should I take when making a teddy bear keychain?
When making a teddy bear keychain, it’s important to take certain safety precautions, especially if you’re crafting with children. Always supervise children closely when using sharp objects like scissors or needles. Use a thimble to protect your fingers when sewing. Be careful when using hot glue guns, and avoid touching the hot glue directly. Keep small parts, such as buttons and beads, out of reach of young children to prevent choking hazards. Work in a well-lit area to avoid eye strain. And most importantly, have fun and be creative!
Leave a Comment