

Wall vegetable garden: Imagine stepping outside your door and plucking fresh, vibrant vegetables right from your own vertical oasis! Forget sprawling plots and back-breaking labor; we’re diving into the wonderful world of wall vegetable gardens, a DIY project that’s as rewarding as it is space-saving.
The concept of vertical gardening isn’t new. In fact, evidence suggests that hanging gardens existed in ancient civilizations, offering both beauty and sustenance. Think of the Hanging Gardens of Babylon, one of the Seven Wonders of the Ancient World! While we might not be building anything quite so grand, the spirit of maximizing space and bringing nature closer remains the same.
But why a wall vegetable garden today? Well, let’s face it, many of us are short on space. Whether you live in an apartment with a tiny balcony or a house with a postage-stamp-sized yard, a vertical garden allows you to grow your own food without sacrificing precious square footage. Plus, it’s a fantastic way to add a touch of green to otherwise drab walls, creating a living piece of art that’s also incredibly practical. I’m excited to share some simple, effective DIY tricks and hacks that will help you create your own thriving wall vegetable garden, no matter your experience level. Get ready to transform your space and enjoy the taste of homegrown goodness!
Creating Your Own Stunning Vertical Wall Garden
Hey there, fellow plant enthusiasts! I’m so excited to share this DIY project with you – building your very own vertical wall garden. It’s a fantastic way to bring some greenery into your life, especially if you’re short on space. Plus, it’s a really fun and rewarding project. I promise, even if you’re not super handy, you can totally do this!
Why a Vertical Wall Garden?
Before we dive in, let’s talk about why a vertical wall garden is such a great idea.
* Space Saver: Perfect for apartments, balconies, or small patios.
* Aesthetic Appeal: Adds a beautiful and unique touch to any space.
* Improved Air Quality: Plants naturally purify the air.
* Easy Access: Makes gardening and harvesting herbs or vegetables much easier on your back.
* Conversation Starter: Trust me, everyone will be asking about your amazing wall garden!
Materials You’ll Need
Okay, let’s gather our supplies. This list might seem long, but don’t worry, it’s all pretty straightforward.
* Wooden Pallet: Look for a sturdy, untreated pallet. You can often find these for free at local businesses or construction sites. Make sure it’s clean and in good condition.
* Heavy-Duty Landscape Fabric: This will line the inside of your pallet and hold the soil.
* Staple Gun and Staples: To secure the landscape fabric to the pallet.
* Gloves: To protect your hands.
* Scissors or Utility Knife: For cutting the landscape fabric.
* Potting Soil: Choose a good quality potting mix that’s suitable for the plants you want to grow.
* Plants: Herbs, vegetables, flowers – the choice is yours! Consider the amount of sunlight your wall will receive when selecting plants.
* Measuring Tape: To measure the pallet and fabric.
* Sandpaper (Optional): To smooth out any rough edges on the pallet.
* Wood Stain or Paint (Optional): To customize the look of your pallet.
* Drill and Screws (Optional): If you want to reinforce the pallet or add extra support.
* Wall Mounting Hardware: Depending on the weight of your filled pallet, you’ll need appropriate hooks, screws, or brackets to securely attach it to the wall. Consider using a French cleat system for easy removal and added stability.
* Level: To ensure your pallet is straight when you hang it.
Preparing the Pallet
This is a crucial step, so let’s take our time and do it right.
1. Inspect the Pallet: Carefully examine the pallet for any loose nails, splinters, or damage. Remove any loose nails and sand down any rough edges with sandpaper. This is especially important if you have kids or pets around.
2. Clean the Pallet: Use a brush and soapy water to clean the pallet thoroughly. Rinse it well and let it dry completely. This will help prevent any mold or mildew from growing.
3. (Optional) Stain or Paint the Pallet: If you want to customize the look of your pallet, now’s the time to stain or paint it. Choose a color that complements your outdoor space. Make sure to use an exterior-grade stain or paint that’s designed to withstand the elements. Apply several thin coats, allowing each coat to dry completely before applying the next.
4. Reinforce the Pallet (Optional): Depending on the condition of your pallet and the weight of the plants you plan to grow, you might want to reinforce it. Use a drill and screws to add extra support to the joints.
Creating the Planting Pockets
This is where the magic happens! We’re going to transform the pallet into a series of individual planting pockets.
1. Measure and Cut the Landscape Fabric: Measure the width and depth of each section of the pallet where you want to create a planting pocket. Add a few extra inches to each measurement to allow for overlap and stapling. Cut the landscape fabric into rectangles that are large enough to line each section.
2. Line the Pockets: Starting with the bottom row of the pallet, carefully line each section with the landscape fabric. Make sure the fabric extends up the sides and back of the section.
3. Staple the Fabric: Use the staple gun to secure the landscape fabric to the pallet. Start by stapling the fabric along the top edge of the section, then work your way down the sides and back. Make sure the staples are close together to create a secure and watertight seal. Overlap the fabric at the corners to prevent soil from leaking out.
4. Repeat for Each Section: Repeat steps 1-3 for each section of the pallet where you want to create a planting pocket. Make sure each pocket is securely lined and stapled.
Planting Your Garden
Now for the fun part – adding the plants!
1. Add Potting Soil: Fill each planting pocket with potting soil, leaving about an inch of space at the top. Gently pat down the soil to remove any air pockets.
2. Plant Your Plants: Carefully remove your plants from their containers and gently loosen the roots. Dig a small hole in the soil in each planting pocket and place the plant in the hole. Backfill with soil and gently pat it down.
3. Water Your Plants: Water your plants thoroughly after planting. Make sure the soil is evenly moist but not waterlogged.
4. Arrange Your Plants: Consider the size and growth habits of your plants when arranging them in the pallet. Place taller plants towards the back and shorter plants towards the front. You can also mix and match different colors and textures to create a visually appealing display.
Hanging Your Wall Garden
This is the final step, and it’s important to do it safely and securely.
1. Choose a Location: Select a location for your wall garden that receives the appropriate amount of sunlight for your plants. Make sure the wall is strong enough to support the weight of the filled pallet.
2. Install Wall Mounting Hardware: Install the appropriate wall mounting hardware according to the manufacturer’s instructions. Consider using a French cleat system for easy removal and added stability. A French cleat involves attaching a beveled piece of wood to the wall and a matching piece to the back of the pallet, allowing it to easily slide on and off.
3. Hang the Pallet: Carefully lift the pallet and hang it on the wall mounting hardware. Use a level to make sure the pallet is straight.
4. Secure the Pallet (Optional): For added security, you can use screws to attach the pallet to the wall mounting hardware.
Tips for Success
Here are a few extra tips to help you create a thriving vertical wall garden:
* Choose the Right Plants: Select plants that are well-suited to the amount of sunlight your wall receives. Consider using drought-tolerant plants if you live in a dry climate.
* Water Regularly: Water your plants regularly, especially during hot weather. Check the soil moisture before watering and water only when the soil is dry to the touch.
* Fertilize Regularly: Fertilize your plants regularly with a balanced fertilizer. Follow the instructions on the fertilizer package.
* Prune Regularly: Prune your plants regularly to keep them healthy and encourage new growth.
* Monitor for Pests and Diseases: Regularly inspect your plants for pests and diseases. Treat any problems promptly to prevent them from spreading.
* Consider a Drip Irrigation System: To make watering easier, consider installing a drip irrigation system. This will deliver water directly to the roots of your plants, saving you time and effort.
* Add Drainage Holes: If you’re concerned about drainage, you can add small drainage holes to the bottom of each planting pocket.
* Use a Pallet with Heat Treatment (HT) Stamp: Pallets marked with “HT” have been heat-treated to kill pests and diseases, making them a safer option for your garden. Avoid pallets marked with “MB,” which indicates they’ve been treated with methyl bromide, a toxic pesticide.
Plant Suggestions for Your Vertical Garden
Here are some plant suggestions based on sunlight exposure:
* Full Sun (6+ hours of direct sunlight):
* Herbs: Rosemary, Thyme, Oregano, Basil, Sage
* Vegetables: Tomatoes (dwarf varieties), Peppers, Strawberries
* Flowers: Petunias, Geraniums, Zinnias, Marigolds
* Partial Sun (3-6 hours of direct sunlight):
* Herbs: Mint, Parsley, Chives, Cilantro
* Vegetables: Lettuce, Spinach, Kale, Radishes
* Flowers: Impatiens, Begonias, Pansies, Violas
* Shade (Less than 3 hours of direct sunlight):
* Herbs: Mint, Pars
Conclusion
So, there you have it! Creating your own wall vegetable garden isn’t just a trendy DIY project; it’s a game-changer for anyone looking to maximize space, enjoy fresh produce, and add a touch of green to their living environment. We’ve walked you through the process, highlighting the ease and affordability of this fantastic gardening solution.
But why is this DIY trick a must-try? It boils down to several compelling reasons. First, it’s incredibly space-efficient. Whether you have a sprawling backyard or a tiny balcony, a wall vegetable garden allows you to grow a surprising amount of food in a vertical space. This is particularly beneficial for urban dwellers or those with limited gardening areas. Second, it’s aesthetically pleasing. A well-designed wall garden can transform a drab wall into a vibrant, living work of art, adding beauty and character to your home. Third, it’s a sustainable and rewarding way to access fresh, healthy produce. Imagine stepping outside your door to harvest ripe tomatoes, fragrant herbs, or crisp lettuce, all grown organically and without the need for a trip to the grocery store.
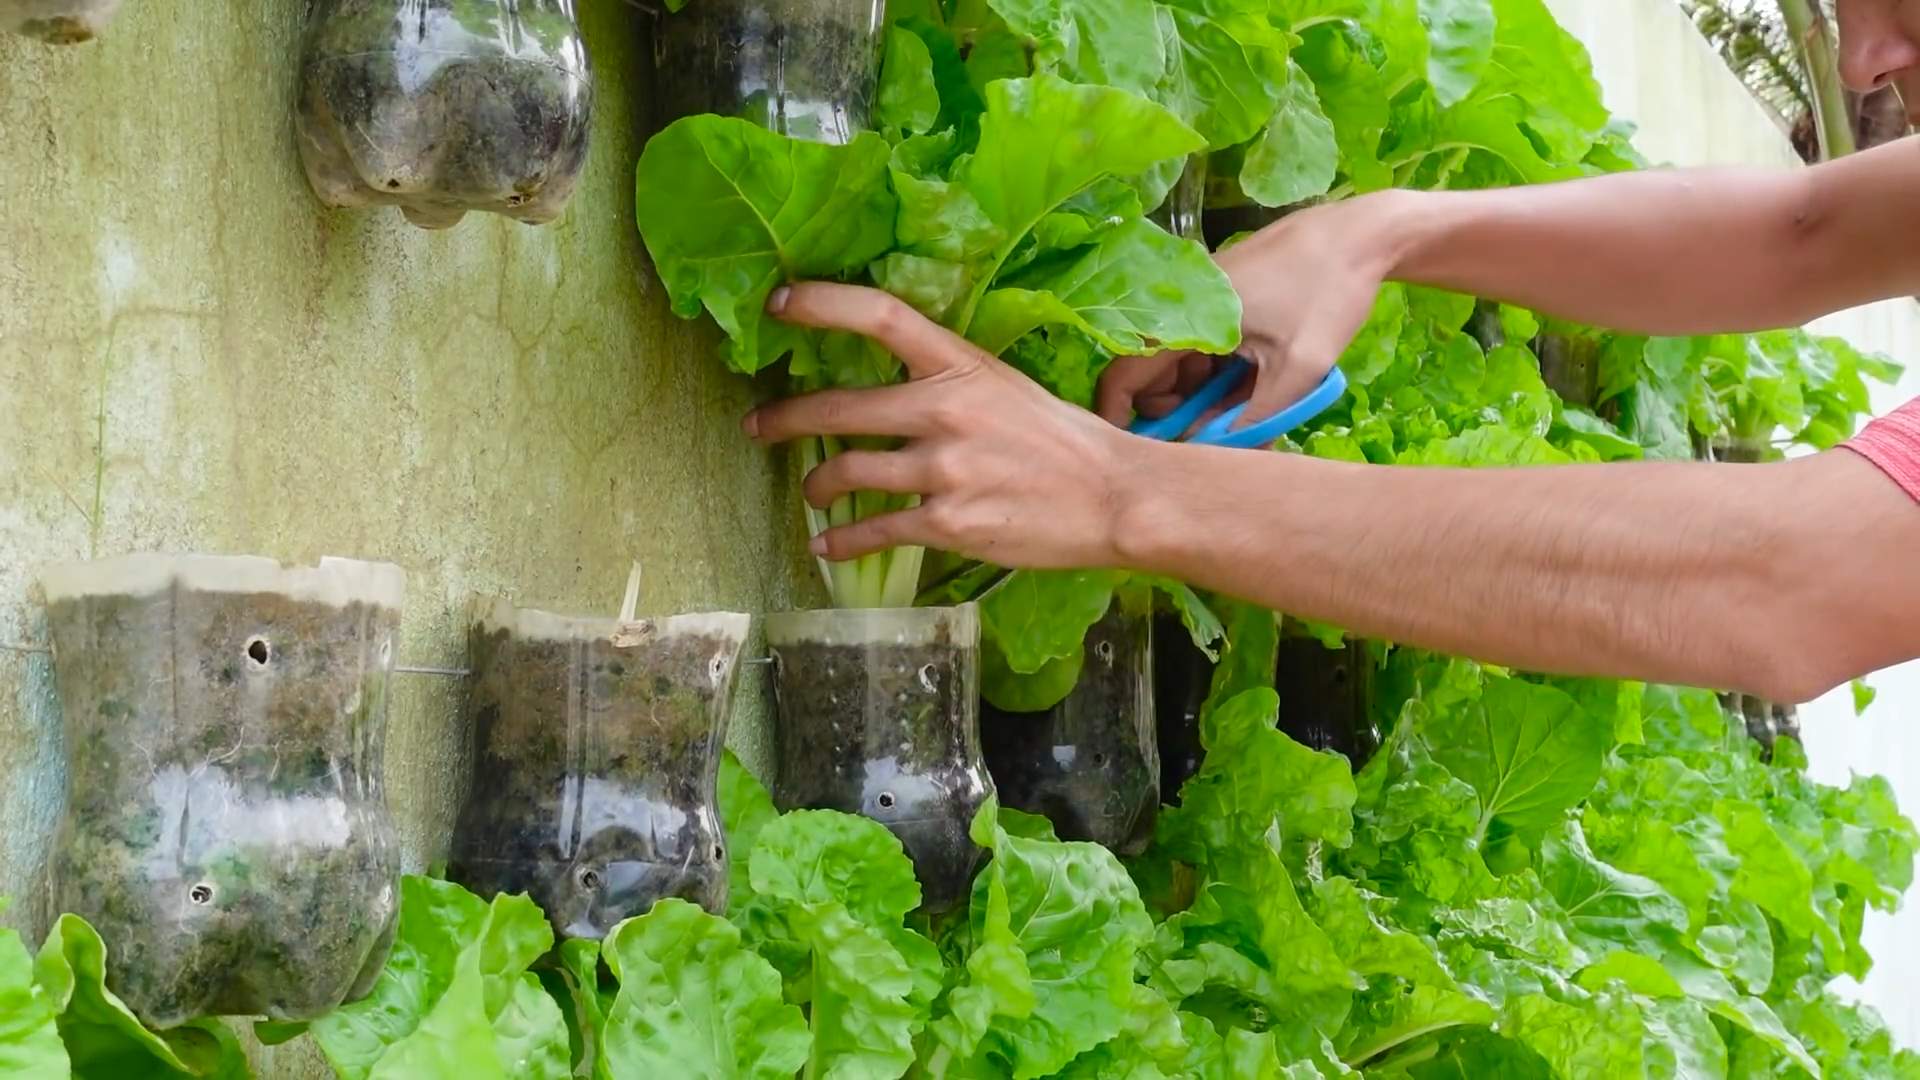
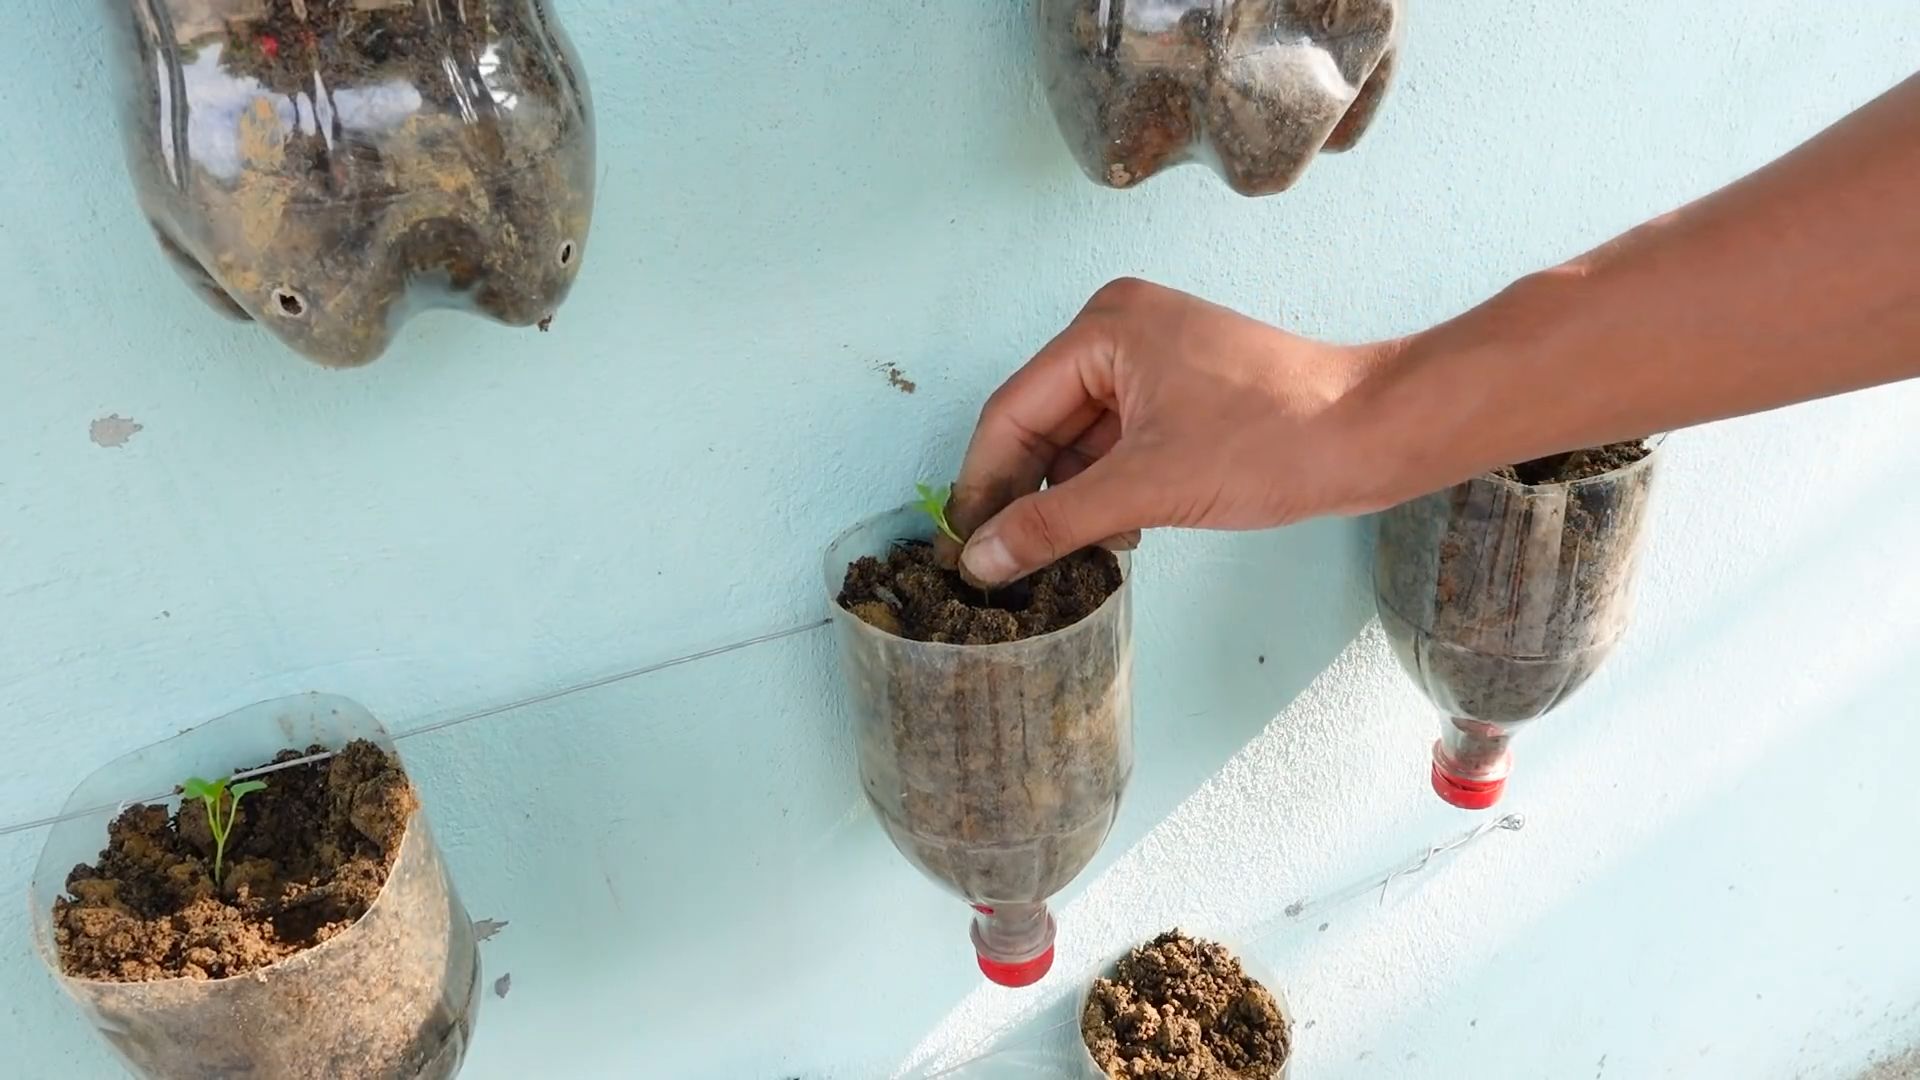
Beyond the basic setup, there are countless ways to customize your wall vegetable garden to suit your specific needs and preferences. Consider experimenting with different types of containers, from repurposed pallets and plastic bottles to stylish hanging baskets and modular planters. You can also tailor your plant selection to match your climate, growing conditions, and culinary interests. For example, if you live in a sunny area, you might focus on heat-loving vegetables like peppers, tomatoes, and eggplant. If you have a shady spot, you could grow leafy greens like spinach, kale, and lettuce.
Don’t be afraid to get creative with your design. You can arrange your plants in a symmetrical pattern for a formal look, or create a more natural, organic feel by mixing different textures and colors. You can also incorporate decorative elements like trellises, sculptures, or lighting to enhance the visual appeal of your wall garden.
For those looking for variations, consider these ideas:
* Herb Spiral Wall: Adapt the traditional herb spiral design to a vertical format. This allows you to create microclimates within your wall garden, catering to the specific needs of different herbs.
* Strawberry Tower: Stack multiple planters on top of each other to create a towering strawberry garden. This is a great way to maximize space and enjoy a bountiful harvest of sweet, juicy berries.
* Salad Wall: Dedicate an entire wall to growing a variety of salad greens. This will provide you with a constant supply of fresh, healthy ingredients for your salads.
* Succulent Wall: For a low-maintenance option, consider creating a succulent wall. Succulents are drought-tolerant and come in a wide range of colors and textures, making them ideal for vertical gardening.
The possibilities are truly endless! The key is to have fun, experiment, and learn as you go.
We are confident that you’ll find this DIY wall vegetable garden project to be both enjoyable and rewarding. It’s a fantastic way to connect with nature, improve your health, and beautify your living space. So, gather your materials, unleash your creativity, and get ready to transform your wall into a thriving oasis of fresh, homegrown goodness.
We can’t wait to see what you create! Please share your experiences, photos, and tips in the comments section below. Let’s inspire each other to grow more food and live more sustainably. Your insights could help others embark on their own wall vegetable garden journey. Happy gardening!
Frequently Asked Questions (FAQ)
What vegetables grow best in a wall garden?
The best vegetables for a wall garden are generally those that don’t require deep root systems and can tolerate being grown in containers. Some excellent choices include:
* Leafy Greens: Lettuce, spinach, kale, arugula, and other salad greens thrive in wall gardens. They are relatively shallow-rooted and can tolerate partial shade.
* Herbs: Basil, mint, parsley, thyme, oregano, and chives are all well-suited for wall gardens. They are compact, easy to grow, and add flavor to your meals.
* Strawberries: These delicious berries are perfect for hanging baskets or stacked planters in a wall garden.
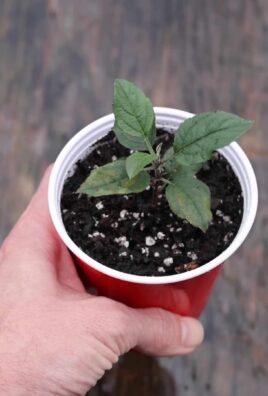
* Peppers: Smaller varieties of peppers, such as chili peppers or bell peppers, can be grown successfully in wall gardens.
* Tomatoes: Bush or dwarf tomato varieties are ideal for wall gardens. They are more compact than indeterminate varieties and don’t require as much support.
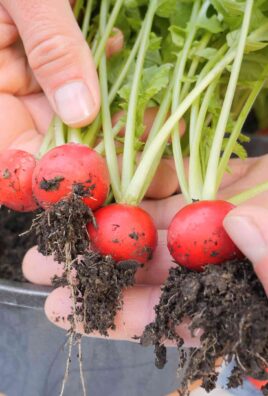
* Radishes: These fast-growing root vegetables can be harvested in just a few weeks, making them a great addition to a wall garden.
* Bush Beans: Compact bush bean varieties are well-suited for container gardening and can produce a good yield in a wall garden.
* Edible Flowers: Nasturtiums, pansies, and other edible flowers add beauty and flavor to your wall garden.
Consider the amount of sunlight your wall receives when selecting your plants. Some vegetables, like tomatoes and peppers, require at least 6-8 hours of sunlight per day, while others, like leafy greens, can tolerate partial shade.
How do I water a wall vegetable garden?
Watering is crucial for the success of your wall vegetable garden. Here are some tips:
* Water Regularly: Wall gardens tend to dry out more quickly than traditional gardens, so it’s important to water them regularly, especially during hot, dry weather. Check the soil moisture daily and water when the top inch feels dry to the touch.
* Water Thoroughly: When you water, make sure to saturate the soil completely, allowing the water to drain out of the bottom of the containers. This will ensure that the roots receive adequate moisture.
* Use a Watering Can or Hose with a Gentle Spray: Avoid using a strong jet of water, as this can damage the plants and erode the soil.
* Consider a Drip Irrigation System: For larger wall gardens, a drip irrigation system can be a convenient and efficient way to water your plants. These systems deliver water directly to the roots, minimizing water waste and ensuring even watering.
* Water in the Morning: Watering in the morning allows the foliage to dry out before nightfall, reducing the risk of fungal diseases.
* Adjust Watering Based on Weather: During rainy periods, you may need to reduce your watering frequency.
What type of soil should I use?
The best type of soil for a wall vegetable garden is a well-draining potting mix that is specifically formulated for container gardening. Avoid using garden soil, as it can be too heavy and compact for containers. Look for a potting mix that contains a blend of peat moss, perlite, and vermiculite. These ingredients help to improve drainage, aeration, and water retention. You can also add compost to your potting mix to provide additional nutrients for your plants.
How do I fertilize my wall vegetable garden?
Vegetables grown in containers require regular fertilization to thrive. Here are some tips:
* Use a Balanced Fertilizer: Choose a fertilizer that contains a balanced ratio of nitrogen, phosphorus, and potassium (N-P-K). A 10-10-10 or 20-20-20 fertilizer is a good option.
* Fertilize Regularly: Follow the instructions on the fertilizer label for application rates and frequency. Generally, you should fertilize your wall garden every 2-4 weeks during the growing season.
* Use a Liquid Fertilizer: Liquid fertilizers are easy to apply and are quickly absorbed by the plants.
* Consider Organic Fertilizers: Organic fertilizers, such as compost tea or fish emulsion, are a great way to provide nutrients to your plants while also improving the soil health.
* Avoid Over-Fertilizing: Over-fertilizing can damage your plants, so it’s important to follow the instructions on the fertilizer label carefully.
How do I protect my wall vegetable garden from pests and diseases?
Pests and diseases can be a problem in any garden, including wall gardens. Here are some tips for protecting your plants:
* Choose Disease-Resistant Varieties: When selecting your plants, look for varieties that are known to be resistant to common diseases.
* Inspect Your Plants Regularly: Check your plants regularly for signs of pests or diseases. The sooner you catch a problem, the easier it will be to control.
* Remove Infested Leaves or Plants: If you find any leaves or plants that are infested with pests or diseases, remove them immediately to prevent the problem from spreading.
* Use Organic Pest Control Methods: There are many organic pest control methods that you can use to protect your plants, such as insecticidal soap, neem oil, and diatomaceous earth.
* Provide Good Air Circulation: Good air circulation helps to prevent fungal diseases. Make sure to space your plants properly and prune them regularly to improve air flow.
* Keep Your Garden Clean: Remove any dead leaves or debris from your garden to prevent pests and diseases from harboring.
How do I prepare my wall vegetable garden for winter?
If you live in an area with cold winters, you’ll need to take steps to protect your wall vegetable garden from the frost.
Leave a Comment